My wife, Karla, claims my only reason for
wanting to build this plane is that it gives me an excuse to buy a whole new
group of tools! Nah!
The bible for aircraft building is FAA AC 43.13, available in
print from various vendors like Avery and ACS (Aircraft Spruce), and available
as a
series of PDF files from the FAA
See HERE for info on various
tools and what they are REALLY used for.
See HERE for a quite amusing
Hazard Fraught spoof on those Harbor Freight ads.
I already have some of the required specialized
aircraft tools, as well as most of the "general" tools. I
have had some of the aircraft tools for about 30 years, bouncing around in the
bottom of junk boxes, because I got them at some long ago auction and didn't
even know what they all were. So, it was kind of interesting to look
through the aircraft tool catalogs & see tools I recognized and say
"Hey, I've got one of those; I wondered what it was for". I've
got things like an air drill, which of course I know what that is, rivet gun,
rivet cutter, micro stop, strap duplicators, rivet sets, bucking bars, clecos,
etc. I may have to get new rivet sets, as I understand they are supposed
to be polished smooth. The ones I have are a bit beat up from being tossed
into the bottom of junk boxes and were probably beat up when I got them long ago
While waiting for my kits to be delivered, I am
going through the tool catalogs and comparing prices. I am also working on
a spreadsheet to
tell me what each major RV tool kit, from
Avery,
ATS, and Cleaveland, contains and
how that compares with what I already have and what Van's and others recommend
for tools, and what it all will cost from each supplier.
Oct 24, 2002 - I've also been collecting
some of the high priced items, like pneumatic squeezer, Sioux rivet gun, Sioux
and Dotco 6000 rpm drills, Magnavon cage, C-frame, etc from ads on ebay,
although the quality of what you get there can vary a lot. I have also
found some good sources of surplus aircraft tools there; from regular sellers
like acfttools,
planetools.com,
rl-industrial,
calaerosupply,
and dracerd77.
Cal Aero Supply and
Planetools
also have their own web sites. I got my first group of tools from
Planetools. Brad at Planetools was very helpful. I gave him a copy
of my spreadsheet list of tools, and he got back to me with very good prices on
high quality items. So, my initial tools order went to him, for the items
on my list that he had. Cal Aero sells stuff like bulk drill bits very
cheap.
I strongly recommend NOT buying anything from a
guy on ebay who calls himself rivetguns. The guy's a real sleaze, as I
found out the hard way.
Nov 7, 2002 - well, so much for the fancy
spreadsheet I put together. ATS (Aircraft Tool Supply) had the lowest
prices on most of the remaining items I wanted, but their catalog didn't specify
which country most of the tools were made in.
Avery's
catalog is very good for specifying what tools are US and which are imports.
I emailed ATS several times to get that info, but they ignored me. I
contacted Avery with a question by
email, and they replied within hours. So, guess who got the rest of my
entire tools order the next day, regardless of price! Good customer
service pays off. When I placed the order with Avery, I thought they were
very nice and accommodating people. The lady who took my order was
exceptionally helpful and knowledgeable. She even said that I probably
wouldn't need the rivet spacing fan I told her I wanted, because I am building a
Quick Build. I also wanted to split my order into a quick shipment part
and a slow shipment part, and she handled that without a hitch. Avery will
definitely be getting all the rest of my tools orders! I had heard that Cleaveland has a
good reputation, but I emailed them several times about their Vixen files and
they did not respond, so I didn't buy any tools from them.
Speaking of tools and customer service, I read on
the RV-7/7A builder's list that many builders get some of their tools through
Harbor Freight. In my experience, proven and re-proven way too many times,
Harbor Freight is the poster child for horrendous customer service.
If you're bored and want to spoil your day, try calling their customer
disservice department about something. If you want Chinese tools, go to
Grizzly.
They have decent (for Chinese) tools, and excellent customer service.
I also have learned that it's easy to
recondition beat up rivet sets and bucking bars. I have a 6"x48"
belt sander, with belts from 220 to 400 grit. Just sand 'em smoother
and smoother with progressively finer belts, then finish polishing on a buffing
wheel. When I really want to go crazy on the finish, after the 400
belt sander, I start in on the 400 wet-or-dry sandpaper, and work my way all the
way up to 1500 grit, alternating the direction of sanding with each grit change.
Changing direction lets you easily see when you have completely removed the
scratches from the previous grit. This process works well for adding new
usable surfaces to existing bucking bars, and for making new ones. I have
made several this way. I also recondition flat sets by chucking them up in
the metal lathe and pressing progressively finer sandpaper against the spinning
surface. This works well, because the outside diameter is moving faster,
so it gets more wear, which helps keep the slightly rounded surface you want.
If you don't have a lathe, you can just use a drill motor for this.
Nov 24, 2002 - After attending the
Alexander Technical Center (ATC) to build my tail, I realized that I still
needed to buy some more tools. For one thing, I'd already gotten a
pneumatic squeezer, but found out at ATC that I will really also need a hand
squeezer. In fact, I really want 2. At ATC, they recommended hand
squeezing all the skin rivets, so I didn't try the pneumatic on the skin rivets.
ATC had a wide
variety of hand squeezers, from all 3 major suppliers (Cleaveland, Avery, Tatco),
so I got to try them all and see which ones I liked the best.I found that, even though I’d already gotten a pneumatic squeezer on
ebay, I want at least one, if not 2, hand squeezers.You need one for dimpling, at least.
DOUBLE DIMPLING - By trial and error, I found that my rivet heads sat in the
dimpled hole better if I redimpled both the skin and the rib/spar together just
before riveting.Of course, this
took more time, but I was very pleased with how the flush rivets sat after doing
that.So, I squeezed rivets with 2
squeezers; first I’d hit all the edge holes with the dimpler again, then I’d
drop the rivets in and squeeze them.
Having 2 squeezers set up for each job meant I didn't have to waste time
changing the dies (and corresponding settings) back and forth. See HERE
or HERE for working examples of
how this works.
COUNTERSINKING FOR DIMPLES (as opposed to countersinking for rivet heads) -
I do not adjust the countersink cage to fit a rivet head of the appropriate
diameter, as I would if a rivet was going into the countersunk hole. I have made
up a series of little test strips of various metal thickness. They are about an
inch in width and a few inches long. In each test strip, I have drilled a #41
hole in one end and a #30 hole in the other end. Then I have dimpled the hole in
each end with the appropriate-sized dimple die. Then, when I am adjusting the
countersink cage for making a countersink where a dimpled skin will sit in the
countersunk area, I use the test strip of the same metal thickness. I use the
dimpled end of the test strip that matches the rivet diameter to be used, and I
match that up to my countersunk hole. I keep adjusting the cage to sink deeper
until the test strip sits completely flat on the piece that’s countersunk.
Typically, IIRC, this is about a dozen clicks deeper than I would set the cage
if I was c/s for just a rivet.
I
used all the hand squeezers at ATC. I really liked the Tatco best.
The handles are smaller diameter than Avery, and it is lighter and quicker and
easier to use, especially for dimpling, than the others. They have a
stronger return spring than the Avery or Cleaveland, so that also makes them
quicker & easier to use, because the handle pops back in your hand quickly
when you release the pressure. The Avery was nice, and I did get more
accustomed to it by the end of the week. The big thing about the Avery is
that it takes the same yokes as the pneumatic squeezer, so that's very
handy. The Cleaveland Main Squeeze was OK for riveting, but I found it
slower and more cumbersome for dimpling. The edges of the handle are not
round, so they didn't feel as comfortable in my hands as the other 2 with round
handles. The Main Squeeze cam action did seem to reduce effort required,
but I didn't think it was as smooth acting as the others. It kind of jumps
some when the cam goes over center, and I didn't want to mar my skins. So,
I ordered a Tatco squeezer from
The Yard
Store. They seem to have very low prices. I also got an Avery
hand squeezer with my second big order from Avery. Check out the MODIFICATIONS
I made to it, to make a great squeezer even better.
This is
a tool cabinet I made from the crate my completed tail came in from Alexander
Technical Center. ATC uses screws to put their crates together, not those
nasty, gnarly nails & staples that Van's uses, so it was quite easy to salvage
everything from the crate. With Van's crates, they're harder to open, and
you damage most of the wood in the process.
My hand squeezers and battery screwdriver (for screws, of course, and great for light
deburring). I highly recommend the battery screwdriver over the dogleg-type
hand swivel deburring handle.
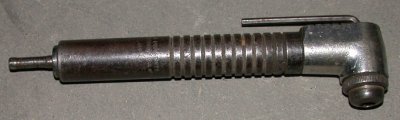
Here's a nice fuzzy closeup of a handy little home-made tool they had at ATC.
You need it to dimple the top rib on the rudder, for example. To make one,
just drill and countersink a piece of 3/16-1/4" plate steel. Put the
male dimpling die on your C-frame driver rod, put this under the piece to be
dimpled, and whack it!
Pneumatic squeezers, both C-type and A-type (aka Alligator). The A-type
aren't as versatile, as they don't take different yokes, but they will
supposedly fit into places others won't. The C-type, on the left, takes
interchangeable yokes, for fitting into different places. I got good deals
on ebay for both of these. The C-type came with all the yokes pictured
(retail $125-150 each new), so I grabbed it. The squeezer had a chunk
blown out of the case, so I took it apart and taught myself how to rebuild CP
214 squeezers. Then I patched the hole with JB Weld. It works great
now. I got the Avery adjustable anvil for the C-type squeezer. When
using it, figure 1.5 turns per rivet length number (e.g. turn it in 1.5 turns
when going from a -5 to a -6). All these yokes will fit on my Avery hand
squeezer, too. I've never used the alligator type, so I don't recommend
that. It also requires shim washers for depth adjustment.
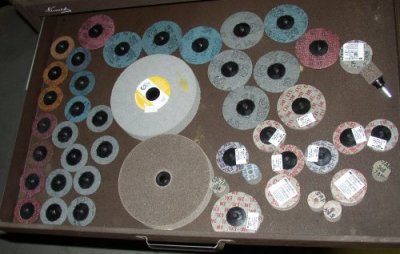
These are some of the small Scotchbrite wheels I got for polishing and scratch
removal. I got some of these from Avery, some from MSC (huge, sometimes
confusing selection), and some from
Planetools. I also got a case of Scotchbrite pads from MSC. There will be LOTS of polishing to do.
ATC also had both of Avery's 6" deburring wheels (fine and extra-fine)
mounted on a grinder. I found I used both a lot, so I needed to get both
of them. The problem was the buffer I want to put them on has a
3/4" shaft, and the wheels from Avery are 1/2" hole. So, I had
to get the equivalent wheels (with 1" hole and a 3/4" adapter) from MSC.
The Avery people were very helpful in getting me the 3M part number info so I
could order the same type wheels from MSC. 2004 UPDATE - While the 6" wheels
are
EXTREMELY useful, and I would be hard pressed to build this plane well without
both of them, I have yet to use any of the rest of the disks in this drawer.
This is the
8" buffer
with the 2 Scotchbrite wheels mounted. I use this ALL the time.
Believe me - you will REALLY need both the fine and coarse wheels. I
learned that at Alexander Technical Center. BTW, I went against my better
judgment and ordered this from Harbor Freight, only because they had a "free
shipping" sale. After waiting at least 2 months to get it, it arrived
in the same condition as most heavy things from HF; trashed. They send the
stuff out USPS, uninsured and poorly boxed, so USPS trashes it and refuses any
responsibility. Luckily, the buffer itself was not damaged, so I didn't
have to go through the Harbor Freight Customer Disservice hassles. This is
how it came (the other 2 sides were equally bad):
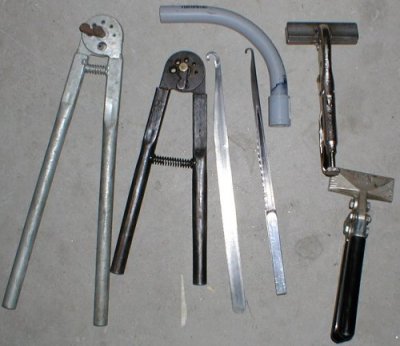
From the left, here are a couple rivet cutters, for cutting rivets to exact
length, when necessary. Next are a couple chip chasers I made from old
hacksaw blades. The one on the right has a nice little aluminum handle I
made by riveting on a couple chunks of aluminum. On the right are 2
different types of hand seamers. I already had the lower one, and the top
one is the high quality Avery model. The Avery one is different (better)
than the similar one made by Vise-Grip, because Avery machines a radius into the
edges, so it doesn't mar or scratch your sheet metal. The curved thing on
top is a tool I made from 1/2" conduit to use as a wrench for rod end
bearings. The end is slotted to go over the rod end, then reinforced with
a coupler over the end. 2004 update - I've never used the chip
chasers; why would I; we dismantle everything before riveting, so that removes
the chips. Maybe someday I will have a use for them, but for now, they are
a waste.
On left top is an
Avery Vise-Grip fluting tool. Left bottom is the Avery Vise-Grip
dimple die for close-quarters dimpling. On the top right are camlock
pliers I already had. In the right middle are nutplate jigs, and on the
bottom right are hole alignment tools I already had. You definitely want
this style of fluting tool, not the ones that are more like regular
pliers. No way will the plier-type work with 0.063" material, and you
will be needing to do that. 2004 update - I have yet to use the
nutplate jigs or the hole alignment tools. You really don't need the
nutplate jigs at all - see here.
I already had the 6x gun on the left, then I got the 3x Sioux and 2x CP guns in
pretty good deals on ebay. For all the agonizing people seem to do over
whether to get a 3x or 2x, I don't see much difference between a 3x with less
air pressure to it and a 2x with a little more pressure. BTW, the swivel
regulator type shown here is about useless. Get the "T" shaped
ones described below. The 6x gun was all froze up inside from years of
laying around unused. I got it loosened up and oiled, and now it works
just fine. It isn't the most ergonomic handle, but the trigger control is
MUCH better than any of my other guns. It's so controllable, I can use it
with no flow regulator and using full tank pressure of about a hundred pounds,
and I can drive anything from 3/32" to 1/4" with it.
These are for cutting sheet metal. I already had most of these tools
before starting the RV project. I had bought most of the cutters, and the
nibbler on the bottom, when I built my steel barn. I did get the other
nibbler (top left) from Avery, because it works differently than the one on the
bottom. I very rarely use any of the snips.
These are my main rivet sets. I got a little bit of everything. The
one best flat set to get is the swivel one with the red rubber hood. I
took the spring off mine. People also recommend putting masking tape on
your sets, so they mar less and so they slip less.
Here are some odd shaped rivet sets I got in a good deal on ebay. Will I
need to use them? I don't know, but I do have them ready.
Here are my clecos. They are used to hold pieces of drilled sheet metal
together for fitting. Silver is 3/32" and copper is 1/8".
They are in a double-sided tub. This is a trick I learned at ATC. In
the back are the "special" clecos; larger ones, 1/2" and 1"
side clamps, "C" clamps, and wingnut clecos. On things like the
canopy frame, you will definitely want at least half a dozen wingnut clecos.
You'll need a dozen or so of each size of the side clamps. See
HERE for the final count on clecoes needed for a
QuickBuild.
This is my C-frame, also from ebay, used mainly for dimpling, but can also be
used for riveting. The cans in front are an idea I got from the Orndorff
videos. Pet food or seafood cans make great containers for the little
rivets. They are wider than they are tall, so they're less likely to tip
over, and the opening is big enough to get my fingers in to get some rivets.
These are my air
drills. Yes, I have too many. I think I got a little carried away on
ebay. I got them pretty cheap, and some came with accessories I wanted
more than the drills, so I will probably sell one or two. I already had
the ARO in the middle, but I wanted a faster one, so I got the 6200 rpm rebuilt
Dotco on the left, from Planetools. It came with 3 chucks, and is designed
to swap them out easily. The chuck in it, and in the other Dotco in the
upper right, are Quick Change chucks for QC drills and cages. The silver
swivel on the Dotco in the upper left is very best. I tried several brands
of swivels, but those (from Planetools) are the best I found. They swivel
very loosely, with no friction, yet they don't leak air. And they are made
in the US. The angle drill is very useful. Many times, I have been
in a situation where nothing else would work. You also need to get the
short, medium, and long threaded bits that go in it. Some jobs will
require a specific length bit to get the job done.
I've gotten a couple
bundles of drill bits from
calaerosupply
and I also have collected some QC drill bits and threaded bits to go with the
angle drill. The thing on the right side is called a pancake, and it lets
you fit into very tight places with a threaded drill bit at one end of the
pancake, while the other end is driven by the drill motor. The round
things in the LT side are chucks to hold regular drill bits in a threaded holder
for the angle drill.
This angle drill bit
holder is very nice. Avery sells some similar ones. The advantage of
this over the angle air drill is that this will hold any regular drill bit up to
1/4" and it will hold a Uni-Bit.
I also tried several
different brands of air regulator. By far the best are the imported ones.
I got mine from Avery. The other kind with the rotary dial, even though
they are made in the US, are very difficult to set exactly, and impossible to
return to a setting. A very small movement in the dial makes a big
difference in the flow. The imported ones use a T shape with a valve that
screws down, as shown here.
I also got some
very thin wall, flexible braided polyurethane hose from
MSC for use as a whip hose. This hose
uses replaceable end fittings. I put the regulator and swivel on the end
of it, so I can swap it between tools. This is much better than having a
big heavy air hose pulling on your air tool as you're using it. This stuff
is very light and flexible. 1/4" ID, 3/8" OD.
hose part number = 08751232
fittings part number =
79861423
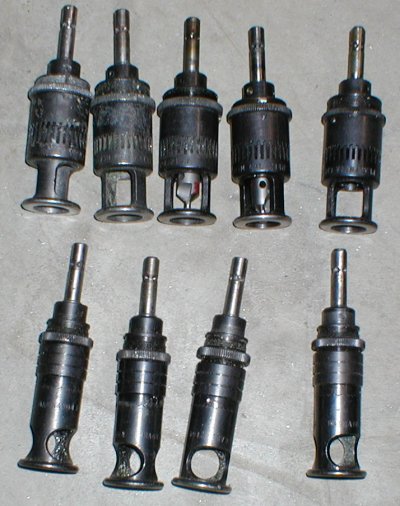
These are some Magnavon QC countersink cages. The nice clean looking one
in the upper right is a reconditioned one I got from
Planetools. The rest,
I got used on ebay. I don't really need this many, but I got half of them
with one drill I bought, and I paid less for all of them on ebay than to buy one
new one. The top ones are the heavy duty 10,000 rpm ball bearing models.
By having so many of these, I can set each one up with a different size cutter,
adjust it once for that cutter, and never have to readjust when changing cutter
sizes.
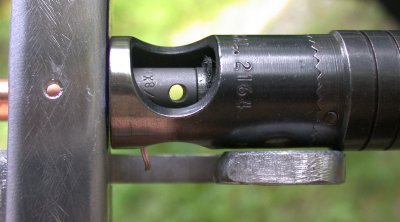
If you grind the
foot off one of the narrower cages, it can be very helpful for getting into
tight places.
These are some of
my countersinks. I have both the fluted kind and the single hole type.
The single hole ones are easier to resharpen. The threaded ones go in the
countersink cage.
These are my Vixen
files. You need them for trimming aluminum. The numbers I wrote on
the end of them tell me how many teeth per inch each one is. I already had
the 10tpi that I got from
Planetools.
While I was at ATC, I found I used both their coarse 8 tpi file and their
finer 13 tpi file. I got all the rest of these on sale at The
Yard Store for less than the price of one. Mostly I use the 15
tpi one, and occasionally the 8 tpi. Any one of these will get you by OK.
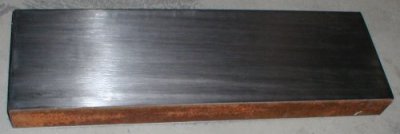
This is a back rivet plate I made from an old chunk of steel I had laying
around. The top used to be as rough and rusty as the side you see nearest
you. It had a lot of big dings and rust pitting. I just went at it
with my portable belt sander, starting with a #36 grit and using progressively
finer grits, until it looks like this. The ones you buy from Avery or
Cleaveland are 1/4" or 3/8" thick. This one is an inch and a
half thick and weighs about a hundred pounds! That's plenty of mass.
I glued felt on the bottom side, so it doesn't ding up my workbench, and it will
slide around easily. I also made a wood plate for it to sit on, so its
height matches the "skin tables" I made to go with, and match the
height of, the C-frame dimpler.
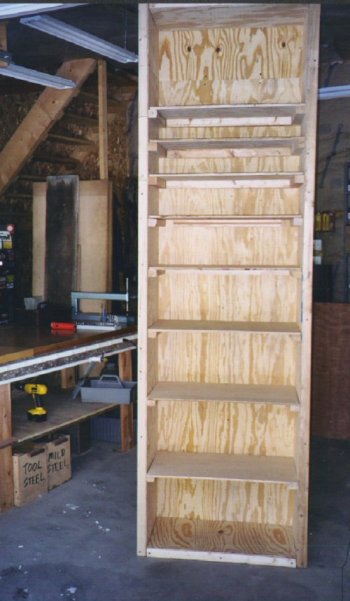
Here's a view of the west half of my garage, right after getting
my QB kit unpacked.
Tools used in any
custom layout you might do.
I use this incredibly
handy little tool from Avery ALL the time. Perfect for marking distance
from an edge. The pen that came with it didn't last too long, but the
standard micro-Sharpies fit right in there.
Another
very handy tool for laying out evenly spaced holes along a line. It is
like an accordion; it stretches in and out for different hole spacing.
Vernier, dial,
or digital calipers will be very useful for you.
You'll
need plenty of various
clamps. The rubber-tipped ones won't mar the metal, but they will allow
the clamped pieces to squirm some. Get the Vise-Grips with the flat
swiveling pads to clamp things you don't want to move at all, like when putting
the tail onto the fuselage.
You will definitely
need a good deburring tool. MSC has the cutters designed to debur both
edges of a piece of metal at once, as shown in the tool in this pic. These
cutters are also especially useful when you
need to debur the back side of a hole that you can't otherwise reach.
I use this all the
time; it holds my most frequently used drill bits, rotary deburring bits,
punches, screwdriver bits, and countersink cutters. Nice and centralized,
and no cutters getting ruined by rolling off the bench onto the concrete floor. Made from a block of
PVC stock. You could make one out of wood or whatever material you have
available.
Another holder
I made for
all my 426 and 470 sets, as well as the Avery springback dimple dies.
You'll
need various
rotary files. These carbide ones work better and last a lot longer than
HSS ones.
The ones with the coarse teeth are for aluminum, and they load up much less than
the others. They also cut FAST, so use them carefully.
Get good
US-made wire cutters, strippers, and crimpers for your wiring work.
You'll need a
swiveling inspection mirror. The crack is optional ;-)
You don't
need to buy any of those nutplate jigs. Clecoes work fine and more easily,
if you do it right. If you have a #8 nutplate to put in, don't
drill the hole to full size. A 1/8" hole will allow you to use a
1/8" copper cleco for a perfect fit in both the hole and the nutplate.
Use a silver 3/32" cleco for #6 and use a black 5/32" cleco for AN3 or
#10. Drill
one nutplate rivet hole, put a silver cleco there, then drill the other
3/32" hole. Remove the clecoes and drill the center hole out to final
size (I generally use #16 or even #12 for AN3 or #8, so the screws will fit in
more easily). Works perfectly every time. For larger or smaller
nutplates, just use appropriately larger or smaller clecoes and starter holes.
Here's about a
useless tool. It sounded like a good idea, but I have yet to find an
application where these cleco C-clamps would work. Maybe a use will
eventually come up. 2004 update - I did eventually use them a couple times, and they
were handy to have. The quality of workmanship is pretty poor. As
you can see in this pic, the 2
clamping surfaces don't even touch each other. I took it apart and ground away some of
the stop, and I had to grind away the casting flash on the clamp contact areas.
Here's another valuable
tool I use frequently. It's a little telescoping magnet. Nice &
small, so it fits into small places, but a powerful magnet. I think I got
it off a MATCO truck. When you need one, you REALLY need one. It's
also quite useful for holding the washer where you have to put washers into
tight places as spacers, like flight control hinge brackets.
This is the hinge
alignment tool from Avery. I also made a few from 20D nails. Very
difficult to hang & align those elevators & rudder without these!
Everyone says the
air drills make much better holes, because they spin faster. I even got a
Dotco
air drill that had a 6200 rpm spec. I have never
seen any difference between the holes I drill with my air drills and those done
with this super handy battery drill. It charges quickly, lasts forever, and
I can drill hundreds of holes for weeks with it for far less than the amount of
electricity it takes to cycle the air compressor just one time. I highly
recommend one like this. More volts means more power and more duration.
This one is 18v and it is GREAT. It is a
lot bigger than an air drill, though, so the air drills are especially nice for
tighter quarters. It also drills slower, so I often switch to the
air drill when I have a lot of holes to drill.
This is my
bench-mounted drill press setup. I think it needs a bit of a cleanup. The
extruded aluminum fixture, from
Avery, makes
it easy to drill round stock, like pushrods.
These are my rivet
squeezers and dimplers. I have yet to use the alligator-type pneumatic
squeezer, but I use the other 3 all the time. Having 2 hand squeezers
makes for fewer switching around of dies. MY ADVICE: get a pneumatic
squeezer, no matter what. With a pneumatic, you can squeeze with one hand, while the other
hand steadies what you're working on. You can get good used ones on ebay for a
couple hundred bucks. On the pneumatic squeezer in the lower RT in this
pic is the Longeron
yoke. You will definitely need at least that yoke, as well as the more
narrow one shown on the Avery squeezer.
Of course, you need
lots of clecoes. Don't forget to get a dozen or so of the black ones
(5/32) and the gold ones (3/16). You will need them. You should also get a few 1/4" ones. You will also need at least several each of the 1" and 1/2" cleco clamps.
A plastic divided tub like this is very handy for storing them.
You will need a pop
rivet tool. The Van's tool list says you need one with a rotating head,
but I am glad I didn't order one; this standard model I already had works fine for everything
I've come up against. You do need one that will take different diameter
pop rivets, though.
Spend the money on
a good US-made 37-degree tubing flare tool, such as this one from
Avery. Don't forget to put those little AN819 sleeves on BEFORE you flare!
You'll
need tools to cut and bend your plumbing tubing. The 6 on the RT are a
General Tools tubing bender set from Avery. The bender in the lower LT is
another type of General Tools bender from Avery. You'll need the one that
handles 1/4", 5/16", and 3'8". Top LT is a T-reamer for cleaning up
the inside of the tubing after cutting. It works much quicker and cleaner than the
triangular stamped steel wedge found on the back of the lower tubing cutter on
the LT. Second down on LT is a Rigid (very good US brand) miniature tubing
cutter. It's very useful. In the top middle is yet another type of
bender. It can sometimes be useful when you can't get any other type of
bender on the tubing. Be very careful with it, though - it crimps the
tubing very easily. Don't use it to make a bend of more than a few
degrees. OCT, 2006 UPDATE - Hey, did you know that those springs on
the RT side of the pic are supposed to go on the INside of the tubing you are
bending? I had NO idea that's how they were supposed to be used, until I
saw them being used on a recent PBS "This Old House" show. I had always
used them on the OUTside of the tubing. For most bending, I use the
(modified) bender in the lower LT corner of the pic.
You should
modify the tubing bender. This one is made by General Tools, and came from
Avery. Rigid
also makes a good one of similar design, found at Home Depot. On the
RT end of the grooves in this picture (upper arrow) is where the moving arm comes down
over the curved portion of the tubing bender. This was a rather abrupt
edge, and it was denting the tubing sometimes, when I swung the arm over the
tubing to begin the bending. I beveled the edge with a round file,
then polished the whole edge, including the groove, on my fine scotchbrite
wheel. It seemed to make a big difference in the quality of my
bends. A drop of oil in the groove on this arm
will also help make the bends nice and smooth, and free of nicks and dents.
Also radius and
polish the fixed arm where the lower arrow is. This, too, can dent your
tubing with an out-of-the-box tool.
The edges
shown here also need to be radiused and polished, too, or you can get denting and
scratching.
Aug, 2003 - One of the goodies I bought at OSH03 was a nice little micro
oxy-acetylene torch from Kent White at
TM
Technologies:
Sep 23, 2003 - A real air pressure regulator with a diaphram is
much better than the kind I've been using, which isn't even a real regulator
- all those little things that go in the air line (even the good one I have)
are really just flow restrictors. So, between bursts, they have time
to fill up to full tank pressure. When you first squeeze the gun, you
get a more powerful burst than you'd planned for. I noticed this by
playing with the rivet guns today. Now, I'll have true pressure
regulation. I also ordered a new Sioux 2x gun from Avery to make it as
easy as possible for Karla to run the gun. My second-hand guns don't
have what I would call real great triggers, even though the 3x is an older
Sioux.
I now have a
real Schrader diaphram-type regulator in the compressed air supply
system. JUNE, 2004 update - I went to a New England Van's Air
Force fly-in, and one of the speakers said we should use full tank PRESSURE and
just restrict the FLOW. I dunno. I've tried it both ways, and
I like the pressure regulator best, but I guess it doesn't make a whole lot of
difference.
Sep 26, 2003 - UPS order from Avery came, so I set up and
tested the new Sioux 2x gun. It doesn't seem a whole lot better than my 2x
Chicago Pneumatic. I am not real thrilled about the trigger control on
either one. My old Air Force 6x gun has by far the best trigger, but it's kinda
big and Karla didn't like it as well.
Here's the new Sioux
rivet gun I ordered. It works well, but frankly I am not all that
impressed with its acclaimed trigger. JUNE, 2004 update - Karla uses this
one, because it's smallest. The one I like to use when I am doing
rivet driving by myself is that old beat up Air Force 6x gun, with no flow
regulator and using full tank pressure. The trigger on it is so much
better than all the others that it's very easy to control.
DIGITAL LEVEL - This is a VERY handy tool. It makes
setting angles & level & incidence much easier and more accurate.
This horizontal/vertical METAL BANDSAW is another
very useful tool I already had, and use quite a bit. They aren't
cheap, and you can get by without one, but it sure makes fabricating those
brackets a LOT quicker and easier. It also ensures all your cuts are
square. This is especially useful for all the tubing cuts you'll be
making. I have heard that you can use a wood
bandsaw to cut aluminum, but I haven't tried it. Either way, be sure you
get a blade with as many teeth per inch as possible.
Here is a picture of my
BOX BRAKE. I keep it covered with plastic when not in use to prevent
occasional condensation dripping off the steel roof from causing the brake to
get rusty. I will have to modify it to make it
more useful, as the bending edge is too sharp, and doesn't put enough radius
into the bend. For the couple bends I've had to make so far, I lay a piece
of heavy cardboard over the sheet metal before bending. That adds some
radius to the bend.
A SHEAR is kinda expensive if you will only use it for building one plane, but I've found
that the one I already owned is VERY useful, and I use it a lot.
I also have a metal lathe and a mill
from Grizzly Industrial.
They certainly aren't essential for building a plane, but they sure are handy to
have around.
I got these
6" swivel pad Vise-Grips from
MSC. There is much less squirm
from these than there was from the plastic ones. I'd say these are
essential.
I've updated
this pic with the latest tool acquisitions. For
electrical work, you'll need a good quality wire stripper and a crimper for each
style of terminals you'll be using. #1 is a Taiwan-made solderless
terminal crimper I got from
B&C.
#2 is a 20-30 ga stripper. #3 is from B&C for crimping molex
pins. #4 is a crimper I got from
SteinAir
at OSH04. It takes multiple dies for different types of terminals. I
also got Stein's crimper for D-sub pins, #5, at OSH04. #6 is a good Klein
stripper, and #8 is a 14-20 ga stripper. #7 is another style of terminal
crimper.
May 5, 2004 -
In my Avery
order for more copper clecoes (you'll need a couple hundred just for the
cabin frame, even with a Quick Build kit), I also got a new one-hole
deburring cutter. I had been using the 3-bladed cutter, because I was
told at Alexander Technical Center that they were better. You can see,
though, that the one-hole cutters come with a bit of a flat spot on the end,
making them not as good for 3/32" holes. But they work great for
1/8" and larger holes.
As
you can see here, the one-hole cutter does a MUCH better job. The
1/8" hole on the LT was deburred with the 3-bladed deburring
cutter. The one on the RT was with the new one-hole cutter.
Quite obvious difference! The one-hole cutters are also very easy to
sharpen. I've also now switched all my countersink tools over to the
one-hole design. The one-hole cutters don't work quite as well on #40
holes, though, because the tip is blunt & barely fits into a hole that
small. But for anything over #40, the one-hole is superior, IMHO.
June 11, 2004 -
You can see
here, on the RT 3 pieces, where I ground a radius into the edge of 3 blocks
on my box brake. You can see how sharp the edge is on the 4th piece, on the
LT. I also then put a piece of split fuel line over the edge, so give me a
better radius. It's a bit cobby, but it does work.
Here are the 120 degree #30 countersink cutter and dimple dies I recently bought
from Cleaveland. It took me quite awhile to figure it out, but the reason
countersunk head pop rivets, like the CS4-4, don't fit worth a damn (see my
notes regarding my rudder stops, for example) is because the heads are 120
degrees. The solid rivets and CherryMax rivets have 100 degree
heads. All the "normal" countersink cutters and dimple dies are
100 degrees. So, you really need to add these 120 degree items to your
tools if you are using any pop rivets in your plane (and the RVs DO use plenty
of the CS4-4 rivets). Avery doesn't carry these, for some reason, but
Cleaveland does. I also noticed that the dimple dies I got from Cleaveland
seem to have a higher polished finish than the Avery dies (see difference in
polish in the Cleaveland dies in the center of the above pic and the Avery dies
on each side of them). I made a suggestion to Avery that they should carry
these 120 degree dies.
These
aren't essential tools until you really need them. I needed them to help
put a curve into a very stiff piece of flanged 0.063 T2024T3
plate. The
shot bag contains 50 pounds of #8 lead shot. I got these from
Avery.
I found out later I could have gotten the shot bag from Kent White at
TM
Technologies for about half what I paid Avery.
Here's another
non-essential, but very handy, tool I just got. It's a laser level, made
in USA by Checkpoint, aka PDP Precision Designed Products, in Harbor City,
CA. You can get a cheap laser level for as little as $10 from Harbor Freight,
but this is a very nice one.
July, 2004 -
Here's
a pic of a rivet protrusion gage I made from 3/8"
aluminum bar stock. One end shows how much should be protruding (before
riveting) for 3/32" rivets and the other end is for 1/8"
rivets. I just set up a chunk in my mill, milled the bottom smooth,
then raised the table 9/64" for one end and 3/16" for the other
end (1.5 times rivet diameter). The tool companies, like Avery, sell
tools like this.
Here's
another tool I got awhile back, but didn't document yet. It's actually
made for putting dimple dies into the gun part and the bucking bar part, and
making dimples where you can't get access otherwise. Here, the bucking
bar part is set up to use for setting 470 rivets while I use a back rivet
tool in the gun. It was much easier to do it this way, for the baggage
compartment panel rivets I couldn't squeeze, than to use a regular cupped
set in the gun and a plain bucking bar, because I could only see one side at
a time of what I was working on. I taped some scrap aluminum pieces to
the other end so that, when they are sitting flat on the work, I can feel
the bucking bar is parallel with the work, without having to see it.
The pieces under the tape are also a bit wider than the bar itself, so that
helps stabilize the bar and keep it from rocking.
Here's
a pic of it as it was meant to be- with a dimple die in it.
This
pop rivet gun dimpling tool,
from Avery, is
definitely the way to go when you have to dimple something you can't get in a
squeezer or C-frame, or on already-assembled pieces, like a QB. This will
squeeze the 2 dies together very uniformly. Trust me - I've tried, and
it's about impossible to hold a die straight enough to use the C-frame plunger
or other tool (like above) free-hand, without tipping it slightly enough to mar the
surface.
I
went through my drawer of threaded drill bits and sorted them out, so it
doesn't take 15 minutes every time I need to find a specific diameter and
length bit. I left 'em here, cuz I haven't yet figured out a good
mechanism to keep them stored sorted. I'd hate to imagine trying to
build this plane without the angle drill and a full assortment of all 3
lengths of each pertinent diameter drill; 40/41, 35, 30, 21, 20, 19, 16, 12,
3/16", 1/4". I now have these bits stored in one of those
blue Akro-Mil multi-box storage cabinets.
The air powered file is
pretty handy sometimes. I got it from MSC. It has an on/off control switch, like an electrical switch,
rather than an air throttle. I don't like that, but all the air
files I've seen come that way, for some odd reason.
A
narrow rivet set like this is essential for getting into tight spots. I
believe the set of these came from
PlaneTools.
This is the kit for
installing rivnuts. Very handy, but do a practice run or 2 with it
first. It doesn't come with any instructions. I got this
from Aircraft Tool Supply. The head has 3 different sets of threads that
work in different directions, so you'll want to understand how it works before using
it for real. Be sure the threads in the tool head are fully into all the
threads in the rivnut before squeezing, or you'll rip them out. If you
squeeze, then readjust the head threads IN for more pull, be aware that you are
also screwing the threads OUT of the rivnut as you do this. My first practice
run tore out half the rivnut threads, because I only had half of them engaged.
August, 2004
PALM DRILL - I got this nice little goodie from
Cleaveland. I liked the demo one they had at AirVenture 04 even
better than the Sioux. The one I got from them in the mail, however, had a rather
sticky trigger. I emailed Cleaveland about it, but they couldn't bother
responding. I had this poor responsiveness problem from them when I was
first buying tools, so I got all my tools from
Avery.
Avery is always very responsive. Cleaveland is NOT. I would not
recommend buying from Cleaveland, because of their poor responsiveness. I
won't be buying from them again. I ended up fixing this drill by taking it
apart and polishing the trigger plunger shaft.
Here's a
cute little die grinder I picked up from one of the Fly Mart vendors at OSH04 for $8. It'll be nice for
getting into tight places. And I don't have very big hands, which
tells you how small this thing is.
AUTOMATIC WIRE STRIPPER - I got these from
SteinAir. The
stripper really works
well. I hated to buy one, because I was sure I have more than one already,
or at least I used to. But I can't find them anywhere, so I finally broke
down and bought this
stripper. It's nice, because it grips the wire for you & holds it,
while the stripper jaws close down on the insulation and take it off, all in one
squeeze. I also got the fine wire cutters. They cut nice &
flush. I suspect they are Chinese, but no markings on them either
way. The stripper is definitely US-made; the only way I'd get one.
TIG WELDER - Lincoln had a special on this welder at OSH04. I
tried doing some TIG welding with this inverter unit at their booth, and it
worked great, so I ordered it. It arrived 8/10. I already have a Hobart TIG welder, but it's huge, weighs several
hundred pounds, and it takes a lot more current than I have available, so I
can't use it. This one is light (even a bit smaller than my 125 and 175
Lincoln MIG welders), and doesn't draw a lot of current (can even run it on a
30a 110v circuit), so I guess I'll be selling the Hobart.
I got this
edge forming tool from Cleaveland at OSH04, too. It works very well. I like the design
better than the round one Avery has. For example, I could not have done this
with the Avery version. It's used to put a little bend into an edge.
You can also use it to put a flare into a lightening hole.
WASHER
HOLDER SET - got this set from Avery at OSH04 - VERY
handy for inserting all those spacing washers. The long piece is for
holding a nut. VERY handy tools; I've used them several times already, and
could have used them a lot before. They DO make it much easier to insert
those spacer washers that Van's has us putting in all over. And yes, I DID
do more at OSH04 than just buy tools! ;-)
September, 2004
Jeff, from the RV list, offered this used air cleco tool up for sale, so I
grabbed it. I had been thinking of getting one. I have carpal tunnel
problems in my hands, presumably from spending so much time on my laptop.
Some things, like clecoing, aggravate the problem. It's especially useful while
I'm currently working on the canopy frame, where there are about a hundred
clecoes involved in the 2 skins, and they have to come on and off at least a
hundred times.
Sometimes you get a real simple thing that makes a big difference. You may
have read earlier about me having to grind the radius of the brake fingers, as
shown in the foreground, and put a split fuel line over the edge of the fingers,
in order to get a bigger radius. Well, duh, my A&P friend Jim told me
about just using a piece of angle as the guide. So simple and so
effective! I used it with great success here, building the new C704
splice plate. You just put some metal in and bend it up. If you
want more radius, put in the first piece you just bent up, between the brake
fingers and the work piece. The new work piece will have a greater radius than
the first piece, and so on. You can make a series of tool pieces, with
ever-increasing radii, to use with making things. It worked SO much faster
and simpler, and more accurate than screwing around with that goofy fuel hose.
I forgot to tell you
about Sharpies earlier. Don't get the onesies & twosies from the tool
places. Go to Staples or similar and get a whole box. It's much cheaper
that way, and you WILL use them. I have read that blue seems to last
longer, for some unknown reason, and that is what I have found, too. It
also shows up better than other colors. Get 1
or 2 of other common colors (Staples sells a mixed color pack), in both fine and
ultra-fine, but get a whole box each of the blue ones.
Sept 8, 2004 - received my Van's order, including more clecoes. I'm
sure this is all I will be needing. Here is my total cleco count for a Quick Build:
DATE
SILVER
COPPER
11/02
175
100
5/04
50
100
9/04
100
50
TOTAL
325
250
So, even if you have a Quick Build kit, this is how many clecoes
you should expect you will need. You may be able to squeak by with a
little bit fewer, but why bother? They aren't that expensive. You
can see how many I had, and I needed to get more. I needed a bunch more
copper ones when I was doing the cabin frame, and I needed a bunch more silver
ones when I was doing the canopy frame and C702/F771 skins.
Storing all those threaded drill bits in something like this sure makes it a lot
easier to quickly find the right diameter and length.
Nov 2, 2004 -
Here is a link to a new page I made, containing Mike Crowe's tool
recommendations.
June 13, 2006 - Here is info on
some more good tools to have
PLEASE
do yourself a favor, and don't buy these pieces of crap the hustlers sell at
Oshkosh and other air shows. I checked them out carefully before buying,
making sure they didn't nick the wires. But the sleazy hucksters selling
this crap must use specific wire for their demos. As soon as I got these
home and used them on my own actual wires, they either nick the wire, sometimes
badly, or they don't remove the insulation. Sheer crap. I really
should have known better.
THESE
are the kind of wire strippers you want. They are sold by SteinAir, B&C,
and other reputable sellers. One does larger wires and one does smaller
wires.
These are also good strippers, just not quite as good as the ones above.
However, they do seem to strip teflon mil-spec wire better than the ones above.
I got this mini ratchet from
Avery at Sun N Fun '06. Not only is it very
small, it is also a toothless ratchet, so the backswing is completely
effortless, and it will operate in the smallest of areas. It's made in
China, but it does seem to work well.
For wiring, and for cutting tiewraps nice and flush, you need some good flush
cutters. Don't screw them up by trying to cut heavy things with them,
though. They're meant for more delicate work. If you've got
some house wiring or safety wire to cut, don't use these.
July 2, 2006 - Made some electric
terminal crimping dies to go in my Avery rivet squeezer. Why buy an
expensive crimper for the big wire lugs when you already own most of what it
takes to create one (a rivet squeezer)?
Here
is one of the electric lug crimping dies I made to go in my Avery rivet squeezer. This one is for
6AWG. I also made one for 8AWG. The male half on the LT is made by simply grinding down a
squeezer set at a 45 degree angle and leaving the end blunt. I made the female half on my mill. You could
probably do the same thing pretty easily on a drill press. Just match
the female die ID to the OD of the terminal lug, drill the appropriate sized
hole in a little block of steel, then cut the block in half and add a 3/16" pin on the base.
Polish & radius the female half for smooth inserting and removing.
See RESULTS here.
I offered
this design, as well as another design, to Avery Tools for free, but they didn't even have enough courtesy
to respond to either one. Avery's customer service was once great, but
has steadily gone downhill, until now I won't even buy from them unless I
can't get something elsewhere.
One tool I took for granted (cuz I already have a few) and forgot to mention
here is an AIR COMPRESSOR. An air compressor is a must, although I
don't subscribe to the idea that you must drill all holes with an air drill.
Lots of people agonize over this decision. Relax - most any decent
compressor will do. Get one with at least a 25 gallon tank.
Bigger is better. Look for at least 7 or so cfm (at a usable 90
pounds, not the 40 psi spec some makers provide). The main thing is
DON'T GET AN OIL-LESS COMPRESSOR. They are VERY loud and annoying.
DEC, '06 - This is a new bucking bar I got from
SteinAir.
It's small, but dense. This little thing weighs a few pounds, I'd
guess. Steel has a specific gravity of 7.93, lead is 11.35, gold is
19.29, and tungsten is 19.62. I never realized tungsten was so heavy,
but it should make a great bucking bar. And it will never get rusty!
Jan, '07 update - this thing works GREAT - I HIGHLY recommend it as
your primary bucking tool. A thinner, longer version is available from
Bucking Bars. Expensive, but
very nice. Everyone on the VAF list also raved about these in a couple
threads. See
HERE for a comparison someone else made of the various ones on the
market
Jan, '07 - Here's a tip that came up on VAF
recently and I had never mentioned before. Use #41 drill bits for your
3/32" rivet holes, not the standard #40. You'll get a better fit,
especially after dimpling enlarges the hole a bit. You might even go
to a 3/32" if you're still getting holes too large. You want to use the
smallest hole that will still allow you to get your dimple die pilot (and
subsequent rivet) into the hole. Also,
Avery now sells #41
reamers, which in theory make for better holes than drill bits, so I suggest
getting the #30 and #41 reamers from them, in addition to your drill bits.
Mar, '07 - I just got this tool from Avery. I had seen
one some time ago, but when I called around last year to all the tool
companies (starting with Avery, I'm sure), they all said "no such tool".
But I just saw it in Avery's catalog (probably where I'd seen it in the
first place), so I grabbed it. I haven't used it yet, but I
think it will be VERY useful. It's for holding Adel clamps while you
fasten them. It seems to be made of high quality. Now, I also
see that
The
Yard is carrying 3 models of them. I don't know why every place I
called about them before said they had no such thing. Perhaps
it's because I now see that both The Yard and Avery call them "Line Clamp
Pliers", not "Adel Clamp Pliers".
April, '07 - Got my DMC crimper from
SteinAir. Stein's prices
are by far the best for this top of the line crimper. It will do
regular machined DB sockets and pins better than other crimpers, and it will
also do (with the right positioners) the mini-DB pins & sockets, such as
those used in most Garmin interconnections.
This is
the crimper used by professionals. You change out the positioner for
different types of pins and sockets. If you're doing Garmin wiring,
it's essential, as a regular 4-jaw crimper will not work properly on the
mini-pins & sockets the Garmin High Density DB connectors use.
July, '07 - Received my AMP 69324 crimper after searching ebay for
one for a couple YEARS. Tested how it does the crimps on the Waytek
parallel connectors. It does a SUPER job; very nice, strong,
clean-looking crimps, with less connector distortion than the crimpers I got
from Waytek for these terminals.
This is the great quality crimp I get on the parallel splice connectors with
the new AMP 69324 crimper. Cover this with dual wall heatshrink and
you've got a bulletproof splice. The AMP crimper should also work well
for the usual PIDG terminals, although I already have a couple good crimpers
for that.
See my new CRIMPING page for more details on how
to make these bulletproof splices.
2009 update - Avery's customer service seems to have gone way
downhill. Over the course of about a month, I emailed them
twice and twice filled out the contact form on their web site, seeking
more detailed info for a rather expensive purchase (inspection scope). ZERO response, zero sale.
I bought one elsewhere. See also my crimper
comment about Avery.
The
Terminal Tool - designed & manufactured by an RV builder. For securing
large wires to terminals.
This is The Terminal Tool. It comes with different dies that go into the
blue frame. It looks like a good tool, although I would personally like to
see it include an 8ga die (it comes with dies for 6ga and larger wires).
Most "standard" crimpers crimp up to 10ga, so 8 ga needs a special
crimper, too. The manufacturer had some excuse for not including an 8 ga
die. If/when the manufacturer follows my suggestion to include 8 ga, I
will buy one.
In addition to
good tools, you also need good workbenches. See
HERE for info on building the standard EAA workbenches, and
HERE
for Bob Collins' update to that. And there are some threads on
RivetBangers and
VAF about benches, too.
 This is
a tool cabinet I made from the crate my completed tail came in from Alexander
Technical Center. ATC uses screws to put their crates together, not those
nasty, gnarly nails & staples that Van's uses, so it was quite easy to salvage
everything from the crate. With Van's crates, they're harder to open, and
you damage most of the wood in the process.
This is
a tool cabinet I made from the crate my completed tail came in from Alexander
Technical Center. ATC uses screws to put their crates together, not those
nasty, gnarly nails & staples that Van's uses, so it was quite easy to salvage
everything from the crate. With Van's crates, they're harder to open, and
you damage most of the wood in the process. My hand squeezers and battery screwdriver (for screws, of course, and great for light
deburring). I highly recommend the battery screwdriver over the dogleg-type
hand swivel deburring handle.
My hand squeezers and battery screwdriver (for screws, of course, and great for light
deburring). I highly recommend the battery screwdriver over the dogleg-type
hand swivel deburring handle. Here's a nice fuzzy closeup of a handy little home-made tool they had at ATC.
You need it to dimple the top rib on the rudder, for example. To make one,
just drill and countersink a piece of 3/16-1/4" plate steel. Put the
male dimpling die on your C-frame driver rod, put this under the piece to be
dimpled, and whack it!
Here's a nice fuzzy closeup of a handy little home-made tool they had at ATC.
You need it to dimple the top rib on the rudder, for example. To make one,
just drill and countersink a piece of 3/16-1/4" plate steel. Put the
male dimpling die on your C-frame driver rod, put this under the piece to be
dimpled, and whack it! 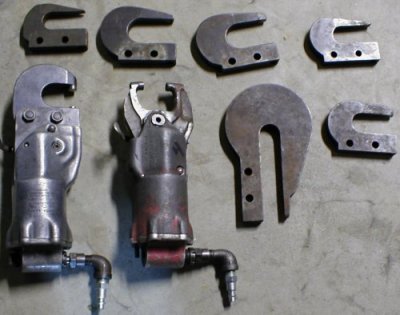 Pneumatic squeezers, both C-type and A-type (aka Alligator). The A-type
aren't as versatile, as they don't take different yokes, but they will
supposedly fit into places others won't. The C-type, on the left, takes
interchangeable yokes, for fitting into different places. I got good deals
on ebay for both of these. The C-type came with all the yokes pictured
(retail $125-150 each new), so I grabbed it. The squeezer had a chunk
blown out of the case, so I took it apart and taught myself how to rebuild CP
214 squeezers. Then I patched the hole with JB Weld. It works great
now. I got the Avery adjustable anvil for the C-type squeezer. When
using it, figure 1.5 turns per rivet length number (e.g. turn it in 1.5 turns
when going from a -5 to a -6). All these yokes will fit on my Avery hand
squeezer, too. I've never used the alligator type, so I don't recommend
that. It also requires shim washers for depth adjustment.
Pneumatic squeezers, both C-type and A-type (aka Alligator). The A-type
aren't as versatile, as they don't take different yokes, but they will
supposedly fit into places others won't. The C-type, on the left, takes
interchangeable yokes, for fitting into different places. I got good deals
on ebay for both of these. The C-type came with all the yokes pictured
(retail $125-150 each new), so I grabbed it. The squeezer had a chunk
blown out of the case, so I took it apart and taught myself how to rebuild CP
214 squeezers. Then I patched the hole with JB Weld. It works great
now. I got the Avery adjustable anvil for the C-type squeezer. When
using it, figure 1.5 turns per rivet length number (e.g. turn it in 1.5 turns
when going from a -5 to a -6). All these yokes will fit on my Avery hand
squeezer, too. I've never used the alligator type, so I don't recommend
that. It also requires shim washers for depth adjustment.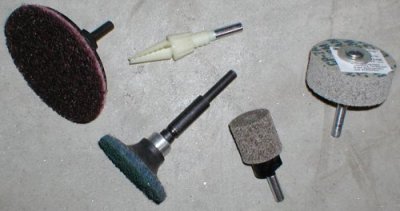 These are some of the small Scotchbrite wheels I got for polishing and scratch
removal. I got some of these from Avery, some from MSC (huge, sometimes
confusing selection), and some from
These are some of the small Scotchbrite wheels I got for polishing and scratch
removal. I got some of these from Avery, some from MSC (huge, sometimes
confusing selection), and some from
 ATC also had both of Avery's 6" deburring wheels (fine and extra-fine)
mounted on a grinder. I found I used both a lot, so I needed to get both
of them. The problem was the buffer I want to put them on has a
3/4" shaft, and the wheels from Avery are 1/2" hole. So, I had
to get the equivalent wheels (with 1" hole and a 3/4" adapter) from
ATC also had both of Avery's 6" deburring wheels (fine and extra-fine)
mounted on a grinder. I found I used both a lot, so I needed to get both
of them. The problem was the buffer I want to put them on has a
3/4" shaft, and the wheels from Avery are 1/2" hole. So, I had
to get the equivalent wheels (with 1" hole and a 3/4" adapter) from 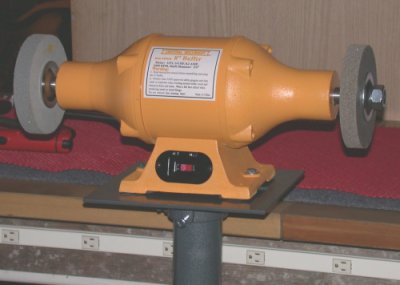 This is the
8" buffer
with the 2 Scotchbrite wheels mounted. I use this ALL the time.
Believe me - you will REALLY need both the fine and coarse wheels. I
learned that at Alexander Technical Center. BTW, I went against my better
judgment and ordered this from Harbor Freight, only because they had a "free
shipping" sale. After waiting at least 2 months to get it, it arrived
in the same condition as most heavy things from HF; trashed. They send the
stuff out USPS, uninsured and poorly boxed, so USPS trashes it and refuses any
responsibility. Luckily, the buffer itself was not damaged, so I didn't
have to go through the Harbor Freight Customer Disservice hassles. This is
how it came (the other 2 sides were equally bad):
This is the
8" buffer
with the 2 Scotchbrite wheels mounted. I use this ALL the time.
Believe me - you will REALLY need both the fine and coarse wheels. I
learned that at Alexander Technical Center. BTW, I went against my better
judgment and ordered this from Harbor Freight, only because they had a "free
shipping" sale. After waiting at least 2 months to get it, it arrived
in the same condition as most heavy things from HF; trashed. They send the
stuff out USPS, uninsured and poorly boxed, so USPS trashes it and refuses any
responsibility. Luckily, the buffer itself was not damaged, so I didn't
have to go through the Harbor Freight Customer Disservice hassles. This is
how it came (the other 2 sides were equally bad): 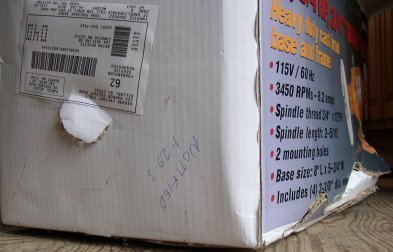
 From the left, here are a couple rivet cutters, for cutting rivets to exact
length, when necessary. Next are a couple chip chasers I made from old
hacksaw blades. The one on the right has a nice little aluminum handle I
made by riveting on a couple chunks of aluminum. On the right are 2
different types of hand seamers. I already had the lower one, and the top
one is the high quality Avery model. The Avery one is different (better)
than the similar one made by Vise-Grip, because Avery machines a radius into the
edges, so it doesn't mar or scratch your sheet metal. The curved thing on
top is a tool I made from 1/2" conduit to use as a wrench for rod end
bearings. The end is slotted to go over the rod end, then reinforced with
a coupler over the end. 2004 update - I've never used the chip
chasers; why would I; we dismantle everything before riveting, so that removes
the chips. Maybe someday I will have a use for them, but for now, they are
a waste.
From the left, here are a couple rivet cutters, for cutting rivets to exact
length, when necessary. Next are a couple chip chasers I made from old
hacksaw blades. The one on the right has a nice little aluminum handle I
made by riveting on a couple chunks of aluminum. On the right are 2
different types of hand seamers. I already had the lower one, and the top
one is the high quality Avery model. The Avery one is different (better)
than the similar one made by Vise-Grip, because Avery machines a radius into the
edges, so it doesn't mar or scratch your sheet metal. The curved thing on
top is a tool I made from 1/2" conduit to use as a wrench for rod end
bearings. The end is slotted to go over the rod end, then reinforced with
a coupler over the end. 2004 update - I've never used the chip
chasers; why would I; we dismantle everything before riveting, so that removes
the chips. Maybe someday I will have a use for them, but for now, they are
a waste. On left top is an
Avery Vise-Grip fluting tool. Left bottom is the Avery Vise-Grip
dimple die for close-quarters dimpling. On the top right are camlock
pliers I already had. In the right middle are nutplate jigs, and on the
bottom right are hole alignment tools I already had. You definitely want
this style of fluting tool, not the ones that are more like regular
pliers. No way will the plier-type work with 0.063" material, and you
will be needing to do that. 2004 update - I have yet to use the
nutplate jigs or the hole alignment tools. You really don't need the
nutplate jigs at all - see
On left top is an
Avery Vise-Grip fluting tool. Left bottom is the Avery Vise-Grip
dimple die for close-quarters dimpling. On the top right are camlock
pliers I already had. In the right middle are nutplate jigs, and on the
bottom right are hole alignment tools I already had. You definitely want
this style of fluting tool, not the ones that are more like regular
pliers. No way will the plier-type work with 0.063" material, and you
will be needing to do that. 2004 update - I have yet to use the
nutplate jigs or the hole alignment tools. You really don't need the
nutplate jigs at all - see 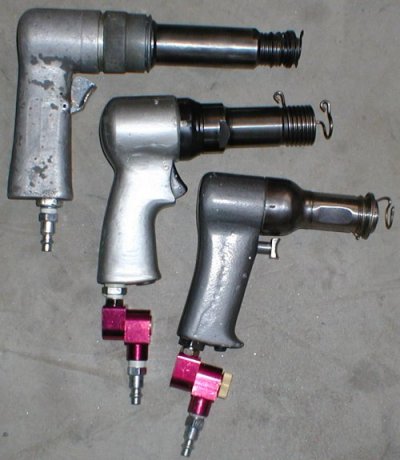 I already had the 6x gun on the left, then I got the 3x Sioux and 2x CP guns in
pretty good deals on ebay. For all the agonizing people seem to do over
whether to get a 3x or 2x, I don't see much difference between a 3x with less
air pressure to it and a 2x with a little more pressure. BTW, the swivel
regulator type shown here is about useless. Get the "T" shaped
ones described below. The 6x gun was all froze up inside from years of
laying around unused. I got it loosened up and oiled, and now it works
just fine. It isn't the most ergonomic handle, but the trigger control is
MUCH better than any of my other guns. It's so controllable, I can use it
with no flow regulator and using full tank pressure of about a hundred pounds,
and I can drive anything from 3/32" to 1/4" with it.
I already had the 6x gun on the left, then I got the 3x Sioux and 2x CP guns in
pretty good deals on ebay. For all the agonizing people seem to do over
whether to get a 3x or 2x, I don't see much difference between a 3x with less
air pressure to it and a 2x with a little more pressure. BTW, the swivel
regulator type shown here is about useless. Get the "T" shaped
ones described below. The 6x gun was all froze up inside from years of
laying around unused. I got it loosened up and oiled, and now it works
just fine. It isn't the most ergonomic handle, but the trigger control is
MUCH better than any of my other guns. It's so controllable, I can use it
with no flow regulator and using full tank pressure of about a hundred pounds,
and I can drive anything from 3/32" to 1/4" with it.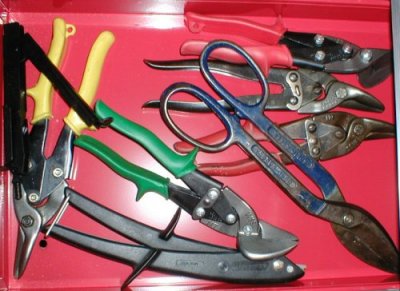 These are for cutting sheet metal. I already had most of these tools
before starting the RV project. I had bought most of the cutters, and the
nibbler on the bottom, when I built my steel barn. I did get the other
nibbler (top left) from Avery, because it works differently than the one on the
bottom. I very rarely use any of the snips.
These are for cutting sheet metal. I already had most of these tools
before starting the RV project. I had bought most of the cutters, and the
nibbler on the bottom, when I built my steel barn. I did get the other
nibbler (top left) from Avery, because it works differently than the one on the
bottom. I very rarely use any of the snips.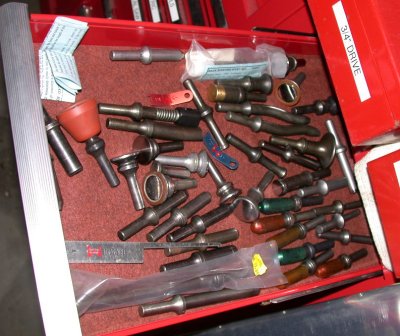 These are my main rivet sets. I got a little bit of everything. The
one best flat set to get is the swivel one with the red rubber hood. I
took the spring off mine. People also recommend putting masking tape on
your sets, so they mar less and so they slip less.
These are my main rivet sets. I got a little bit of everything. The
one best flat set to get is the swivel one with the red rubber hood. I
took the spring off mine. People also recommend putting masking tape on
your sets, so they mar less and so they slip less. Here are some odd shaped rivet sets I got in a good deal on ebay. Will I
need to use them? I don't know, but I do have them ready.
Here are some odd shaped rivet sets I got in a good deal on ebay. Will I
need to use them? I don't know, but I do have them ready. Here are my clecos. They are used to hold pieces of drilled sheet metal
together for fitting. Silver is 3/32" and copper is 1/8".
They are in a double-sided tub. This is a trick I learned at ATC. In
the back are the "special" clecos; larger ones, 1/2" and 1"
side clamps, "C" clamps, and wingnut clecos. On things like the
canopy frame, you will definitely want at least half a dozen wingnut clecos.
You'll need a dozen or so of each size of the side clamps. See
Here are my clecos. They are used to hold pieces of drilled sheet metal
together for fitting. Silver is 3/32" and copper is 1/8".
They are in a double-sided tub. This is a trick I learned at ATC. In
the back are the "special" clecos; larger ones, 1/2" and 1"
side clamps, "C" clamps, and wingnut clecos. On things like the
canopy frame, you will definitely want at least half a dozen wingnut clecos.
You'll need a dozen or so of each size of the side clamps. See
 This is my C-frame, also from ebay, used mainly for dimpling, but can also be
used for riveting. The cans in front are an idea I got from the Orndorff
videos. Pet food or seafood cans make great containers for the little
rivets. They are wider than they are tall, so they're less likely to tip
over, and the opening is big enough to get my fingers in to get some rivets.
This is my C-frame, also from ebay, used mainly for dimpling, but can also be
used for riveting. The cans in front are an idea I got from the Orndorff
videos. Pet food or seafood cans make great containers for the little
rivets. They are wider than they are tall, so they're less likely to tip
over, and the opening is big enough to get my fingers in to get some rivets.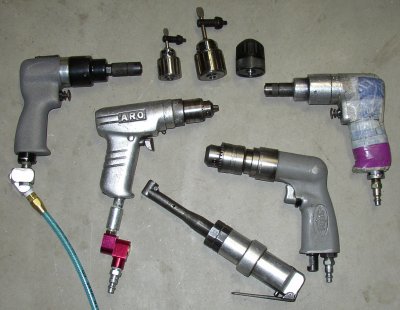 These are my air
drills. Yes, I have too many. I think I got a little carried away on
ebay. I got them pretty cheap, and some came with accessories I wanted
more than the drills, so I will probably sell one or two. I already had
the ARO in the middle, but I wanted a faster one, so I got the 6200 rpm rebuilt
Dotco on the left, from
These are my air
drills. Yes, I have too many. I think I got a little carried away on
ebay. I got them pretty cheap, and some came with accessories I wanted
more than the drills, so I will probably sell one or two. I already had
the ARO in the middle, but I wanted a faster one, so I got the 6200 rpm rebuilt
Dotco on the left, from 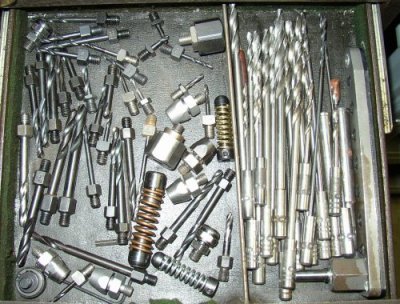 I've gotten a couple
bundles of drill bits from
I've gotten a couple
bundles of drill bits from
 This angle drill bit
holder is very nice. Avery sells some similar ones. The advantage of
this over the angle air drill is that this will hold any regular drill bit up to
1/4" and it will hold a Uni-Bit.
This angle drill bit
holder is very nice. Avery sells some similar ones. The advantage of
this over the angle air drill is that this will hold any regular drill bit up to
1/4" and it will hold a Uni-Bit.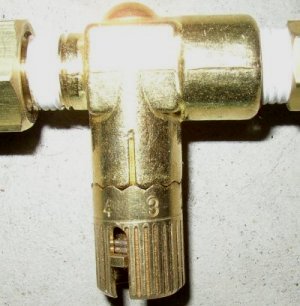 I also tried several
different brands of air regulator. By far the best are the imported ones.
I got mine from Avery. The other kind with the rotary dial, even though
they are made in the US, are very difficult to set exactly, and impossible to
return to a setting. A very small movement in the dial makes a big
difference in the flow. The imported ones use a T shape with a valve that
screws down, as shown here.
I also tried several
different brands of air regulator. By far the best are the imported ones.
I got mine from Avery. The other kind with the rotary dial, even though
they are made in the US, are very difficult to set exactly, and impossible to
return to a setting. A very small movement in the dial makes a big
difference in the flow. The imported ones use a T shape with a valve that
screws down, as shown here.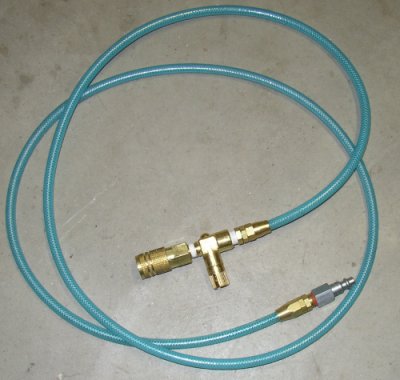 I also got some
very thin wall, flexible braided polyurethane hose from
I also got some
very thin wall, flexible braided polyurethane hose from
 These are some Magnavon QC countersink cages. The nice clean looking one
in the upper right is a reconditioned one I got from
These are some Magnavon QC countersink cages. The nice clean looking one
in the upper right is a reconditioned one I got from
 If you grind the
foot off one of the narrower cages, it can be very helpful for getting into
tight places.
If you grind the
foot off one of the narrower cages, it can be very helpful for getting into
tight places.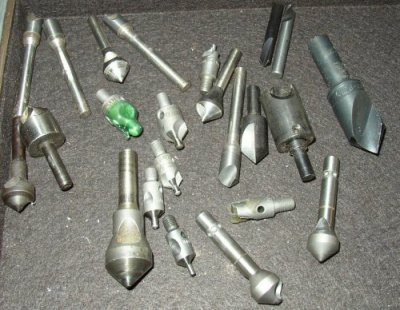 These are some of
my countersinks. I have both the fluted kind and the single hole type.
The single hole ones are easier to resharpen. The threaded ones go in the
countersink cage.
These are some of
my countersinks. I have both the fluted kind and the single hole type.
The single hole ones are easier to resharpen. The threaded ones go in the
countersink cage.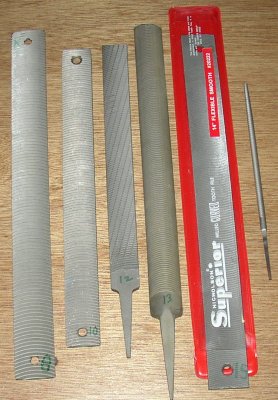 These are my Vixen
files. You need them for trimming aluminum. The numbers I wrote on
the end of them tell me how many teeth per inch each one is. I already had
the 10tpi that I got from
These are my Vixen
files. You need them for trimming aluminum. The numbers I wrote on
the end of them tell me how many teeth per inch each one is. I already had
the 10tpi that I got from
 This is a back rivet plate I made from an old chunk of steel I had laying
around. The top used to be as rough and rusty as the side you see nearest
you. It had a lot of big dings and rust pitting. I just went at it
with my portable belt sander, starting with a #36 grit and using progressively
finer grits, until it looks like this. The ones you buy from Avery or
Cleaveland are 1/4" or 3/8" thick. This one is an inch and a
half thick and weighs about a hundred pounds! That's plenty of mass.
I glued felt on the bottom side, so it doesn't ding up my workbench, and it will
slide around easily. I also made a wood plate for it to sit on, so its
height matches the "skin tables" I made to go with, and match the
height of, the C-frame dimpler.
This is a back rivet plate I made from an old chunk of steel I had laying
around. The top used to be as rough and rusty as the side you see nearest
you. It had a lot of big dings and rust pitting. I just went at it
with my portable belt sander, starting with a #36 grit and using progressively
finer grits, until it looks like this. The ones you buy from Avery or
Cleaveland are 1/4" or 3/8" thick. This one is an inch and a
half thick and weighs about a hundred pounds! That's plenty of mass.
I glued felt on the bottom side, so it doesn't ding up my workbench, and it will
slide around easily. I also made a wood plate for it to sit on, so its
height matches the "skin tables" I made to go with, and match the
height of, the C-frame dimpler.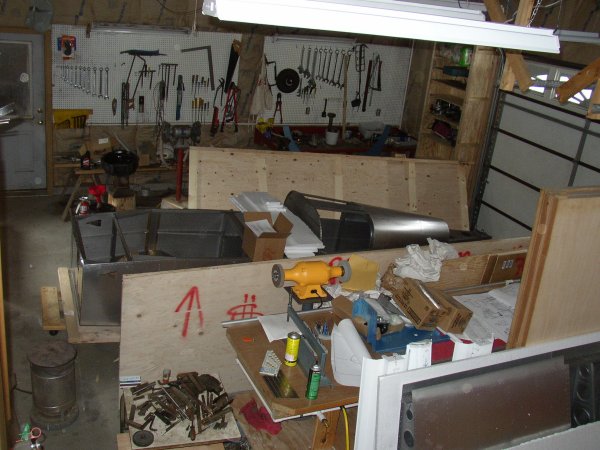
 Tools used in any
custom layout you might do.
Tools used in any
custom layout you might do.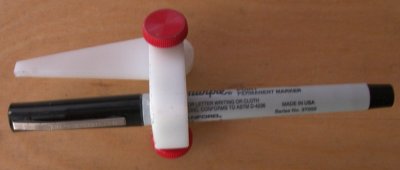 I use this incredibly
handy little tool from Avery ALL the time. Perfect for marking distance
from an edge. The pen that came with it didn't last too long, but the
standard micro-Sharpies fit right in there.
I use this incredibly
handy little tool from Avery ALL the time. Perfect for marking distance
from an edge. The pen that came with it didn't last too long, but the
standard micro-Sharpies fit right in there.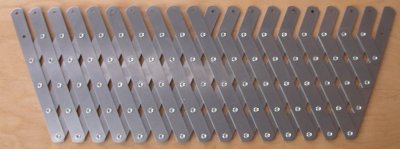 Another
very handy tool for laying out evenly spaced holes along a line. It is
like an accordion; it stretches in and out for different hole spacing.
Another
very handy tool for laying out evenly spaced holes along a line. It is
like an accordion; it stretches in and out for different hole spacing.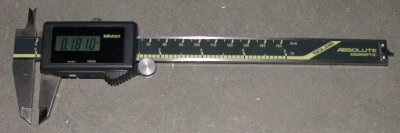 Vernier, dial,
or digital calipers will be very useful for you.
Vernier, dial,
or digital calipers will be very useful for you.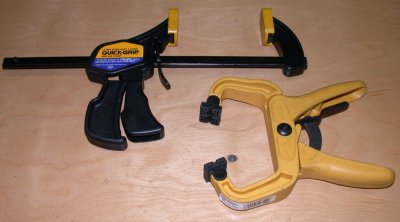 You'll
need plenty of various
clamps. The rubber-tipped ones won't mar the metal, but they will allow
the clamped pieces to squirm some. Get the Vise-Grips with the flat
swiveling pads to clamp things you don't want to move at all, like when putting
the tail onto the fuselage.
You'll
need plenty of various
clamps. The rubber-tipped ones won't mar the metal, but they will allow
the clamped pieces to squirm some. Get the Vise-Grips with the flat
swiveling pads to clamp things you don't want to move at all, like when putting
the tail onto the fuselage.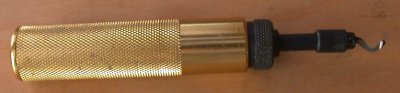 You will definitely
need a good deburring tool. MSC has the cutters designed to debur both
edges of a piece of metal at once, as shown in the tool in this pic. These
cutters are also especially useful when you
need to debur the back side of a hole that you can't otherwise reach.
You will definitely
need a good deburring tool. MSC has the cutters designed to debur both
edges of a piece of metal at once, as shown in the tool in this pic. These
cutters are also especially useful when you
need to debur the back side of a hole that you can't otherwise reach.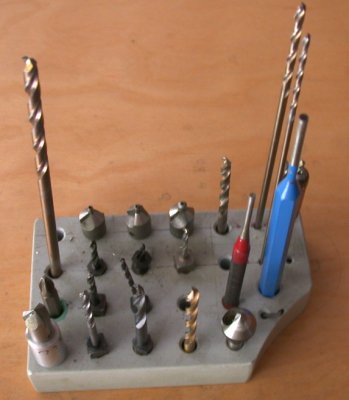 I use this all the
time; it holds my most frequently used drill bits, rotary deburring bits,
punches, screwdriver bits, and countersink cutters. Nice and centralized,
and no cutters getting ruined by rolling off the bench onto the concrete floor. Made from a block of
PVC stock. You could make one out of wood or whatever material you have
available.
I use this all the
time; it holds my most frequently used drill bits, rotary deburring bits,
punches, screwdriver bits, and countersink cutters. Nice and centralized,
and no cutters getting ruined by rolling off the bench onto the concrete floor. Made from a block of
PVC stock. You could make one out of wood or whatever material you have
available.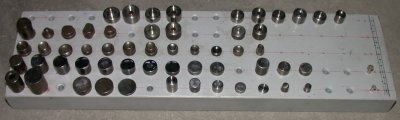 Another holder
I made for
all my 426 and 470 sets, as well as the Avery springback dimple dies.
Another holder
I made for
all my 426 and 470 sets, as well as the Avery springback dimple dies.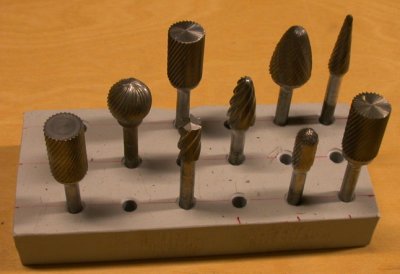 You'll
need various
rotary files. These carbide ones work better and last a lot longer than
HSS ones.
The ones with the coarse teeth are for aluminum, and they load up much less than
the others. They also cut FAST, so use them carefully.
You'll
need various
rotary files. These carbide ones work better and last a lot longer than
HSS ones.
The ones with the coarse teeth are for aluminum, and they load up much less than
the others. They also cut FAST, so use them carefully.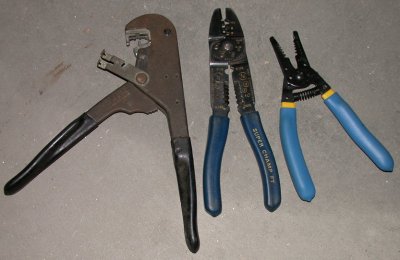 Get good
US-made wire cutters, strippers, and crimpers for your wiring work.
Get good
US-made wire cutters, strippers, and crimpers for your wiring work. You'll need a
swiveling inspection mirror. The crack is optional ;-)
You'll need a
swiveling inspection mirror. The crack is optional ;-)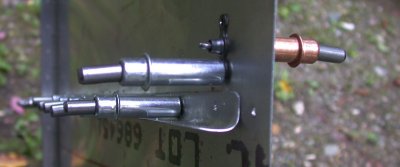 You don't
need to buy any of those nutplate jigs. Clecoes work fine and more easily,
if you do it right. If you have a #8 nutplate to put in, don't
drill the hole to full size. A 1/8" hole will allow you to use a
1/8" copper cleco for a perfect fit in both the hole and the nutplate.
Use a silver 3/32" cleco for #6 and use a black 5/32" cleco for AN3 or
#10. Drill
one nutplate rivet hole, put a silver cleco there, then drill the other
3/32" hole. Remove the clecoes and drill the center hole out to final
size (I generally use #16 or even #12 for AN3 or #8, so the screws will fit in
more easily). Works perfectly every time. For larger or smaller
nutplates, just use appropriately larger or smaller clecoes and starter holes.
You don't
need to buy any of those nutplate jigs. Clecoes work fine and more easily,
if you do it right. If you have a #8 nutplate to put in, don't
drill the hole to full size. A 1/8" hole will allow you to use a
1/8" copper cleco for a perfect fit in both the hole and the nutplate.
Use a silver 3/32" cleco for #6 and use a black 5/32" cleco for AN3 or
#10. Drill
one nutplate rivet hole, put a silver cleco there, then drill the other
3/32" hole. Remove the clecoes and drill the center hole out to final
size (I generally use #16 or even #12 for AN3 or #8, so the screws will fit in
more easily). Works perfectly every time. For larger or smaller
nutplates, just use appropriately larger or smaller clecoes and starter holes.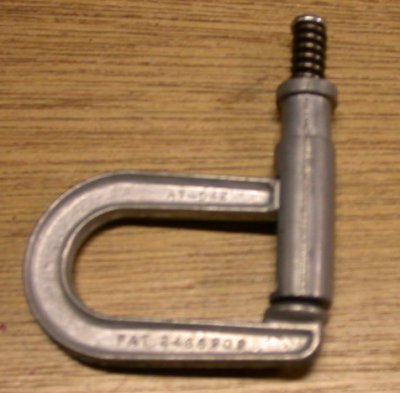 Here's about a
useless tool. It sounded like a good idea, but I have yet to find an
application where these cleco C-clamps would work. Maybe a use will
eventually come up. 2004 update - I did eventually use them a couple times, and they
were handy to have. The quality of workmanship is pretty poor. As
you can see in this pic, the 2
clamping surfaces don't even touch each other. I took it apart and ground away some of
the stop, and I had to grind away the casting flash on the clamp contact areas.
Here's about a
useless tool. It sounded like a good idea, but I have yet to find an
application where these cleco C-clamps would work. Maybe a use will
eventually come up. 2004 update - I did eventually use them a couple times, and they
were handy to have. The quality of workmanship is pretty poor. As
you can see in this pic, the 2
clamping surfaces don't even touch each other. I took it apart and ground away some of
the stop, and I had to grind away the casting flash on the clamp contact areas. Here's another valuable
tool I use frequently. It's a little telescoping magnet. Nice &
small, so it fits into small places, but a powerful magnet. I think I got
it off a MATCO truck. When you need one, you REALLY need one. It's
also quite useful for holding the washer where you have to put washers into
tight places as spacers, like flight control hinge brackets.
Here's another valuable
tool I use frequently. It's a little telescoping magnet. Nice &
small, so it fits into small places, but a powerful magnet. I think I got
it off a MATCO truck. When you need one, you REALLY need one. It's
also quite useful for holding the washer where you have to put washers into
tight places as spacers, like flight control hinge brackets. 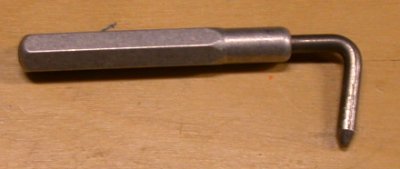 This is the hinge
alignment tool from Avery. I also made a few from 20D nails. Very
difficult to hang & align those elevators & rudder without these!
This is the hinge
alignment tool from Avery. I also made a few from 20D nails. Very
difficult to hang & align those elevators & rudder without these!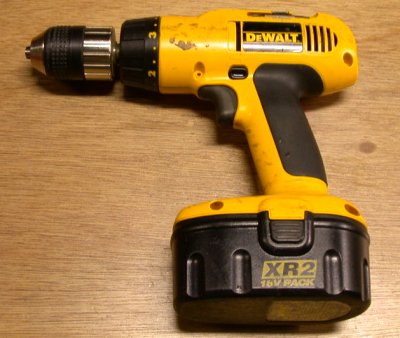 Everyone says the
air drills make much better holes, because they spin faster. I even got a
Dotco
air drill that had a 6200 rpm spec. I have never
seen any difference between the holes I drill with my air drills and those done
with this super handy battery drill. It charges quickly, lasts forever, and
I can drill hundreds of holes for weeks with it for far less than the amount of
electricity it takes to cycle the air compressor just one time. I highly
recommend one like this. More volts means more power and more duration.
This one is 18v and it is GREAT. It is a
lot bigger than an air drill, though, so the air drills are especially nice for
tighter quarters. It also drills slower, so I often switch to the
air drill when I have a lot of holes to drill.
Everyone says the
air drills make much better holes, because they spin faster. I even got a
Dotco
air drill that had a 6200 rpm spec. I have never
seen any difference between the holes I drill with my air drills and those done
with this super handy battery drill. It charges quickly, lasts forever, and
I can drill hundreds of holes for weeks with it for far less than the amount of
electricity it takes to cycle the air compressor just one time. I highly
recommend one like this. More volts means more power and more duration.
This one is 18v and it is GREAT. It is a
lot bigger than an air drill, though, so the air drills are especially nice for
tighter quarters. It also drills slower, so I often switch to the
air drill when I have a lot of holes to drill.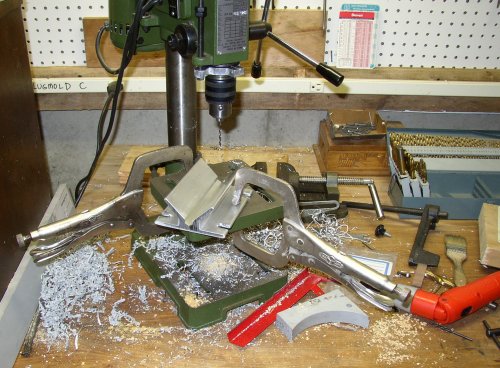 This is my
bench-mounted drill press setup. I think it needs a bit of a cleanup. The
extruded aluminum fixture, from
This is my
bench-mounted drill press setup. I think it needs a bit of a cleanup. The
extruded aluminum fixture, from
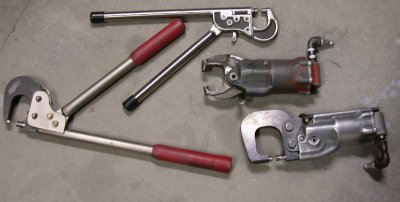 These are my rivet
squeezers and dimplers. I have yet to use the alligator-type pneumatic
squeezer, but I use the other 3 all the time. Having 2 hand squeezers
makes for fewer switching around of dies. MY ADVICE: get a pneumatic
squeezer, no matter what. With a pneumatic, you can squeeze with one hand, while the other
hand steadies what you're working on. You can get good used ones on ebay for a
couple hundred bucks. On the pneumatic squeezer in the lower RT in this
pic is the Longeron
yoke. You will definitely need at least that yoke, as well as the more
narrow one shown on the Avery squeezer.
These are my rivet
squeezers and dimplers. I have yet to use the alligator-type pneumatic
squeezer, but I use the other 3 all the time. Having 2 hand squeezers
makes for fewer switching around of dies. MY ADVICE: get a pneumatic
squeezer, no matter what. With a pneumatic, you can squeeze with one hand, while the other
hand steadies what you're working on. You can get good used ones on ebay for a
couple hundred bucks. On the pneumatic squeezer in the lower RT in this
pic is the Longeron
yoke. You will definitely need at least that yoke, as well as the more
narrow one shown on the Avery squeezer.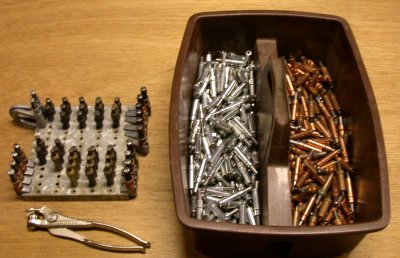 Of course, you need
lots of clecoes. Don't forget to get a dozen or so of the black ones
(5/32) and the gold ones (3/16). You will need them. You should also get a few 1/4" ones. You will also need at least several each of the 1" and 1/2" cleco clamps.
A plastic divided tub like this is very handy for storing them.
Of course, you need
lots of clecoes. Don't forget to get a dozen or so of the black ones
(5/32) and the gold ones (3/16). You will need them. You should also get a few 1/4" ones. You will also need at least several each of the 1" and 1/2" cleco clamps.
A plastic divided tub like this is very handy for storing them.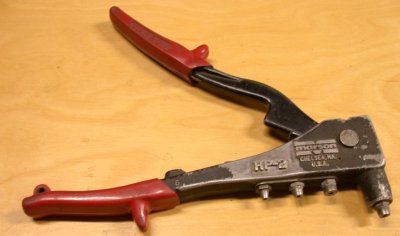 You will need a pop
rivet tool. The Van's tool list says you need one with a rotating head,
but I am glad I didn't order one; this standard model I already had works fine for everything
I've come up against. You do need one that will take different diameter
pop rivets, though.
You will need a pop
rivet tool. The Van's tool list says you need one with a rotating head,
but I am glad I didn't order one; this standard model I already had works fine for everything
I've come up against. You do need one that will take different diameter
pop rivets, though.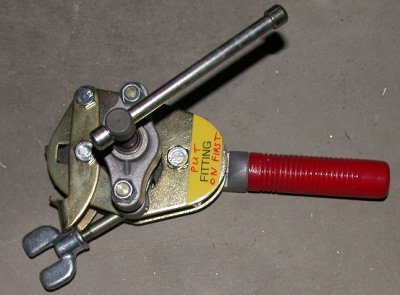 Spend the money on
a good US-made 37-degree tubing flare tool, such as this one from
Avery. Don't forget to put those little AN819 sleeves on BEFORE you flare!
Spend the money on
a good US-made 37-degree tubing flare tool, such as this one from
Avery. Don't forget to put those little AN819 sleeves on BEFORE you flare!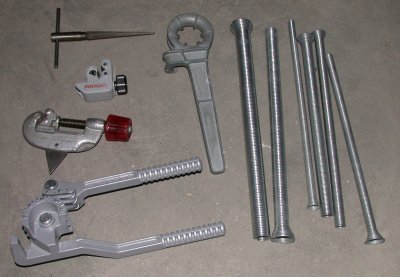 You'll
need tools to cut and bend your plumbing tubing. The 6 on the RT are a
General Tools tubing bender set from Avery. The bender in the lower LT is
another type of General Tools bender from Avery. You'll need the one that
handles 1/4", 5/16", and 3'8". Top LT is a T-reamer for cleaning up
the inside of the tubing after cutting. It works much quicker and cleaner than the
triangular stamped steel wedge found on the back of the lower tubing cutter on
the LT. Second down on LT is a Rigid (very good US brand) miniature tubing
cutter. It's very useful. In the top middle is yet another type of
bender. It can sometimes be useful when you can't get any other type of
bender on the tubing. Be very careful with it, though - it crimps the
tubing very easily. Don't use it to make a bend of more than a few
degrees. OCT, 2006 UPDATE - Hey, did you know that those springs on
the RT side of the pic are supposed to go on the INside of the tubing you are
bending? I had NO idea that's how they were supposed to be used, until I
saw them being used on a recent PBS "This Old House" show. I had always
used them on the OUTside of the tubing. For most bending, I use the
(modified) bender in the lower LT corner of the pic.
You'll
need tools to cut and bend your plumbing tubing. The 6 on the RT are a
General Tools tubing bender set from Avery. The bender in the lower LT is
another type of General Tools bender from Avery. You'll need the one that
handles 1/4", 5/16", and 3'8". Top LT is a T-reamer for cleaning up
the inside of the tubing after cutting. It works much quicker and cleaner than the
triangular stamped steel wedge found on the back of the lower tubing cutter on
the LT. Second down on LT is a Rigid (very good US brand) miniature tubing
cutter. It's very useful. In the top middle is yet another type of
bender. It can sometimes be useful when you can't get any other type of
bender on the tubing. Be very careful with it, though - it crimps the
tubing very easily. Don't use it to make a bend of more than a few
degrees. OCT, 2006 UPDATE - Hey, did you know that those springs on
the RT side of the pic are supposed to go on the INside of the tubing you are
bending? I had NO idea that's how they were supposed to be used, until I
saw them being used on a recent PBS "This Old House" show. I had always
used them on the OUTside of the tubing. For most bending, I use the
(modified) bender in the lower LT corner of the pic.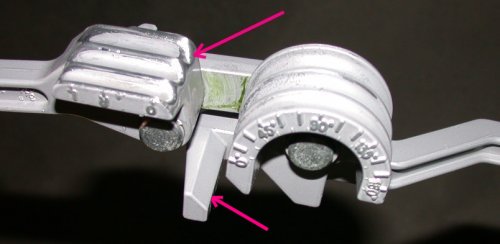 You should
modify the tubing bender. This one is made by General Tools, and came from
Avery. Rigid
also makes a good one of similar design, found at Home Depot. On the
RT end of the grooves in this picture (upper arrow) is where the moving arm comes down
over the curved portion of the tubing bender. This was a rather abrupt
edge, and it was denting the tubing sometimes, when I swung the arm over the
tubing to begin the bending. I beveled the edge with a round file,
then polished the whole edge, including the groove, on my fine scotchbrite
wheel. It seemed to make a big difference in the quality of my
bends. A drop of oil in the groove on this arm
will also help make the bends nice and smooth, and free of nicks and dents.
Also radius and
polish the fixed arm where the lower arrow is. This, too, can dent your
tubing with an out-of-the-box tool.
You should
modify the tubing bender. This one is made by General Tools, and came from
Avery. Rigid
also makes a good one of similar design, found at Home Depot. On the
RT end of the grooves in this picture (upper arrow) is where the moving arm comes down
over the curved portion of the tubing bender. This was a rather abrupt
edge, and it was denting the tubing sometimes, when I swung the arm over the
tubing to begin the bending. I beveled the edge with a round file,
then polished the whole edge, including the groove, on my fine scotchbrite
wheel. It seemed to make a big difference in the quality of my
bends. A drop of oil in the groove on this arm
will also help make the bends nice and smooth, and free of nicks and dents.
Also radius and
polish the fixed arm where the lower arrow is. This, too, can dent your
tubing with an out-of-the-box tool. The edges
shown here also need to be radiused and polished, too, or you can get denting and
scratching.
The edges
shown here also need to be radiused and polished, too, or you can get denting and
scratching.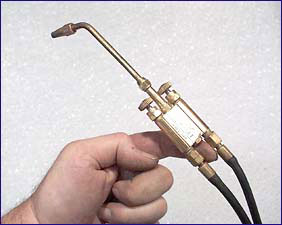
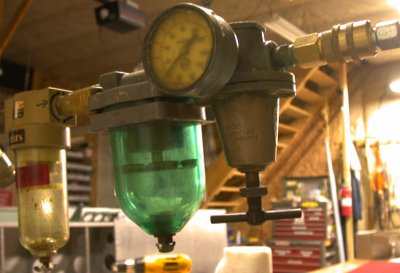 I now have a
real Schrader diaphram-type regulator in the compressed air supply
system. JUNE, 2004 update - I went to a New England Van's Air
Force fly-in, and one of the speakers said we should use full tank PRESSURE and
just restrict the FLOW. I dunno. I've tried it both ways, and
I like the pressure regulator best, but I guess it doesn't make a whole lot of
difference.
I now have a
real Schrader diaphram-type regulator in the compressed air supply
system. JUNE, 2004 update - I went to a New England Van's Air
Force fly-in, and one of the speakers said we should use full tank PRESSURE and
just restrict the FLOW. I dunno. I've tried it both ways, and
I like the pressure regulator best, but I guess it doesn't make a whole lot of
difference.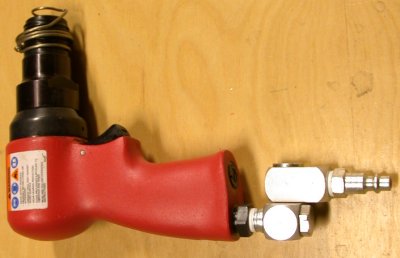 Here's the new Sioux
rivet gun I ordered. It works well, but frankly I am not all that
impressed with its acclaimed trigger. JUNE, 2004 update - Karla uses this
one, because it's smallest. The one I like to use when I am doing
rivet driving by myself is that old beat up Air Force 6x gun, with no flow
regulator and using full tank pressure. The trigger on it is so much
better than all the others that it's very easy to control.
Here's the new Sioux
rivet gun I ordered. It works well, but frankly I am not all that
impressed with its acclaimed trigger. JUNE, 2004 update - Karla uses this
one, because it's smallest. The one I like to use when I am doing
rivet driving by myself is that old beat up Air Force 6x gun, with no flow
regulator and using full tank pressure. The trigger on it is so much
better than all the others that it's very easy to control.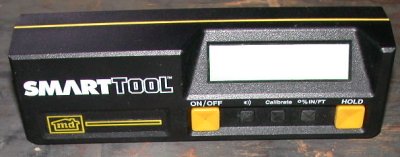 DIGITAL LEVEL - This is a VERY handy tool. It makes
setting angles & level & incidence much easier and more accurate.
DIGITAL LEVEL - This is a VERY handy tool. It makes
setting angles & level & incidence much easier and more accurate. 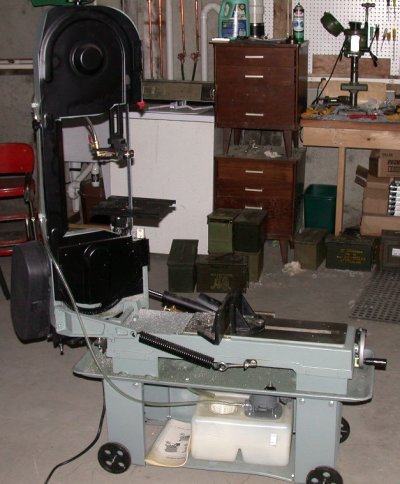 This horizontal/vertical METAL BANDSAW is another
very useful tool I already had, and use quite a bit. They aren't
cheap, and you can get by without one, but it sure makes fabricating those
brackets a LOT quicker and easier. It also ensures all your cuts are
square. This is especially useful for all the tubing cuts you'll be
making. I have heard that you can use a wood
bandsaw to cut aluminum, but I haven't tried it. Either way, be sure you
get a blade with as many teeth per inch as possible.
This horizontal/vertical METAL BANDSAW is another
very useful tool I already had, and use quite a bit. They aren't
cheap, and you can get by without one, but it sure makes fabricating those
brackets a LOT quicker and easier. It also ensures all your cuts are
square. This is especially useful for all the tubing cuts you'll be
making. I have heard that you can use a wood
bandsaw to cut aluminum, but I haven't tried it. Either way, be sure you
get a blade with as many teeth per inch as possible.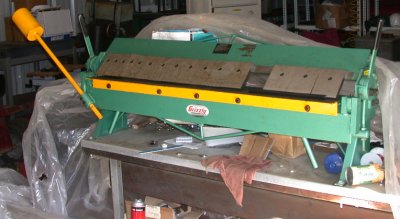 Here is a picture of my
BOX BRAKE. I keep it covered with plastic when not in use to prevent
occasional condensation dripping off the steel roof from causing the brake to
get rusty. I will have to modify it to make it
more useful, as the bending edge is too sharp, and doesn't put enough radius
into the bend. For the couple bends I've had to make so far, I lay a piece
of heavy cardboard over the sheet metal before bending. That adds some
radius to the bend.
Here is a picture of my
BOX BRAKE. I keep it covered with plastic when not in use to prevent
occasional condensation dripping off the steel roof from causing the brake to
get rusty. I will have to modify it to make it
more useful, as the bending edge is too sharp, and doesn't put enough radius
into the bend. For the couple bends I've had to make so far, I lay a piece
of heavy cardboard over the sheet metal before bending. That adds some
radius to the bend.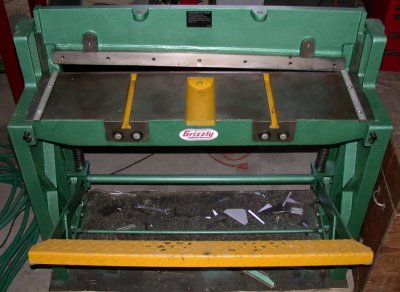 A SHEAR is kinda expensive if you will only use it for building one plane, but I've found
that the one I already owned is VERY useful, and I use it a lot.
A SHEAR is kinda expensive if you will only use it for building one plane, but I've found
that the one I already owned is VERY useful, and I use it a lot.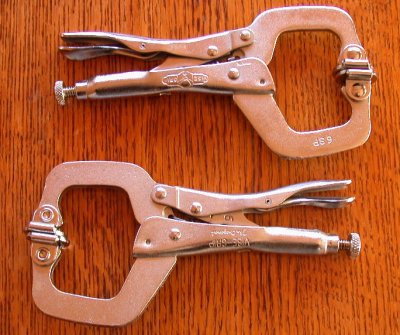 I got these
6" swivel pad Vise-Grips from
I got these
6" swivel pad Vise-Grips from
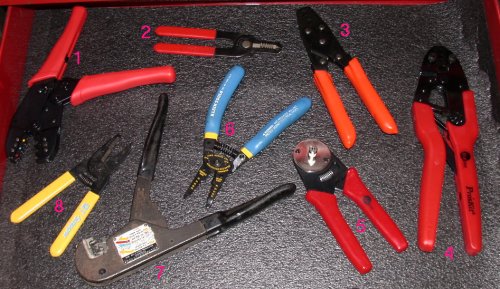 I've updated
this pic with the latest tool acquisitions. For
electrical work, you'll need a good quality wire stripper and a crimper for each
style of terminals you'll be using. #1 is a Taiwan-made solderless
terminal crimper I got from
I've updated
this pic with the latest tool acquisitions. For
electrical work, you'll need a good quality wire stripper and a crimper for each
style of terminals you'll be using. #1 is a Taiwan-made solderless
terminal crimper I got from
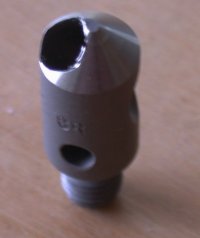 In my Avery
order for more copper clecoes (you'll need a couple hundred just for the
cabin frame, even with a Quick Build kit), I also got a new one-hole
deburring cutter. I had been using the 3-bladed cutter, because I was
told at Alexander Technical Center that they were better. You can see,
though, that the one-hole cutters come with a bit of a flat spot on the end,
making them not as good for 3/32" holes. But they work great for
1/8" and larger holes.
In my Avery
order for more copper clecoes (you'll need a couple hundred just for the
cabin frame, even with a Quick Build kit), I also got a new one-hole
deburring cutter. I had been using the 3-bladed cutter, because I was
told at Alexander Technical Center that they were better. You can see,
though, that the one-hole cutters come with a bit of a flat spot on the end,
making them not as good for 3/32" holes. But they work great for
1/8" and larger holes.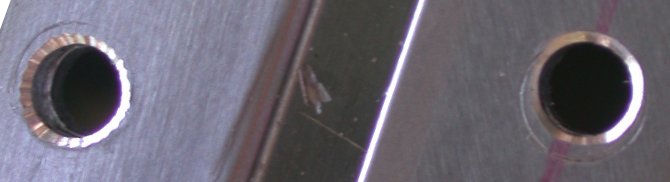 As
you can see here, the one-hole cutter does a MUCH better job. The
1/8" hole on the LT was deburred with the 3-bladed deburring
cutter. The one on the RT was with the new one-hole cutter.
Quite obvious difference! The one-hole cutters are also very easy to
sharpen. I've also now switched all my countersink tools over to the
one-hole design. The one-hole cutters don't work quite as well on #40
holes, though, because the tip is blunt & barely fits into a hole that
small. But for anything over #40, the one-hole is superior, IMHO.
As
you can see here, the one-hole cutter does a MUCH better job. The
1/8" hole on the LT was deburred with the 3-bladed deburring
cutter. The one on the RT was with the new one-hole cutter.
Quite obvious difference! The one-hole cutters are also very easy to
sharpen. I've also now switched all my countersink tools over to the
one-hole design. The one-hole cutters don't work quite as well on #40
holes, though, because the tip is blunt & barely fits into a hole that
small. But for anything over #40, the one-hole is superior, IMHO.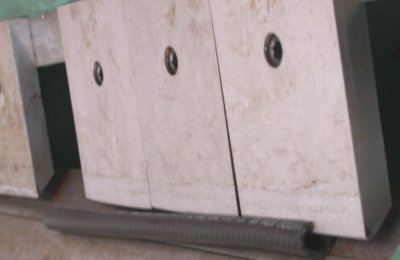 You can see
here, on the RT 3 pieces, where I ground a radius into the edge of 3 blocks
on my box brake. You can see how sharp the edge is on the 4th piece, on the
LT. I also then put a piece of split fuel line over the edge, so give me a
better radius. It's a bit cobby, but it does work.
You can see
here, on the RT 3 pieces, where I ground a radius into the edge of 3 blocks
on my box brake. You can see how sharp the edge is on the 4th piece, on the
LT. I also then put a piece of split fuel line over the edge, so give me a
better radius. It's a bit cobby, but it does work.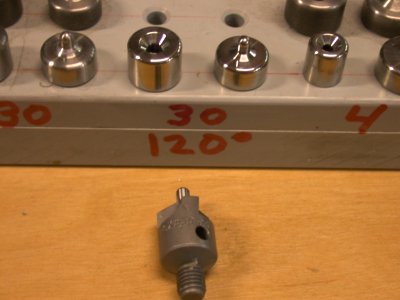
 These
aren't essential tools until you really need them. I needed them to help
put a curve into a very stiff piece of
These
aren't essential tools until you really need them. I needed them to help
put a curve into a very stiff piece of 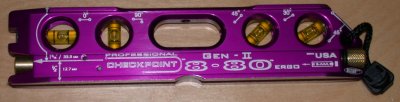 Here's another
non-essential, but very handy, tool I just got. It's a laser level, made
in USA by Checkpoint, aka PDP Precision Designed Products, in Harbor City,
CA. You can get a cheap laser level for as little as $10 from Harbor Freight,
but this is a very nice one.
Here's another
non-essential, but very handy, tool I just got. It's a laser level, made
in USA by Checkpoint, aka PDP Precision Designed Products, in Harbor City,
CA. You can get a cheap laser level for as little as $10 from Harbor Freight,
but this is a very nice one. Here's
a pic of a rivet protrusion gage I made from 3/8"
aluminum bar stock. One end shows how much should be protruding (before
riveting) for 3/32" rivets and the other end is for 1/8"
rivets. I just set up a chunk in my mill, milled the bottom smooth,
then raised the table 9/64" for one end and 3/16" for the other
end (1.5 times rivet diameter). The tool companies, like Avery, sell
tools like this.
Here's
a pic of a rivet protrusion gage I made from 3/8"
aluminum bar stock. One end shows how much should be protruding (before
riveting) for 3/32" rivets and the other end is for 1/8"
rivets. I just set up a chunk in my mill, milled the bottom smooth,
then raised the table 9/64" for one end and 3/16" for the other
end (1.5 times rivet diameter). The tool companies, like Avery, sell
tools like this.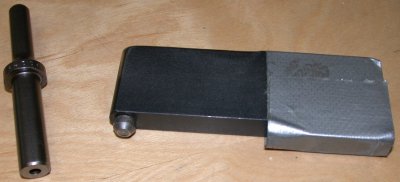 Here's
another tool I got awhile back, but didn't document yet. It's actually
made for putting dimple dies into the gun part and the bucking bar part, and
making dimples where you can't get access otherwise. Here, the bucking
bar part is set up to use for setting 470 rivets while I use a back rivet
tool in the gun. It was much easier to do it this way, for the baggage
compartment panel rivets I couldn't squeeze, than to use a regular cupped
set in the gun and a plain bucking bar, because I could only see one side at
a time of what I was working on. I taped some scrap aluminum pieces to
the other end so that, when they are sitting flat on the work, I can feel
the bucking bar is parallel with the work, without having to see it.
The pieces under the tape are also a bit wider than the bar itself, so that
helps stabilize the bar and keep it from rocking.
Here's
another tool I got awhile back, but didn't document yet. It's actually
made for putting dimple dies into the gun part and the bucking bar part, and
making dimples where you can't get access otherwise. Here, the bucking
bar part is set up to use for setting 470 rivets while I use a back rivet
tool in the gun. It was much easier to do it this way, for the baggage
compartment panel rivets I couldn't squeeze, than to use a regular cupped
set in the gun and a plain bucking bar, because I could only see one side at
a time of what I was working on. I taped some scrap aluminum pieces to
the other end so that, when they are sitting flat on the work, I can feel
the bucking bar is parallel with the work, without having to see it.
The pieces under the tape are also a bit wider than the bar itself, so that
helps stabilize the bar and keep it from rocking. 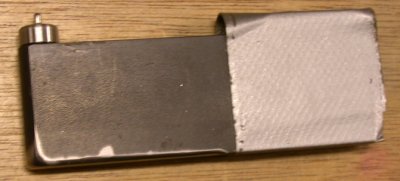 Here's
a pic of it as it was meant to be- with a dimple die in it.
Here's
a pic of it as it was meant to be- with a dimple die in it. 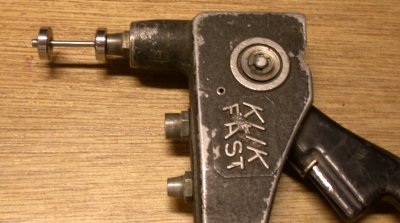 This
pop rivet gun dimpling tool,
from Avery, is
definitely the way to go when you have to dimple something you can't get in a
squeezer or C-frame, or on already-assembled pieces, like a QB. This will
squeeze the 2 dies together very uniformly. Trust me - I've tried, and
it's about impossible to hold a die straight enough to use the C-frame plunger
or other tool (like above) free-hand, without tipping it slightly enough to mar the
surface.
This
pop rivet gun dimpling tool,
from Avery, is
definitely the way to go when you have to dimple something you can't get in a
squeezer or C-frame, or on already-assembled pieces, like a QB. This will
squeeze the 2 dies together very uniformly. Trust me - I've tried, and
it's about impossible to hold a die straight enough to use the C-frame plunger
or other tool (like above) free-hand, without tipping it slightly enough to mar the
surface. 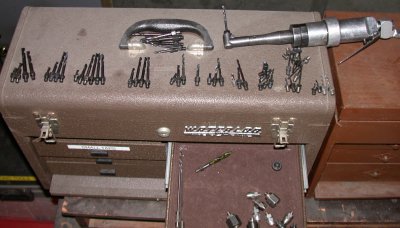 I
went through my drawer of threaded drill bits and sorted them out, so it
doesn't take 15 minutes every time I need to find a specific diameter and
length bit. I left 'em here, cuz I haven't yet figured out a good
mechanism to keep them stored sorted. I'd hate to imagine trying to
build this plane without the angle drill and a full assortment of all 3
lengths of each pertinent diameter drill; 40/41, 35, 30, 21, 20, 19, 16, 12,
3/16", 1/4". I now have these bits stored in one of those
blue Akro-Mil multi-box storage cabinets.
I
went through my drawer of threaded drill bits and sorted them out, so it
doesn't take 15 minutes every time I need to find a specific diameter and
length bit. I left 'em here, cuz I haven't yet figured out a good
mechanism to keep them stored sorted. I'd hate to imagine trying to
build this plane without the angle drill and a full assortment of all 3
lengths of each pertinent diameter drill; 40/41, 35, 30, 21, 20, 19, 16, 12,
3/16", 1/4". I now have these bits stored in one of those
blue Akro-Mil multi-box storage cabinets.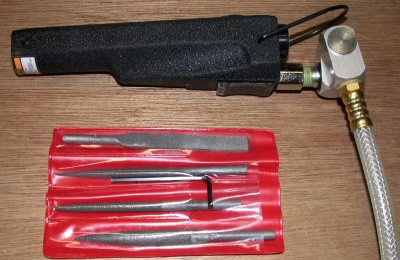 The air powered file is
pretty handy sometimes. I got it from MSC. It has an on/off control switch, like an electrical switch,
rather than an air throttle. I don't like that, but all the air
files I've seen come that way, for some odd reason.
The air powered file is
pretty handy sometimes. I got it from MSC. It has an on/off control switch, like an electrical switch,
rather than an air throttle. I don't like that, but all the air
files I've seen come that way, for some odd reason. A
narrow rivet set like this is essential for getting into tight spots. I
believe the set of these came from
A
narrow rivet set like this is essential for getting into tight spots. I
believe the set of these came from
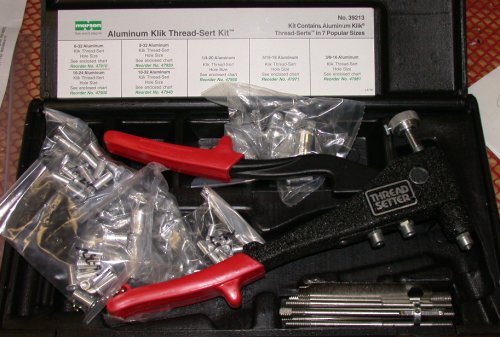 This is the kit for
installing rivnuts. Very handy, but do a practice run or 2 with it
first. It doesn't come with any instructions. I got this
from Aircraft Tool Supply. The head has 3 different sets of threads that
work in different directions, so you'll want to understand how it works before using
it for real. Be sure the threads in the tool head are fully into all the
threads in the rivnut before squeezing, or you'll rip them out. If you
squeeze, then readjust the head threads IN for more pull, be aware that you are
also screwing the threads OUT of the rivnut as you do this. My first practice
run tore out half the rivnut threads, because I only had half of them engaged.
This is the kit for
installing rivnuts. Very handy, but do a practice run or 2 with it
first. It doesn't come with any instructions. I got this
from Aircraft Tool Supply. The head has 3 different sets of threads that
work in different directions, so you'll want to understand how it works before using
it for real. Be sure the threads in the tool head are fully into all the
threads in the rivnut before squeezing, or you'll rip them out. If you
squeeze, then readjust the head threads IN for more pull, be aware that you are
also screwing the threads OUT of the rivnut as you do this. My first practice
run tore out half the rivnut threads, because I only had half of them engaged.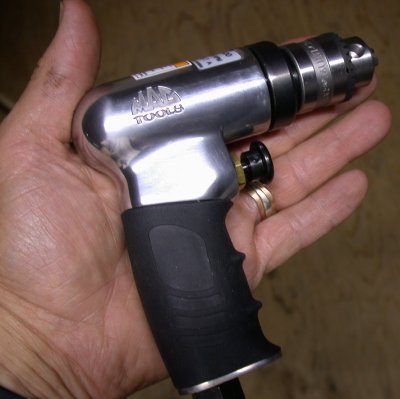 PALM DRILL - I got this nice little goodie from
Cleaveland. I liked the demo one they had at AirVenture 04 even
better than the Sioux. The one I got from them in the mail, however, had a rather
sticky trigger. I emailed Cleaveland about it, but they couldn't bother
responding. I had this poor responsiveness problem from them when I was
PALM DRILL - I got this nice little goodie from
Cleaveland. I liked the demo one they had at AirVenture 04 even
better than the Sioux. The one I got from them in the mail, however, had a rather
sticky trigger. I emailed Cleaveland about it, but they couldn't bother
responding. I had this poor responsiveness problem from them when I was
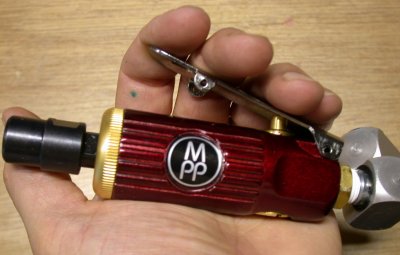 Here's a
cute little die grinder I picked up from one of the Fly Mart vendors at OSH04 for $8. It'll be nice for
getting into tight places. And I don't have very big hands, which
tells you how small this thing is.
Here's a
cute little die grinder I picked up from one of the Fly Mart vendors at OSH04 for $8. It'll be nice for
getting into tight places. And I don't have very big hands, which
tells you how small this thing is.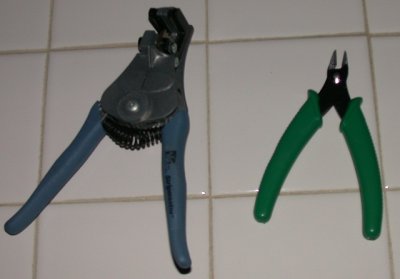
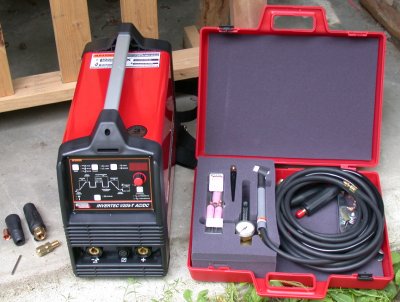
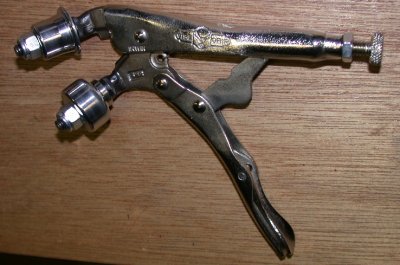 I got this
edge forming tool from Cleaveland at OSH04, too. It works very well. I like the design
better than the round one Avery has. For example, I could not have done
I got this
edge forming tool from Cleaveland at OSH04, too. It works very well. I like the design
better than the round one Avery has. For example, I could not have done 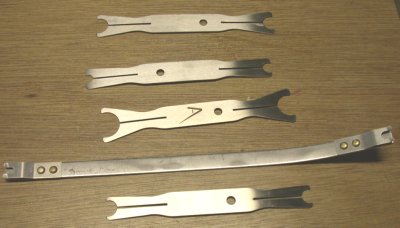 WASHER
HOLDER SET - got this set from Avery at OSH04 - VERY
handy for inserting all those spacing washers. The long piece is for
holding a nut. VERY handy tools; I've used them several times already, and
could have used them a lot before. They DO make it much easier to insert
those spacer washers that Van's has us putting in all over. And yes, I DID
do more at OSH04 than just buy tools! ;-)
WASHER
HOLDER SET - got this set from Avery at OSH04 - VERY
handy for inserting all those spacing washers. The long piece is for
holding a nut. VERY handy tools; I've used them several times already, and
could have used them a lot before. They DO make it much easier to insert
those spacer washers that Van's has us putting in all over. And yes, I DID
do more at OSH04 than just buy tools! ;-)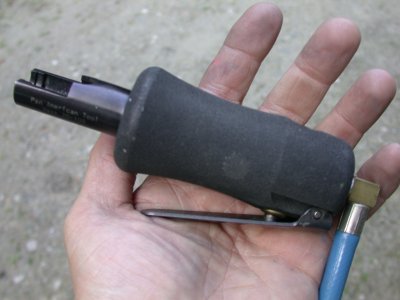 Jeff, from the RV list, offered this used air cleco tool up for sale, so I
grabbed it. I had been thinking of getting one. I have carpal tunnel
problems in my hands, presumably from spending so much time on my laptop.
Some things, like clecoing, aggravate the problem. It's especially useful while
I'm currently working on the canopy frame, where there are about a hundred
clecoes involved in the 2 skins, and they have to come on and off at least a
hundred times.
Jeff, from the RV list, offered this used air cleco tool up for sale, so I
grabbed it. I had been thinking of getting one. I have carpal tunnel
problems in my hands, presumably from spending so much time on my laptop.
Some things, like clecoing, aggravate the problem. It's especially useful while
I'm currently working on the canopy frame, where there are about a hundred
clecoes involved in the 2 skins, and they have to come on and off at least a
hundred times.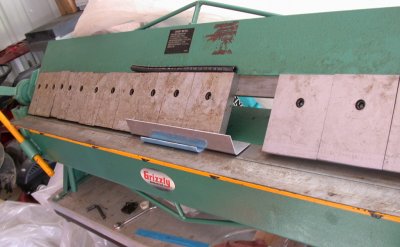 Sometimes you get a real simple thing that makes a big difference. You may
have read earlier about me having to grind the radius of the brake fingers, as
shown in the foreground, and put a split fuel line over the edge of the fingers,
in order to get a bigger radius. Well, duh, my A&P friend Jim told me
about just using a piece of angle as the guide. So simple and so
effective! I used it with great success here, building the new
Sometimes you get a real simple thing that makes a big difference. You may
have read earlier about me having to grind the radius of the brake fingers, as
shown in the foreground, and put a split fuel line over the edge of the fingers,
in order to get a bigger radius. Well, duh, my A&P friend Jim told me
about just using a piece of angle as the guide. So simple and so
effective! I used it with great success here, building the new 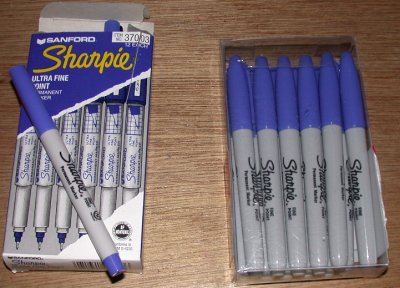 I forgot to tell you
about Sharpies earlier. Don't get the onesies & twosies from the tool
places. Go to Staples or similar and get a whole box. It's much cheaper
that way, and you WILL use them. I have read that blue seems to last
longer, for some unknown reason, and that is what I have found, too. It
also shows up better than other colors. Get 1
or 2 of other common colors (Staples sells a mixed color pack), in both fine and
ultra-fine, but get a whole box each of the blue ones.
I forgot to tell you
about Sharpies earlier. Don't get the onesies & twosies from the tool
places. Go to Staples or similar and get a whole box. It's much cheaper
that way, and you WILL use them. I have read that blue seems to last
longer, for some unknown reason, and that is what I have found, too. It
also shows up better than other colors. Get 1
or 2 of other common colors (Staples sells a mixed color pack), in both fine and
ultra-fine, but get a whole box each of the blue ones.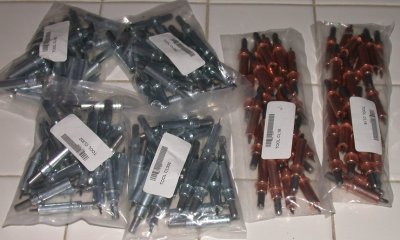
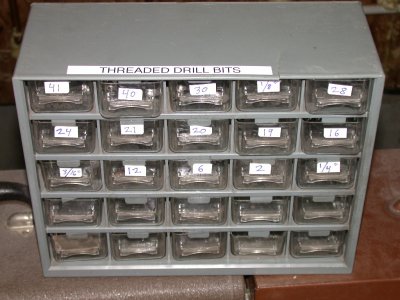 Storing all those threaded drill bits in something like this sure makes it a lot
easier to quickly find the right diameter and length.
Storing all those threaded drill bits in something like this sure makes it a lot
easier to quickly find the right diameter and length.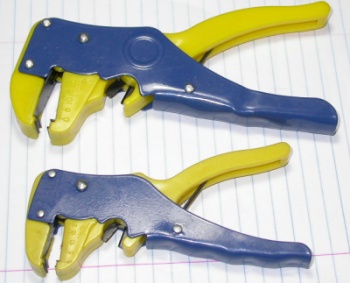 PLEASE
do yourself a favor, and don't buy these pieces of crap the hustlers sell at
Oshkosh and other air shows. I checked them out carefully before buying,
making sure they didn't nick the wires. But the sleazy hucksters selling
this crap must use specific wire for their demos. As soon as I got these
home and used them on my own actual wires, they either nick the wire, sometimes
badly, or they don't remove the insulation. Sheer crap. I really
should have known better.
PLEASE
do yourself a favor, and don't buy these pieces of crap the hustlers sell at
Oshkosh and other air shows. I checked them out carefully before buying,
making sure they didn't nick the wires. But the sleazy hucksters selling
this crap must use specific wire for their demos. As soon as I got these
home and used them on my own actual wires, they either nick the wire, sometimes
badly, or they don't remove the insulation. Sheer crap. I really
should have known better. THESE
are the kind of wire strippers you want. They are sold by SteinAir, B&C,
and other reputable sellers. One does larger wires and one does smaller
wires.
THESE
are the kind of wire strippers you want. They are sold by SteinAir, B&C,
and other reputable sellers. One does larger wires and one does smaller
wires.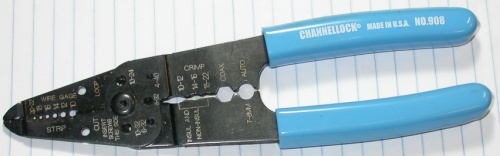 These are also good strippers, just not quite as good as the ones above.
However, they do seem to strip teflon mil-spec wire better than the ones above.
These are also good strippers, just not quite as good as the ones above.
However, they do seem to strip teflon mil-spec wire better than the ones above.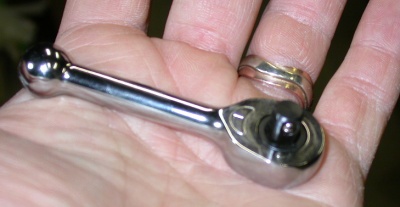 I got this mini ratchet from
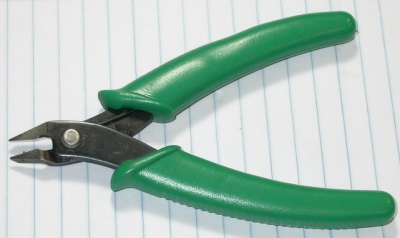 For wiring, and for cutting tiewraps nice and flush, you need some good flush
cutters. Don't screw them up by trying to cut heavy things with them,
though. They're meant for more delicate work. If you've got
some house wiring or safety wire to cut, don't use these.
For wiring, and for cutting tiewraps nice and flush, you need some good flush
cutters. Don't screw them up by trying to cut heavy things with them,
though. They're meant for more delicate work. If you've got
some house wiring or safety wire to cut, don't use these.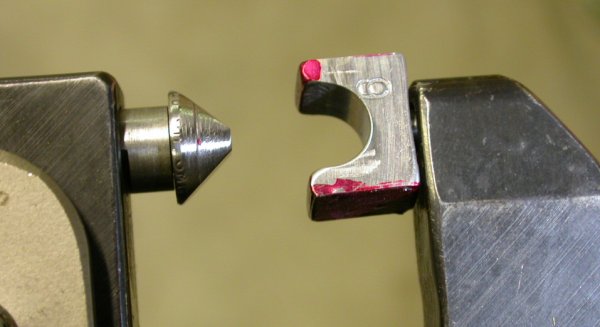 Here
is one of the electric lug crimping dies I made to go in my Avery rivet squeezer. This one is for
6AWG. I also made one for 8AWG. The male half on the LT is made by simply grinding down a
squeezer set at a 45 degree angle and leaving the end blunt. I made the female half on my mill. You could
probably do the same thing pretty easily on a drill press. Just match
the female die ID to the OD of the terminal lug, drill the appropriate sized
hole in a little block of steel, then cut the block in half and add a 3/16" pin on the base.
Polish & radius the female half for smooth inserting and removing.
See
Here
is one of the electric lug crimping dies I made to go in my Avery rivet squeezer. This one is for
6AWG. I also made one for 8AWG. The male half on the LT is made by simply grinding down a
squeezer set at a 45 degree angle and leaving the end blunt. I made the female half on my mill. You could
probably do the same thing pretty easily on a drill press. Just match
the female die ID to the OD of the terminal lug, drill the appropriate sized
hole in a little block of steel, then cut the block in half and add a 3/16" pin on the base.
Polish & radius the female half for smooth inserting and removing.
See 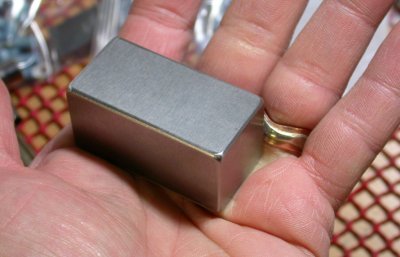 DEC, '06 - This is a new bucking bar I got from
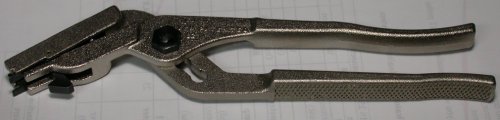 Adel clamp pliers from
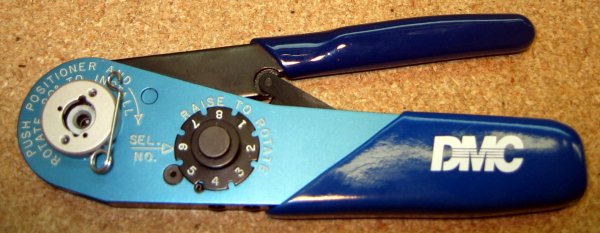 This is
the crimper used by professionals. You change out the positioner for
different types of pins and sockets. If you're doing Garmin wiring,
it's essential, as a regular 4-jaw crimper will not work properly on the
mini-pins & sockets the Garmin High Density DB connectors use.
This is
the crimper used by professionals. You change out the positioner for
different types of pins and sockets. If you're doing Garmin wiring,
it's essential, as a regular 4-jaw crimper will not work properly on the
mini-pins & sockets the Garmin High Density DB connectors use.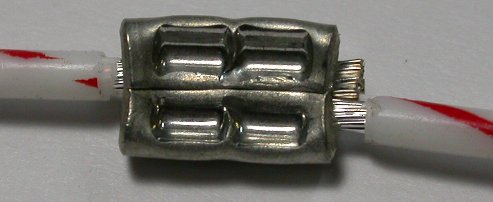 This is the great quality crimp I get on the parallel splice connectors with
the new AMP 69324 crimper. Cover this with dual wall heatshrink and
you've got a bulletproof splice. The AMP crimper should also work well
for the usual PIDG terminals, although I already have a couple good crimpers
for that.
This is the great quality crimp I get on the parallel splice connectors with
the new AMP 69324 crimper. Cover this with dual wall heatshrink and
you've got a bulletproof splice. The AMP crimper should also work well
for the usual PIDG terminals, although I already have a couple good crimpers
for that.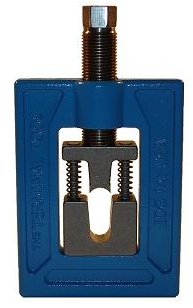 This is The Terminal Tool. It comes with different dies that go into the
blue frame. It looks like a good tool, although I would personally like to
see it include an 8ga die (it comes with dies for 6ga and larger wires).
Most "standard" crimpers crimp up to 10ga, so 8 ga needs a special
crimper, too. The manufacturer had some excuse for not including an 8 ga
die. If/when the manufacturer follows my suggestion to include 8 ga, I
will buy one.
This is The Terminal Tool. It comes with different dies that go into the
blue frame. It looks like a good tool, although I would personally like to
see it include an 8ga die (it comes with dies for 6ga and larger wires).
Most "standard" crimpers crimp up to 10ga, so 8 ga needs a special
crimper, too. The manufacturer had some excuse for not including an 8 ga
die. If/when the manufacturer follows my suggestion to include 8 ga, I
will buy one. 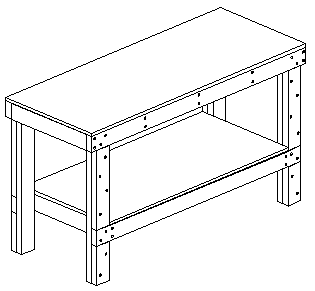
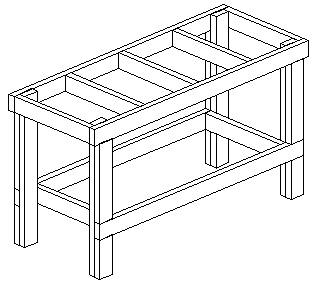 In addition to
good tools, you also need good workbenches. See
In addition to
good tools, you also need good workbenches. See
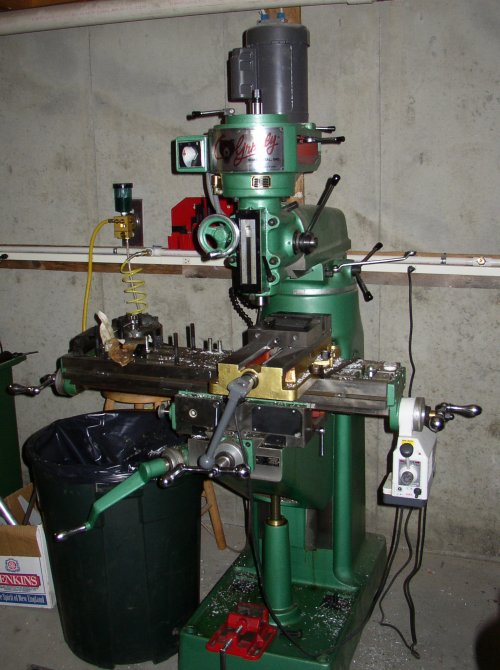