 Here's the F-712 A&B aft fuselage bulkhead, clecoed and ready for
rivets.
Here's the F-712 A&B aft fuselage bulkhead, clecoed and ready for
rivets.August, 2003 fuselage work
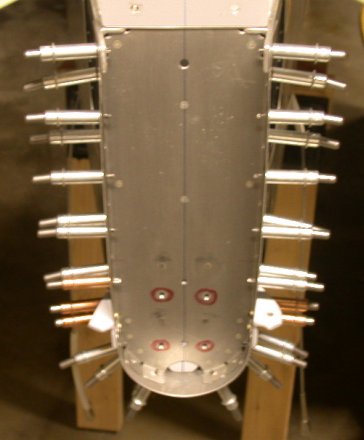
Aug 12 - Talk to Van's about the double row of rivets at the aft fuseleage 712 A & B rear bulkhead. Tom said they're just left out of the QB for taildragger guys, so I can go ahead and rivet them up with the rudder stops. Removed rudder and V-stab so I could install F-712A/B rivets. Squeezed rudder stop aft F-712B rivets. Holes seemed a bit large for -3 rivets, but too small for -4, and plans say to use -3.
Here's the F-712 A&B aft fuselage bulkhead, clecoed and ready for
rivets.
Aug 13 - Started bucking rivets for F-712A fwd row of rivets at rear fuselage bulkhead. This job turned out to be an absolute son of a bitch! Trying to buck rivets with the gun in one hand and the bucking bar in the other is difficult, at best. The gun easily walks off the rivet head, and it was hard to get the bucking bar in place and keep it there. Also, the F-712A holes were slightly large and lined up poorly with the skin. I made one shitty rivet after another. Some I drilled out 2 or 3 times. I ended up getting most of them in, but the quality was not great. The ones on the bottom, on the curved surface of the bottom of the fuselage, were impossible. Because these holes in the QB kit came a bit oversize, if I use a rivet that's only a little bit too long, the rivets squeezes up to fill the hole, and I am left with no shop head. If it go a bit longer, it bends over. I need to drill out the holes, and use "oops" rivets, with a 1/8" shank and 3/32" head, and get someone to help me with these, or else go to CR3212 Cherrymax rivets. 3.0 hr
Aug 21 - Receive and inventory UPS order from Van's; baggage tiedowns, crotch strap kit, aileron trim kit, wiring kit, flap control kit, hardware. Then FedEx came with another order; more hardware and Finishing Kit videos. Organize and put away all new hardware. Rivet rudder stops with CR3212-4-6 Cherrymax rivets. Finishing the elevator control rod is on hold until I get a new piece of tubing. Clean up workbench. Lengthen wires to elevator trim servo, and put snap bushings into H-stab for elevator trim wiring. Watch Finishing Kit videos. 6.5 hr
 These
CR3212 Cherry Max rivets (on the left) sit in the countersink holes very
well, and the rivets are very strong. Of course, they also cost $1.10
EACH, compared to a nickel each for CS4-4 pop rivets and a small fraction of
a penny for solid rivets, but it's worth it here.
These
CR3212 Cherry Max rivets (on the left) sit in the countersink holes very
well, and the rivets are very strong. Of course, they also cost $1.10
EACH, compared to a nickel each for CS4-4 pop rivets and a small fraction of
a penny for solid rivets, but it's worth it here.
Aug 22 - Decided to wait on finishing elevator trim final adjustments to get some better wire. The leads that come with the Ray Allen products are too short to be very useful. Ordered 40' of Ray Allen's wire for the servos. Removed and replaced AN3-12A landing gear weldment bolts with AN3-13A, for proper number of threads showing. Van's had said they used to use -13, then switched to -12 so people could get their hands into the spar easier. They said the -12s would be fine, but IMHO, the -12s are just not the proper length. There are no threads at all showing outside the nut when using the -12 bolts. There is no way to torque the nuts on these, so I just snugged them up as evenly as I could. Start working on Aileron Trim Kit. Fabricated F-7123 pivot block, and installed F-6124 trim servo bracket. Primed bracket, trimmed WD-756 trim arm weldment. Dimpled and reprimed the bracket, and countersunk the block for the bracket dimple. Riveted nutplate to F-6124 and mounted the block and arm to the F-6124 bracket. Set up servo. 7.0 hr
 Here are the AN3-12A bolts called for in the plans to hold the gear weldment
to the spar; no threads showing past the locknut.
Here are the AN3-12A bolts called for in the plans to hold the gear weldment
to the spar; no threads showing past the locknut.
 I
removed the -12 bolts, and put in AN3-13A bolts; much better.
I
removed the -12 bolts, and put in AN3-13A bolts; much better.
 Mounting the aileron trim block to the bracket.
 It was
quite difficult to get a good picture of this; it took about 20 tries.
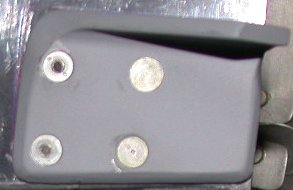
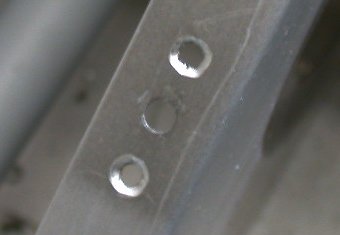
Part of the procedure for installing the aileron trim bracket & servo
was to remove 2 nutplates in the floor ribs. These were installed as
part of the Quick Build Kit. As you can see, the quality here is
rather poor. First, the thin sheet metal was countersunk, instead of
being properly dimpled. Second, it looks like they used a deburring
tool to do the countersinking, so the holes are enlarged, and the
countersinks themselves are quite sloppy and oblong. I sent Van's an
email about it.
It was
quite difficult to get a good picture of this; it took about 20 tries.
Part of the procedure for installing the aileron trim bracket & servo
was to remove 2 nutplates in the floor ribs. These were installed as
part of the Quick Build Kit. As you can see, the quality here is
rather poor. First, the thin sheet metal was countersunk, instead of
being properly dimpled. Second, it looks like they used a deburring
tool to do the countersinking, so the holes are enlarged, and the
countersinks themselves are quite sloppy and oblong. I sent Van's an
email about it.
 Clecoing the nutplates to the aileron trim bracket.
 This is the aileron trim bracket, dimpled and ready for primer.
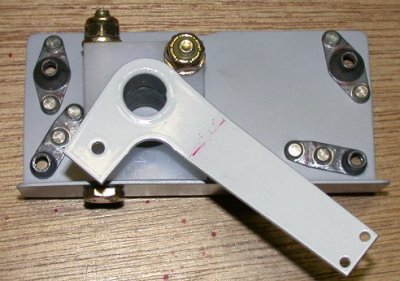 Here is the aileron trim bracket, primed and with all the nutplates and the
control arm installed.
Here is the aileron trim bracket, primed and with all the nutplates and the
control arm installed.
Aug 23 - Assemble aileron trim servo/block/arm/bracket, and mount servo. Attach servo C-606 arms. Change C-606 arm mount bolts from AN3-10A to AN3-11A for proper thread length showing through locknut. Took elevator fwd control rod out to facilitate getting the servo in. Had a hard time getting the washers back in to reinstall the elevator control rod. Ended up having to super-glue the washers in place, because the servo now restricts access for my hands to get at the heim rod end to install the washers. Adjusted C-606 arms and ground clearance in floor rib for the control arm. Adjust aileron trim springs and grind floor ribs for spring clearance. 7.0 hr
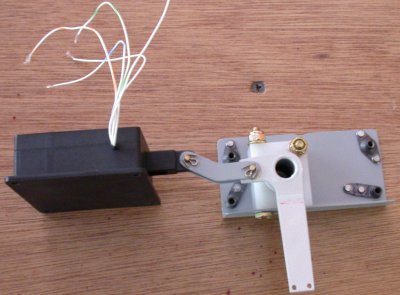 Aileron trim bracket, with servo attached, ready to install.
 Aileron
trim bracket bolted in place and servo clecoed.
Aileron
trim bracket bolted in place and servo clecoed.
 Aileron trim installed.
 After installing the aileron trim and getting the springs adjusted right, I
had to cut away part of the inside of the floor rib, to clear the spring.
After installing the aileron trim and getting the springs adjusted right, I
had to cut away part of the inside of the floor rib, to clear the spring.
Aug 24 - Karla and I made a valiant attempt to buck the rivets for the aft fuselage bulkhead. It was a disaster. I'd drilled the holes out to 1/8" and was using "oops" rivets, because part of the original problem was that the original holes were a bit oversized for 3/32". It was extremely difficult to do the riveting. Because the skin was a quite convex surface, the gun didn't want to stay on the head, and it was very hard to see that the gun & set were squarely on the rivet head. The one just below the rudder stop on each side was the worst one, because I couldn't even see the other side of the rivet on the inside of the fuselage. I tried the RT side running the gun and buck myself, with Karla holding the set in place. My hand slipped off the buck, and the gun hammered the skin up. We tried it on the LT side, with Karla running the gun. Holding the buck was quite awkward, with no visibility and gave me a poor grip on the buck, so the buck bounced off the rivet again, and the gun really hammered up the LT side skin. After that, I said screw it, and decided to redimple the holes for a 1/8" head, and use CR3212 pop rivets there. Made final clearance check on aileron trim, then started on RT crotch strap kit. Watched Finish Kit videos for a couple hours. 7.5 hr
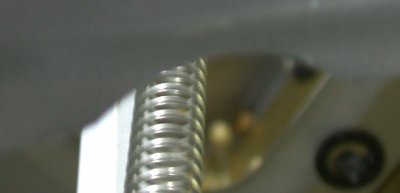
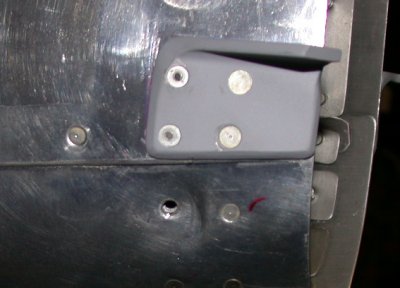 This
shows how the aft fuse skin got hammered when my buck slipped off the
rivet. Access to this rivet is difficult; that's why the plans call
for the 2 rivets above it, holding the rudder stop on, to be pop
rivets. This damage really ticked me off, but there's nothing I can do
about it now. Well, I guess it's one less incentive to go with a
polished skin. If I paint it, it can easily cover up the dent with
epoxy filler. I will enlarge the dimple and use a CR3212 Cherry Max
rivet here, when my order for the right length Cherry Max rivets arrives..
This
shows how the aft fuse skin got hammered when my buck slipped off the
rivet. Access to this rivet is difficult; that's why the plans call
for the 2 rivets above it, holding the rudder stop on, to be pop
rivets. This damage really ticked me off, but there's nothing I can do
about it now. Well, I guess it's one less incentive to go with a
polished skin. If I paint it, it can easily cover up the dent with
epoxy filler. I will enlarge the dimple and use a CR3212 Cherry Max
rivet here, when my order for the right length Cherry Max rivets arrives..
Aug 25 - Lay out RT crotch strap kit. Spent several hours talking to my avionics panel builder, studying avionics choices, and studying the Eggenfellner electric plans & instructions. See Avionics page. 2.0 hr
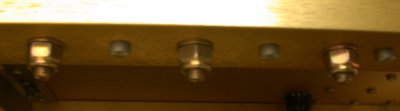
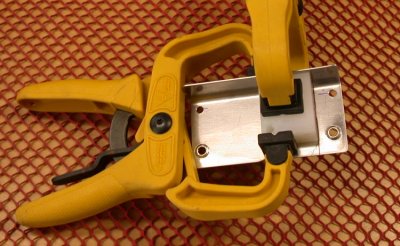
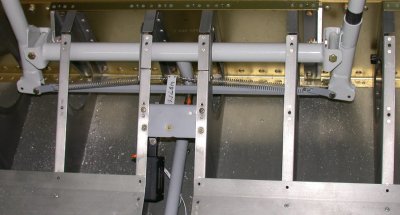
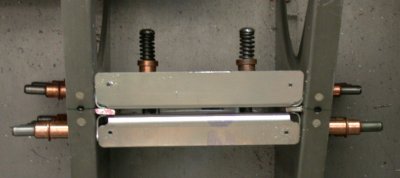
 Here is the RT crotch strap mount kit, clamped and clecoed into place.
The aluminum bar is there to ensure the proper 1/8" spacing between the
fwd bracket and the aft bracket.
Here is the RT crotch strap mount kit, clamped and clecoed into place.
The aluminum bar is there to ensure the proper 1/8" spacing between the
fwd bracket and the aft bracket.
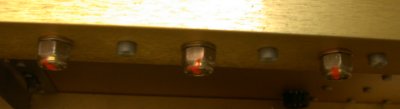
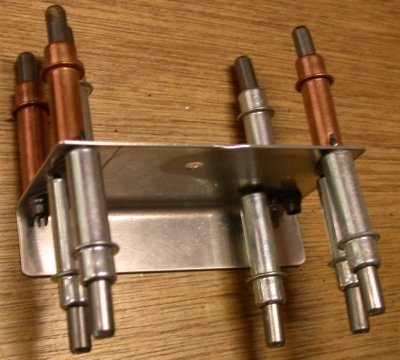
 Here is one of the crotch strap mounts, fully clecoed and drilled, with the
tops also drilled for the floor panel. Again, pieces of 1/8" bar
and the cleco clamps ensure that the fwd bracket is a tight 1/8" fwd of
the rear bracket. The rivets on the fwd bracket do not go all the way
to the top, for some unknown reason, so this keeps the fwd bracket from
moving forward while the floor mount holes get match-drilled. These
holes will be enlarged, and nutplates installed there.
Here is one of the crotch strap mounts, fully clecoed and drilled, with the
tops also drilled for the floor panel. Again, pieces of 1/8" bar
and the cleco clamps ensure that the fwd bracket is a tight 1/8" fwd of
the rear bracket. The rivets on the fwd bracket do not go all the way
to the top, for some unknown reason, so this keeps the fwd bracket from
moving forward while the floor mount holes get match-drilled. These
holes will be enlarged, and nutplates installed there.
Aug 26 - Lay out LT crotch strap kit. Spent lots of time on Avionics. Finish crotch strap mounts, prep and prime. 5.5 hr
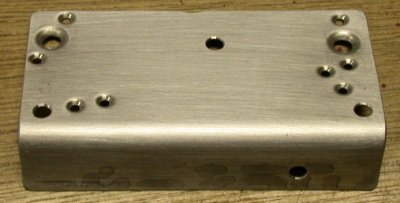
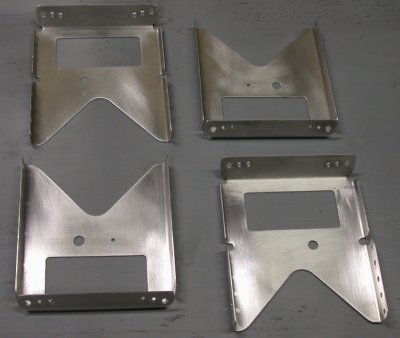 These are the 4 plates making up the crotch strap mount kit, ready for
primer.
These are the 4 plates making up the crotch strap mount kit, ready for
primer.
Aug 27 - Rivet nutplates to F-7117 crotch strap plates. Rivet plates to ribs. Try out new speckle paint for Interior. 5.0 hr
GO TO SEPTEMBER
BACK TO MY RV BUILDER'S HOME
BACK TO BRIAN'S HOME