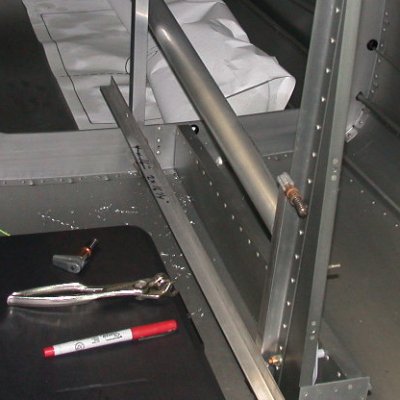
 Laying
out the aluminum angle for the custom baggage area.
Laying
out the aluminum angle for the custom baggage area.September, 2003 fuselage work
Sep 1 - Finish aft bulkhead rivets, using a combination of "oops" rivets and CR3212 Cherrymax rivets. Drilled out several rivets that had been done, and redid them until I was satisfied with the quality. Cleaned up tools and thought about what to do for my next step. Decided to start planning and laying out my custom baggage compartment, so it will hold a rifle case. Worked on custom baggage compartment layout. 6.25 hr
TO SEE A SUMMARY OF ALL THE STEPS I TOOK TO MAKE THE CUSTOM BAGGAGE COMPARTMENT, SEE MY CUSTOM BAGGAGE COMPARTMENT PAGE OR ALL CUSTOMIZATIONS ON MY CUSTOM PAGE.
Sep 5 - Receive flap control kit and new 1.5" tubing to build F-790 aft elevator pushrod. 1.0 hr
Sep 6 - Continue work on custom baggage area; cut, fit, cleco, drill inboard frame. Plan design for outboard part of custom baggage area. Decided to just use a simple piece of tubing over the rudder cable. Ordered tubing and sheet metal for custom baggage area from Aircraft Spruce. Build, finish, and prime F-790 aft elevator pushrod. See empennage for more details on installing that. 8.75 hr
Laying
out the aluminum angle for the custom baggage area.
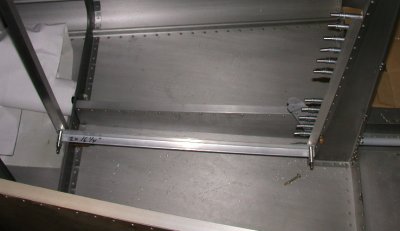 Here is
the inboard frame, clecoed into place.
Here is
the inboard frame, clecoed into place.
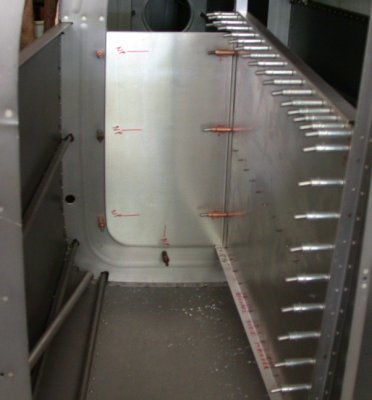
Sep 12 - Receive and put away Aircraft Spruce order for custom baggage area parts. Remove rudder cable yet AGAIN and lay out rudder cable protection tube for custom baggage area. Lay out inboard custom baggage area wall. 2.0 hr + 2.0 doc
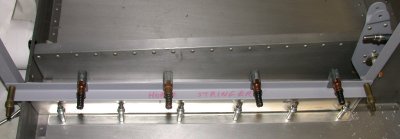
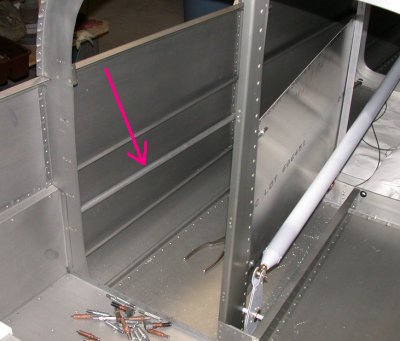 The arrow shows the tubing that goes from one rudder cable hole to the next,
to protect the rudder cable from anything in the baggage area. I was
going to put in a more complicated wall, but then decided this simple tubing
would do the job. After considering various ways of securing the
tubing, I decided a simple and effective way will be to just clamp it in
place with Adel clamps fastened to the bulkhead with small pieces of angle.
The arrow shows the tubing that goes from one rudder cable hole to the next,
to protect the rudder cable from anything in the baggage area. I was
going to put in a more complicated wall, but then decided this simple tubing
would do the job. After considering various ways of securing the
tubing, I decided a simple and effective way will be to just clamp it in
place with Adel clamps fastened to the bulkhead with small pieces of angle.
 Laying out the inboard baggage area wall. It is 0.032" 6061T4,
and will be stiffened with stiffeners made from the same material.
Laying out the inboard baggage area wall. It is 0.032" 6061T4,
and will be stiffened with stiffeners made from the same material.
Sep 19 - Resumed layout, drill, cleco of custom baggage area inboard skin. Phil Cobbin, EAA 740 member who's ordered his RV tail, came by to look at my project. He looked at the custom baggage area & thought I should add a rear panel, just in case anything got loose when I had that area open. Also worked on rebuilding my alligator pneumatic squeezer and packing up my front gear leg to ship to Van's. The engine mount I returned is match drilled to that particular leg. So I ordered a new undrilled leg and a couple more things I need from Van's. Worked on making aft baggage area panel. 5.5 hr
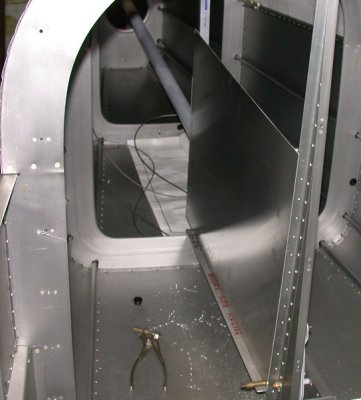
 Here's the baggage area, with the inboard panel clecoed into place.
 Here's the
rear baggage panel clecoed in place. It will be held in by 7 screws,
as indicated by the "NP" (nutplate) markings, and where the 7
copper clecoes are.
Here's the
rear baggage panel clecoed in place. It will be held in by 7 screws,
as indicated by the "NP" (nutplate) markings, and where the 7
copper clecoes are.
Sep 20 - Worked on custom baggage area aft panel. Finished rebuilding alligator squeezer. Installed nutplates on baggage panels. Dismantled, cleaned, primed baggage area panels and frame. Removed and packed Van's fuel valve to ship back to them, as I will be using the 6-way Andair valve that comes with the Eggenfellner engine kit. 6.0 hr
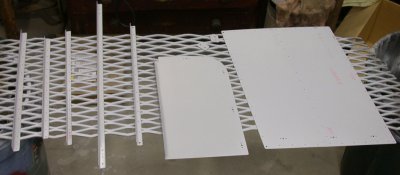 Here are
the custom baggage compartment parts primed.
Here are
the custom baggage compartment parts primed.
Sep 21 - Rivet nutplates onto baggage panels. I made the rear panel removable, in case I need a little extra length or access to the rear fuselage. I decided to take Phil's suggestion a step further, and laid out a lower panel to go between the fuselage bottom skin and the lower baggage area frame rail. All I had was the 0.032" 6061T4 I had used for the original inboard panel (and that was PLENTY thick and I probably could have gotten by with 0.025"), so I used it to make the rear panel and the lower panel. After I made the panels, it bugged me a lot that I had used thicker aluminum sheet than I really needed to. I calculated that I wasted about 8 ounces by doing them in 0.032". The rear panel could have been 0.025, possibly even 0.020, and the lower panel could have been 0.020" or possibly even 0.016". The lower panel doesn't do anything, except block any loose floating objects from getting to the elevator bellcrank. Unfortunately, I did a great job when I made the panels (they came out very well and fit quite snugly), so I was loathe to redo them in thinner metal. Oh well - I did order some 2024T3 in 0.032, 0.025, and 0.020 from Aircraft Spruce, so maybe I'll redo them later. I ordered more sheet metal, in 2024T3 this time, because I realized that the part of the fuselage where I now have access to the custom baggage area (and especially the removable rear panel) will be covered up with fuselage skin and the rear of the tipup canopy later, so I decided to make an access panel in the side of the fuselage. I also decided to make one on the other side, for the same reasons, so that I will be able to access my autopilot elevator servo after the fuselage is completed. Laid out where fuselage access panel will go. 5.0 hr
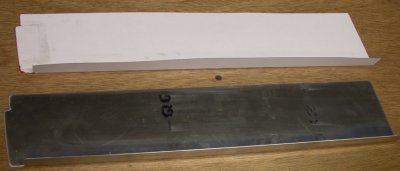 Layout & pattern for the lower panel.
 And here it is clecoed into place under the inboard panel.
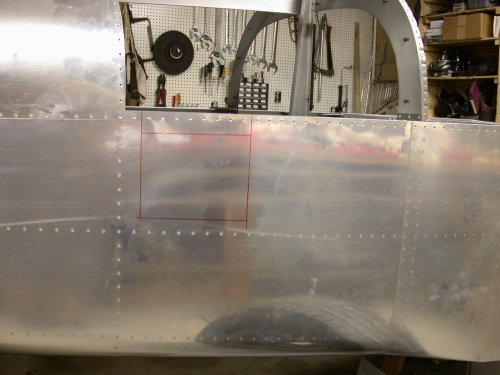 This is the planned place for the baggage access panel cutout. I'll
make a longer one on the other side for access to the autopilot servo.
This is the planned place for the baggage access panel cutout. I'll
make a longer one on the other side for access to the autopilot servo.
Sep 22 - Clean up workbench some. Drill and cleco lower baggage panel in place. Dimple bottom fuselage skin for lower panel. Still considering redoing lower panel in a much lighter gage metal. 2.5 hr
Sep 23 - Work on air compressor/distribution system. Added a gage to the tanks, and added a real pressure regulator. After my bad experiences bucking rivets on the aft fuselage, I've been getting nervous about upcoming rivet bucking jobs, and decided to make the system better. A real regulator with a diaphram is much better than the kind I've been using, which isn't even a real regulator - all those little things that go in the air line (even the good one I have) are really just flow restrictors. So, between bursts, they have time to fill up to full tank pressure. When you first squeeze the gun, you get a more powerful burst than you'd planned for. I noticed this by playing with the rivet guns today. Now, I'll have true pressure regulation. I also ordered a new Sioux 2x gun from Avery to make it as easy as possible for Karla to run the gun. My second-hand guns don't have what I would call real great triggers, even though the 3x is an older Sioux. I also finished fully cleaning up the workbench. 5.5 hr + 2.5 doc
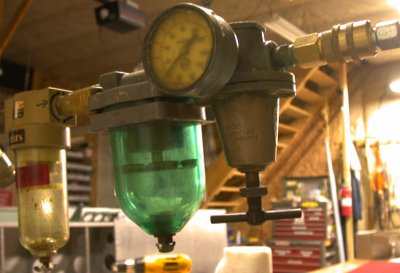 I now have a
real Schrader diaphram-type regulator in the compressed air supply
system.
I now have a
real Schrader diaphram-type regulator in the compressed air supply
system.
Sep 26 - Trying to decide what to work on next. UPS order from Avery came, so I set up and tested the new Sioux 2x gun. It doesn't seem a whole lot better than my 2x Chicago Pneumatic. I am not real thrilled about the trigger control on either one. My old AF 6x gun has by far the best trigger, but it's kinda big and Karla didn't like it as well. Wrote up list of plumbing parts to order from Aircraft Spruce for the Eggenfellner fuel return plumbing, and some Pro Seal and other stuff from Van's. The Pro Seal at Van's is MUCH cheaper than at ACS. 1.5 hr
Sep 27 - Still trying to decide what to work on next. Most of the things I want to do next are on hold, waiting for parts orders from Van's and ACS. Karla stopped by, so we dug out my old EAA SportAir sheet metal workshop project, and practiced riveting with the new Sioux 2x gun. She got more used to running the gun by the time we were done. I need her to be up to speed on running the gun, for upcoming jobs on the plane. 5.0 hr
Sep 28 - Finally decided to work on putting in the landing light lenses. See WINGS page
Go to October
BACK TO MY RV BUILDER'S HOME
BACK TO BRIAN'S HOME