Oct 3 - Night-time temps have been getting down into
the mid-20s, so I was suddenly struck with the need to do about a million
things to prep for winter. All my race bikes, other motorcycles,
tractors, mowers, generators, compressors, splitter, etc; everything with an
engine, and the house all need things done to get ready for the horrible 6
months of winter to about to descend upon us. Also, my wind generator
was having problems, so I had to get that taken down, and I spent an entire
weekend working on the wind gen blades. I also had to replace the fuel
pump on my plow truck. With all the pumps and accessories
mounted on that engine, I knew it would be a difficult job, even though it's
only 2 bolts and 2 rubber fuel lines to attach. Working on
that nasty, filthy, greasy thing, laying in its puddle of grease, oil, and antifreeze, with crud falling and dripping down onto my face, sure made me
appreciate working on my nice, clean plane.
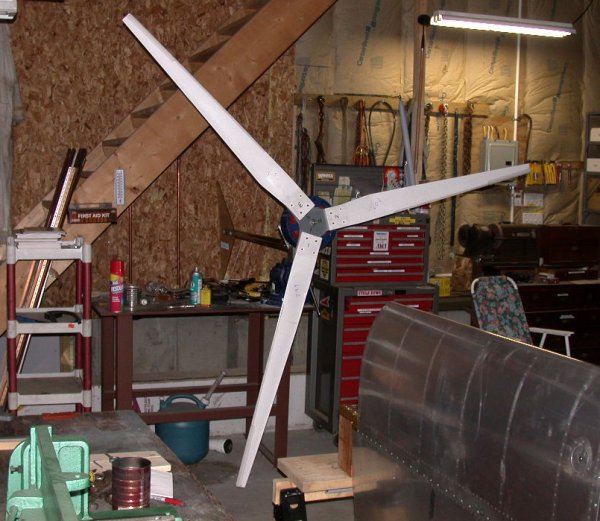
Wind generator set
up in my shop to fix the blades. They were out of balance in every
way; balance point off by a little, weight off by 2.2 oz, tracking off by
3/4", incidence off by a couple degrees. After lots of trial and
error, and shimming, got them trued up pretty good. The wind gen has
been plagued with balance/vibration problems for several years. I got
it "professionally" balanced a couple times, but obviously they
didn't put any care into it. With what I've learned about props from
building the plane, I was able to do a MUCH better job by myself. No
more vibration problems!
Oct 10 - Finally got a chance to get back to the
plane. I received my dual brake kit last week, so I started working on
that. I had originally ordered the QB kit with the dual brakes, then I
decided to cancel them to save weight. Then I decided that I should
get them for the unlikely chance they might be used, especially in a plane
that uses brake steering. Filed, deburred, clecoed, drilled, cleaned
& primed all the brake pedal parts. Removed brake/rudder pedal
weldment from fuselage. It comes out rather easily if you do it just
right, but it took me a while to figure out what was the "just
right" sequence of moves. 4.0 hr
RT side
brake pedals deburred and clecoed.
Oct 11 - Countersunk one set of holes I'd missed on
the RT brake pedal parts. Finished priming parts. Took a couple
hours off to do some shooting while the primer dried. Fired up a
couple hundred rounds of .223. Rebuilt air compressor line oiler.
Started clecoing brake parts to rivet. 1.5 hr
Priming the
back side of all the brake pedal pieces.
Oct 12 - Rivet and mount RT brake pedal parts.
Reinstall brake/rudder pedal assembly. Plumb in brake line tubing and
hoses. Decided that the plastic tubing I had set up for the single
brake system (different routing) is just a bit too short for the dual brake
routing. Removed tubing. 3.0 hr
+ 3.0 doc
Here are
the brake pedals riveted together. I used 470 rivets on the pedal
faces, instead of the 426 called out in the plans. This was to match
the LT side, where I had initially used 470s inadvertently, then decided I like this
look better, anyway.
Here
are the RT side brake pedals mounted to the rudder pedal weldment.
And
here they're all reinstalled in the fuselage. I decided to redo the
plastic tubing from the LT side. With the new configuration, I thought
the plastic tubing was a few inches too short to run to the RT side. I need to lay
the lines out carefully, so
neither they nor the black brake hoses chafe on anything.
Oct 15 - Received Eggenfellner fuel valve and heater
kit
Oct 22 - Been working 7 days a week, so no work on
plane. Good to have income, though. Gotta take it when &
where I can get it.
 Wind generator set
up in my shop to fix the blades. They were out of balance in every
way; balance point off by a little, weight off by 2.2 oz, tracking off by
3/4", incidence off by a couple degrees. After lots of trial and
error, and shimming, got them trued up pretty good. The wind gen has
been plagued with balance/vibration problems for several years. I got
it "professionally" balanced a couple times, but obviously they
didn't put any care into it. With what I've learned about props from
building the plane, I was able to do a MUCH better job by myself. No
more vibration problems!
Wind generator set
up in my shop to fix the blades. They were out of balance in every
way; balance point off by a little, weight off by 2.2 oz, tracking off by
3/4", incidence off by a couple degrees. After lots of trial and
error, and shimming, got them trued up pretty good. The wind gen has
been plagued with balance/vibration problems for several years. I got
it "professionally" balanced a couple times, but obviously they
didn't put any care into it. With what I've learned about props from
building the plane, I was able to do a MUCH better job by myself. No
more vibration problems!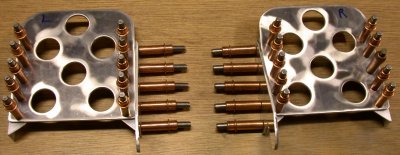 RT side
brake pedals deburred and clecoed.
RT side
brake pedals deburred and clecoed.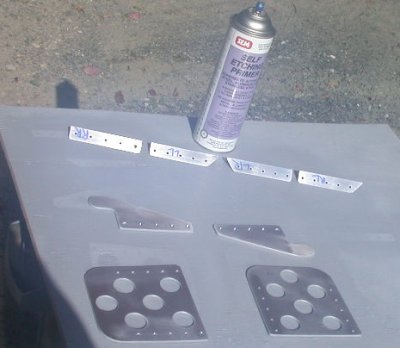 Priming the
back side of all the brake pedal pieces.
Priming the
back side of all the brake pedal pieces.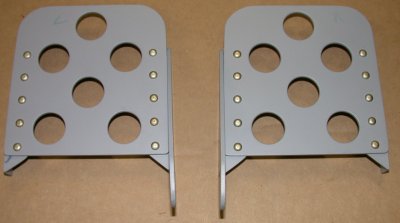 Here are
the brake pedals riveted together. I used 470 rivets on the pedal
faces, instead of the 426 called out in the plans. This was to match
the LT side, where I had initially used 470s inadvertently, then decided I like this
look better, anyway.
Here are
the brake pedals riveted together. I used 470 rivets on the pedal
faces, instead of the 426 called out in the plans. This was to match
the LT side, where I had initially used 470s inadvertently, then decided I like this
look better, anyway.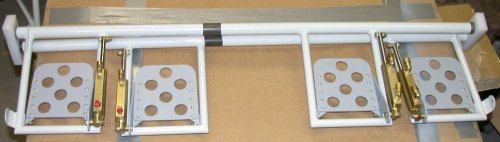 Here
are the RT side brake pedals mounted to the rudder pedal weldment.
Here
are the RT side brake pedals mounted to the rudder pedal weldment.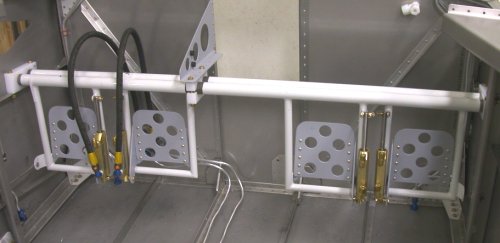 And
here they're all reinstalled in the fuselage. I decided to redo the
plastic tubing from the LT side. With the new configuration, I thought
the plastic tubing was a few inches too short to run to the RT side. I need to lay
the lines out carefully, so
neither they nor the black brake hoses chafe on anything.
And
here they're all reinstalled in the fuselage. I decided to redo the
plastic tubing from the LT side. With the new configuration, I thought
the plastic tubing was a few inches too short to run to the RT side. I need to lay
the lines out carefully, so
neither they nor the black brake hoses chafe on anything.