Feb 6 - Used 3M rotary pads to
clean up excess epoxy from doing the vertical holes. Applied
epoxy to gap behind horizontal holes. The horzontal holes gap needs a
thinner mix than the vertical holes gap did. There is less space for
thin excess to leak out the bottom, and you need it pretty thin to get it to
flow to that fwd hole, where the gap is pretty small. As a rough
guide, I used 2 pumps of the West System epoxy, then 3 heaping plastic soup
spoons full of microballoons when I did these. 3-4 is good for the
vertical holes. I'd recommend 2 spoons full for the horizontal holes.
3.25 hr + 1.0 doc
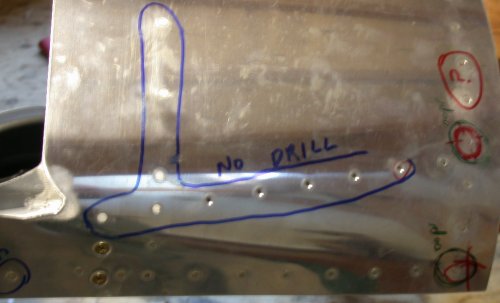
Here, the canopy fame is laying flat, with the gap behind the vertical holes
done, ready to do the horizontal holes gap. You can see that the
vertical holes all filled up nicely. You can also see, at the LT edge
of the pic, where the epoxy wanted to flow out there, so you have to tape it
well there.
Here's the inside view of the canopy frame. The gap was previously
taped off at B and, with the frame standing vertical, epoxy poured in from
A. Now, I am doing the horizontal holes gap by spooning epoxy in at C.
I didn't bother sealing the bottom, and nothing came out the bottom.
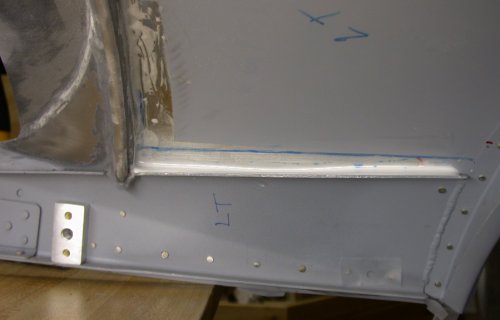
The horizontal holes gaps are filled. The top of the flange is
parallel with the bottom of the WD725 rails, so there was not a tendency to
flow over the top, with the WD725 rails sitting flat on the table.
As each gap filled in with epoxy, Karla was ready at the outside to put
Scotch tape over each hole after the dimple filled up with epoxy. You
need to leave the tape off until the hole fills, otherwise it won't fill up.
You can also see here where I used the green marker to indicate where oops
rivets were needed.
Feb 7 - web site update
0.5 hr doc
Feb 15 - Back working from home
now and getting back into moving forward on the plane. Used various
scotchbrite wheels to remove excess epoxy and smooth up the epoxy work.
0.5 hr
Feb 16 - more excess epoxy
cleanup & smoothing 1.25 hr
Feb 18 - Prime canopy frame and
strut blocks. Prep bubble for countersinking, trim back plastic shield
from bubble edges, install strut blocks, countersink bolt holes on one side.
2.75 hr
Feb 19 - Countersink remaining
bolt holes in bubble. Drill out all holes with 5/32" plexi drill.
Debur all holes. Assemble bubble to frame. Force bubble fit
around skin tabs; should not have riveted the 3 aft rivets on each side.
Need more 5/32" black clecoes and need to ask Van's about heating bubble to
help reshape it around skin tabs. 4.0 hr
Here I am, deburring the back side of all the bolt holes in the canopy.
This is the LT side, where the canopy goes behind the tab at the aft end of
the C702, through the slot, then out & over the top of the C702. In
hindsight, while I should have drilled and countersunk the 3 rivets you see
holding the tab to the frame, I think I should have waited to rivet them.
With the rivets in place, the bubble is kind of a force fit to bend it in
enough to go behind what is now a stiff C702 tab, and I had to be careful
that the bubble didn't bend the tab outward. It takes a fair amount of
force to squeeze that bubble in so it will go behind the tab. I wrote
to Van's to see if I can apply some heat to the bubble, so it will relax it
and let it curve more straight down, to fit better here.
Here is the first mating of the bubble and the frame. WIth everything
in place as it will be in the end, there's a bit too much gap between the
bubble and frame, in a couple places in the front, especially in the middle
of the corners. I think some judicial trimming will help it. I
also need to order some more 5/32" clecoes from Avery, as the 20 I have are
not really enough for this. I currently have none in the C631A aft
frame hoop. Where you see the 3 clecoes together at the front, I had
to use quite a bit of inward pressure at the bottom, countered by outward
pressure from the inside about 6" up from the bottom, to get the bubble to
bend and go straight down into the slot between the canopy frame and the aft
C702 skin tab. I'm thinking some heat here will let the bubble take
more of a "set" in the shape it needs to be to be a more natural fit here.
Feb 20 - Wrote to Van's about
heating bubble to reshape it a tad. Used red Loctite 271 to lock
bushings into hinge arms. It's apparent that the C7802 skin under the
bubble will have to be finish painted before the bubble is epoxied and
bolted into place for the final time. Marked front of bubble for some
more trimming so it sits better. Update web site.
1.0 hr + 2.0 doc
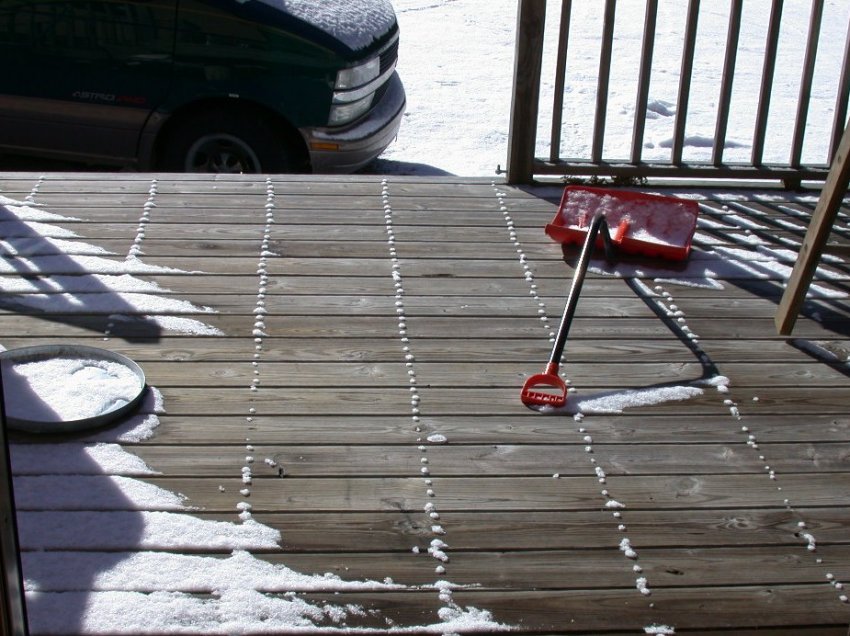
This is a cool pic. Click on it to see a bigger version.
We got a dusting of snow last night. The pic is facing due south.
The morning sun is evaporating the snow as it moves up and to the RT. On the LT, you can see where
the snow is evaporating away as the shadow from the rail moves and exposes
the snow to the sun. You can also
even see where it's doing it with the shadow from the shovel handle.
But the really cool thing is how the sun is not evaporating the snow on each
nail head holding the deck in place. Of course, after another half hour or
so, this was all gone, but I thought it was a very unique thing to see.
Feb 23 - Even though I'm working
from home now, I've been mostly working 16 hour
days, 7 days a week, on a big project, so not much work on the plane. Got my order of 5/32" clecoes from Avery.
The new ones won't go into the #28 holes in the frame, although the old ones
would. Went one drill number size smaller until they would just barely
go in. I ended up at #24. I got a reply back from Van's about
heating the bubble. They didn't really recomend it. They
suggested I contact the manufacturer. I did that, but the owner was
out that day. I didn't bother calling back, because after the bubble
sat clecoed in the frame a few days, near the stove and in the sunlight, it
seemed to relax the fit a bit. It didn't seem like an issue after
that. 0.5 hr
Feb 24 - remove bubble to drill
frame holes to #24, file and fit front edge of bubble to better fit C702 skin.
2.0 hr
Feb 25 - watched Sam James'
Fiberglassing video again, getting myself ready to soon start epoxying the
bubble to the frame. I decided to find & obtain some of the
"Plastiline" clay he mentioned in his video. I found a few web sites
selling it, but they wanted $20-25 minimum order. I finally found
ArtMolds, where they had no minimum
order, and ordered some. It comes in different densities. I
ordered a 2 pound block of "soft" and a 2 pound block of "medium". I
was afraid the "soft" might be too mushy, so I got some "medium", too.
It was about $5 for a 2# block. Also picked up some flat black paint
to use for the canopy frame. 2.0 hr
Feb 27 - final trim on fwd edge
of bubble 0.75 hr
Feb 28 - more final trim on fwd
edge of bubble 1.0 hr
 Here, the canopy fame is laying flat, with the gap behind the vertical holes
done, ready to do the horizontal holes gap. You can see that the
vertical holes all filled up nicely. You can also see, at the LT edge
of the pic, where the epoxy wanted to flow out there, so you have to tape it
well there.
Here, the canopy fame is laying flat, with the gap behind the vertical holes
done, ready to do the horizontal holes gap. You can see that the
vertical holes all filled up nicely. You can also see, at the LT edge
of the pic, where the epoxy wanted to flow out there, so you have to tape it
well there.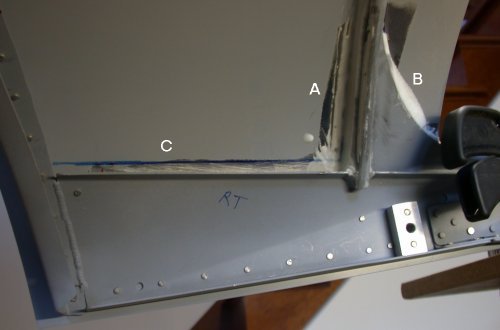 Here's the inside view of the canopy frame. The gap was previously
taped off at B and, with the frame standing vertical, epoxy poured in from
A. Now, I am doing the horizontal holes gap by spooning epoxy in at C.
I didn't bother sealing the bottom, and nothing came out the bottom.
Here's the inside view of the canopy frame. The gap was previously
taped off at B and, with the frame standing vertical, epoxy poured in from
A. Now, I am doing the horizontal holes gap by spooning epoxy in at C.
I didn't bother sealing the bottom, and nothing came out the bottom.
 The horizontal holes gaps are filled. The top of the flange is
parallel with the bottom of the WD725 rails, so there was not a tendency to
flow over the top, with the WD725 rails sitting flat on the table.
The horizontal holes gaps are filled. The top of the flange is
parallel with the bottom of the WD725 rails, so there was not a tendency to
flow over the top, with the WD725 rails sitting flat on the table. As each gap filled in with epoxy, Karla was ready at the outside to put
Scotch tape over each hole after the dimple filled up with epoxy. You
need to leave the tape off until the hole fills, otherwise it won't fill up.
You can also see here where I used the green marker to indicate where oops
rivets were needed.
As each gap filled in with epoxy, Karla was ready at the outside to put
Scotch tape over each hole after the dimple filled up with epoxy. You
need to leave the tape off until the hole fills, otherwise it won't fill up.
You can also see here where I used the green marker to indicate where oops
rivets were needed.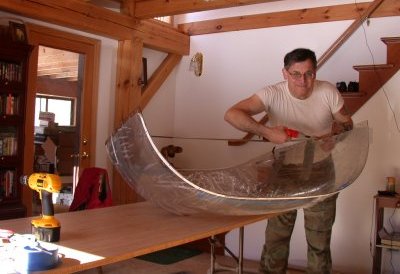 Here I am, deburring the back side of all the bolt holes in the canopy.
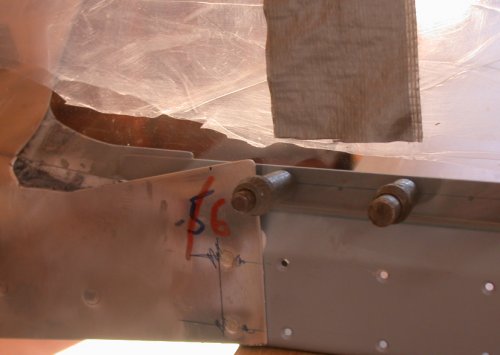 This is the LT side, where the canopy goes behind the tab at the aft end of
the C702, through the slot, then out & over the top of the C702. In
hindsight, while I should have drilled and countersunk the 3 rivets you see
holding the tab to the frame, I think I should have waited to rivet them.
With the rivets in place, the bubble is kind of a force fit to bend it in
enough to go behind what is now a stiff C702 tab, and I had to be careful
that the bubble didn't bend the tab outward. It takes a fair amount of
force to squeeze that bubble in so it will go behind the tab. I wrote
to Van's to see if I can apply some heat to the bubble, so it will relax it
and let it curve more straight down, to fit better here.
This is the LT side, where the canopy goes behind the tab at the aft end of
the C702, through the slot, then out & over the top of the C702. In
hindsight, while I should have drilled and countersunk the 3 rivets you see
holding the tab to the frame, I think I should have waited to rivet them.
With the rivets in place, the bubble is kind of a force fit to bend it in
enough to go behind what is now a stiff C702 tab, and I had to be careful
that the bubble didn't bend the tab outward. It takes a fair amount of
force to squeeze that bubble in so it will go behind the tab. I wrote
to Van's to see if I can apply some heat to the bubble, so it will relax it
and let it curve more straight down, to fit better here.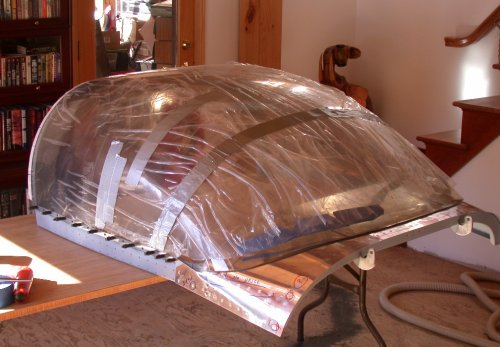 Here is the first mating of the bubble and the frame. WIth everything
in place as it will be in the end, there's a bit too much gap between the
bubble and frame, in a couple places in the front, especially in the middle
of the corners. I think some judicial trimming will help it. I
also need to order some more 5/32" clecoes from Avery, as the 20 I have are
not really enough for this. I currently have none in the C631A aft
frame hoop. Where you see the 3 clecoes together at the front, I had
to use quite a bit of inward pressure at the bottom, countered by outward
pressure from the inside about 6" up from the bottom, to get the bubble to
bend and go straight down into the slot between the canopy frame and the aft
C702 skin tab. I'm thinking some heat here will let the bubble take
more of a "set" in the shape it needs to be to be a more natural fit here.
Here is the first mating of the bubble and the frame. WIth everything
in place as it will be in the end, there's a bit too much gap between the
bubble and frame, in a couple places in the front, especially in the middle
of the corners. I think some judicial trimming will help it. I
also need to order some more 5/32" clecoes from Avery, as the 20 I have are
not really enough for this. I currently have none in the C631A aft
frame hoop. Where you see the 3 clecoes together at the front, I had
to use quite a bit of inward pressure at the bottom, countered by outward
pressure from the inside about 6" up from the bottom, to get the bubble to
bend and go straight down into the slot between the canopy frame and the aft
C702 skin tab. I'm thinking some heat here will let the bubble take
more of a "set" in the shape it needs to be to be a more natural fit here.