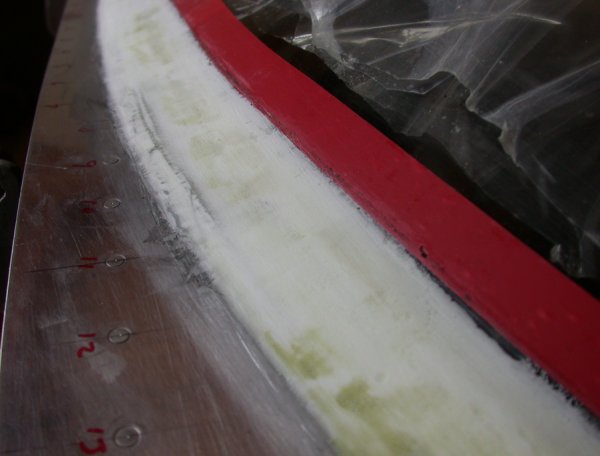
 This is what the blending looks like now, with me starting to fill it in
solid to the bottom of the tape line. I will be sanding that
back to a feathered edge.
This is what the blending looks like now, with me starting to fill it in
solid to the bottom of the tape line. I will be sanding that
back to a feathered edge.CANOPY April, 2005
Apr 2 - update web site. I asked my EAA chapter who knows bodywork pretty well, and people mentioned Bud Bushway, so I called him, and he's going to come by tomorrow and advise me on how to best blend the bubble/epoxy/frame. I am currently torn between feathering the upper line and leaving an edge that I can later mask to for painting. We'll see what Bud says. 1.0 hr doc
Apr 3 - Bud Bushway came by & looked at the canopy and how I am blending the filler to the bubble. He said I'd be much better off feathering the top edge, so I will now have to carefully sand down where I built the top edge up to be the thickness of the red tape. He says the painter should have no problem layout out his masking tape line where it's feathered, and it will result in a much better, cleaner line between paint and bubble. So, so much for my dumb idea, and the work it entailed to do and will entail to fix, to leave a distinct step at the top of the filler. 1.0 hr
This is what the blending looks like now, with me starting to fill it in
solid to the bottom of the tape line. I will be sanding that
back to a feathered edge.
Apr 10 - sanded filler under tape bottom edge, to try to bring it back to a feathered edge. 0.25 hr
Apr 12 - finish sanding lip off and put on a layer of epoxy. I used a whole level spoonful of microballoons, and it was too thick. 1.25 hr
Apr 13 - made up a thinner mix of microballoons, about 1/2 level spoonful, and it went on pretty good. 1.0 hr
Apr 14 - applied another thin epoxy layer - getting there. 1.0 hr
Apr 15 - update web site 1.0 hr doc
Apr 19 - sand & apply a couple more epoxy/microballoon layers. It's about there now; nicely feathered top & bottom. Maybe just one more thin layer. 1.5 hr
Apr 20 - update web site 1.0 hr doc
Apr 26 - sand bubble/skin transition 0.25 hr
Apr 30 - sand bubble/skin transition. Getting close to completion. 0.25 hr + 0.5 hr doc
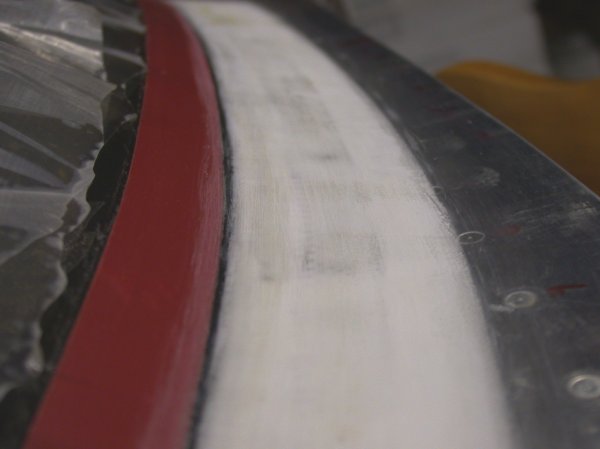 The canopy epoxy blending is nearly complete. It's nice weather, and I
am now starting to focus on mounting the landing
gear and then the engine. So, this
is about done for now.
The canopy epoxy blending is nearly complete. It's nice weather, and I
am now starting to focus on mounting the landing
gear and then the engine. So, this
is about done for now.
BACK TO MY RV BUILDER'S HOME
BACK TO BRIAN'S HOME