I sure wish I hadn't riveted those cabin and baggage
compartment floors down when I got the Quick Build kit. Part of the
reason I did was because the Quick Build fuselage comes with some of the
rivets, and I believe all the nutplates, already installed, so I'd have had
to remove all those. And, of course, when I first got the kit, I
wasn't about to be taking anything apart or doing anything that I wasn't
told to do so in the manual. I strongly recommend that you install
nutplates and make your cabin and baggage compartment floors removable.
It'll make later wiring a lot easier, and it'll give you an accessible place
to stash various electronic boxes.
Because I'd failed to make the floor removable, I decided I can just cut an
access hole in the baggage floor, and install a cover for the hole. It
doesn't even have to be a fancy flush cover; just a plate over the hole will
be fine. Then, I can get access to beneath the baggage floor.
Cut a starter 3" hole in the floor. I may make it bigger later, but
for now, it's big enough to get my hand in there.
I cut an access hole in the LT baggage floor, for better access in there.
It may get larger, depending on needs. You could make as many of these
as you need, most any size you need. It's just the baggage compartment
floor, so I don't even see any need to bother making the access hole covers
flush; just cover the hole with a plate, put some nutplates in the floor
around the hole, and that's it.
Received order from ACS, with the thin wall 3/4" aluminum tubing I
plan to use for conduit under the LT cabin and baggage compartment floors.
Worked on cutting holes in LT baggage floor for access under baggage
compartment and cutting holes in LT baggage floor ribs for the conduit.
Started installing Adel clamps for the conduit.
2.25 hr
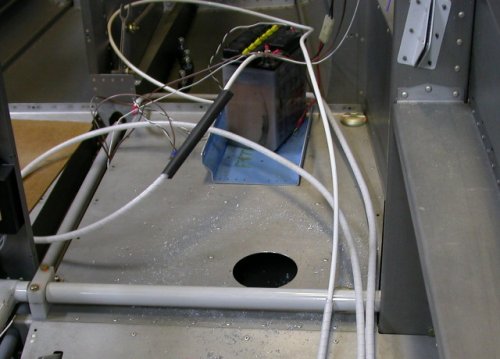
This pic shows the planned layout (under the floors) of the conduit.
The two 3" holes I drilled into the baggage floor give me access to the
baggage floor ribs. They will be covered by access plates later.
I needed a drill at least 2' long to get from the 7/8" hole I made in the
aft baggage compartment floor rib to the middle rib. The standard
drill extensions are made for a 1/4" shank. So, I used the lathe and
mill to make this little adapter to let me use a 12" #40 bit in the 1/4" ID
extension. I needed to start the hole with a small bit because I was
not able to attack the rib from a 90 degree angle, and there's no way a
Unibit would have started a hole where I needed it, without a starter hole.
Then, I needed a bigger extension to handle the 3/8" shank on the big 7/8"
Unibit to enlarge the hole for the conduit, so I pieced together
large-diameter 12" and 15" extensions to get that done.
Make covers for the
two 3" access holes I cut in the baggage compartment floor. Lay out &
install cover nutplates. Install & clamp conduit.
Prime & paint baggage compartment access covers.
Here is a view, looking down and slightly forward, of the LT baggage
compartment floor, the 2 access holes, one of the access hole covers, and a
look at the installed wiring conduit. It's very quick and easy to cut
a hole with a 3" or so holesaw, make a quick cover that's larger than the
hole, match drill 4 holes in the cover and the floor, and put in 4 nutplates
around the hole perimeter. That's all there is to it. The silver
screw at the very aft end of the aft hole (RT in pic) is fastening an Adel
clamp, which is holding the conduit in place.
 I cut an access hole in the LT baggage floor, for better access in there.
It may get larger, depending on needs. You could make as many of these
as you need, most any size you need. It's just the baggage compartment
floor, so I don't even see any need to bother making the access hole covers
flush; just cover the hole with a plate, put some nutplates in the floor
around the hole, and that's it.
I cut an access hole in the LT baggage floor, for better access in there.
It may get larger, depending on needs. You could make as many of these
as you need, most any size you need. It's just the baggage compartment
floor, so I don't even see any need to bother making the access hole covers
flush; just cover the hole with a plate, put some nutplates in the floor
around the hole, and that's it.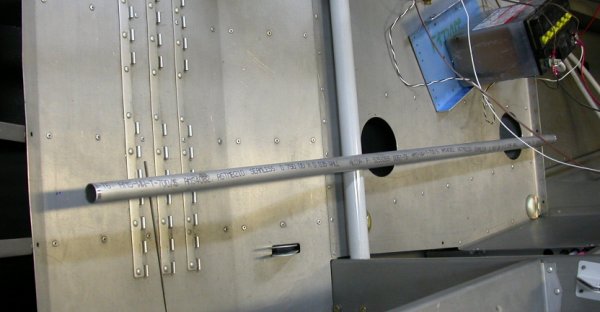 This pic shows the planned layout (under the floors) of the conduit.
The two 3" holes I drilled into the baggage floor give me access to the
baggage floor ribs. They will be covered by access plates later.
This pic shows the planned layout (under the floors) of the conduit.
The two 3" holes I drilled into the baggage floor give me access to the
baggage floor ribs. They will be covered by access plates later.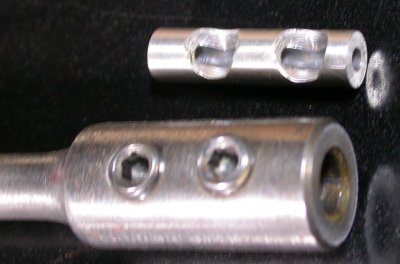 I needed a drill at least 2' long to get from the 7/8" hole I made in the
aft baggage compartment floor rib to the middle rib. The standard
drill extensions are made for a 1/4" shank. So, I used the lathe and
mill to make this little adapter to let me use a 12" #40 bit in the 1/4" ID
extension. I needed to start the hole with a small bit because I was
not able to attack the rib from a 90 degree angle, and there's no way a
Unibit would have started a hole where I needed it, without a starter hole.
I needed a drill at least 2' long to get from the 7/8" hole I made in the
aft baggage compartment floor rib to the middle rib. The standard
drill extensions are made for a 1/4" shank. So, I used the lathe and
mill to make this little adapter to let me use a 12" #40 bit in the 1/4" ID
extension. I needed to start the hole with a small bit because I was
not able to attack the rib from a 90 degree angle, and there's no way a
Unibit would have started a hole where I needed it, without a starter hole.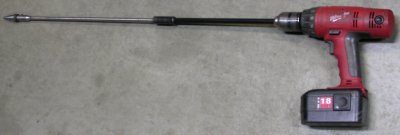 Then, I needed a bigger extension to handle the 3/8" shank on the big 7/8"
Unibit to enlarge the hole for the conduit, so I pieced together
large-diameter 12" and 15" extensions to get that done.
Then, I needed a bigger extension to handle the 3/8" shank on the big 7/8"
Unibit to enlarge the hole for the conduit, so I pieced together
large-diameter 12" and 15" extensions to get that done.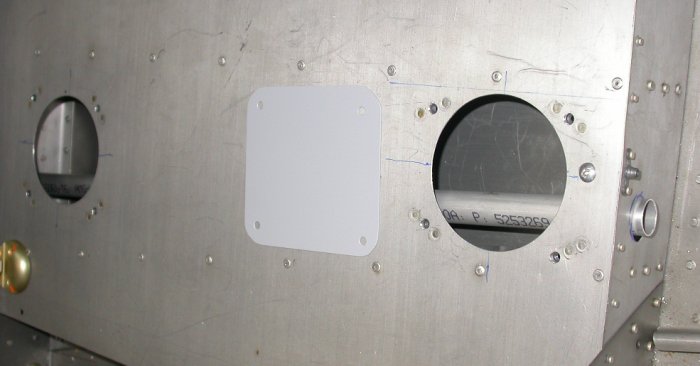 Here is a view, looking down and slightly forward, of the LT baggage
compartment floor, the 2 access holes, one of the access hole covers, and a
look at the installed wiring conduit. It's very quick and easy to cut
a hole with a 3" or so holesaw, make a quick cover that's larger than the
hole, match drill 4 holes in the cover and the floor, and put in 4 nutplates
around the hole perimeter. That's all there is to it. The silver
screw at the very aft end of the aft hole (RT in pic) is fastening an Adel
clamp, which is holding the conduit in place.
Here is a view, looking down and slightly forward, of the LT baggage
compartment floor, the 2 access holes, one of the access hole covers, and a
look at the installed wiring conduit. It's very quick and easy to cut
a hole with a 3" or so holesaw, make a quick cover that's larger than the
hole, match drill 4 holes in the cover and the floor, and put in 4 nutplates
around the hole perimeter. That's all there is to it. The silver
screw at the very aft end of the aft hole (RT in pic) is fastening an Adel
clamp, which is holding the conduit in place.