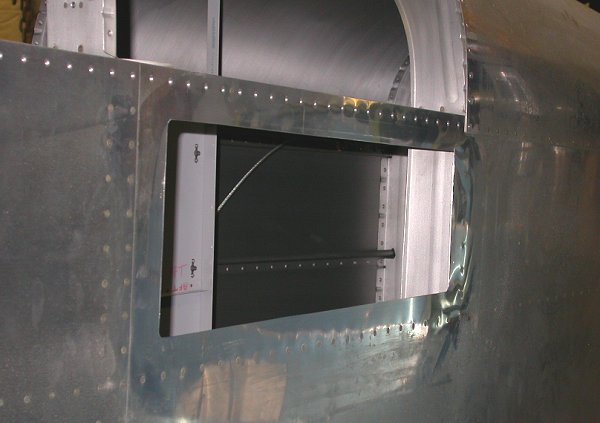
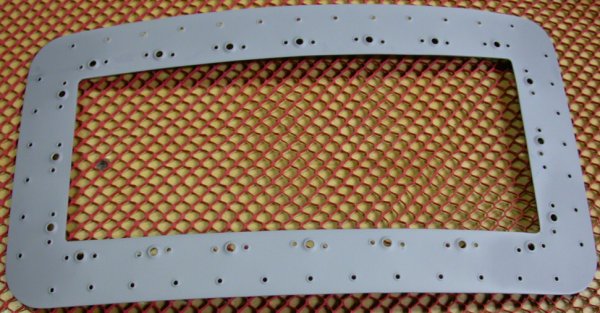
 Here is the opening for the LT fuselage access panel.
September, 2005 fuselage work
Sep 1 - Updating the web site during another 4 day weekend at NHIS. 1.0 hr doc
Sep 11 - I FINALLY got back to working on the plane. I've just been real busy with other things and dealing with multiple camera failure issues. I ended up getting 2 new cameras, so I've been playing with them and getting to know their features. I got a Nikon Coolpix 4500 for the quick stuff and a Canon EOS 20D for the more serious stuff. Filed the LT side fuselage access panel cutout. I used the larger LT side cutout as my RT side access panel, and fit the RT panel to the cutout hole. Made RT side access panel backing plate from 0.040" 2024T3 alclad sheet. The skin there is 0.025". I debated between using 0.032" or 0.040" as the backing plate. I finally decided to go with the heavier, but stronger, solution. 2.5 hr + 0.5 hr doc
Here is the opening for the LT fuselage access panel.
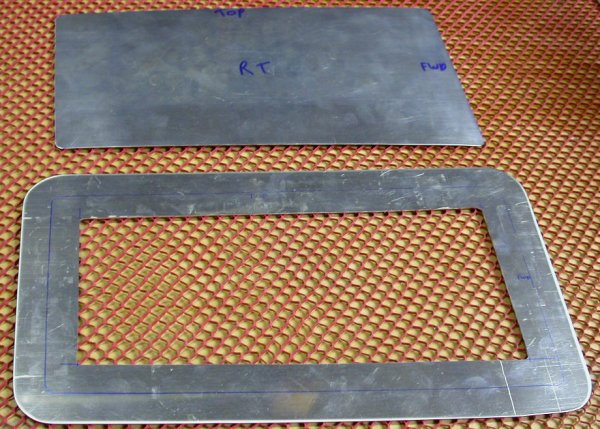 Here is the RT side access panel, made from the LT side cutout, and the RT
side 0.040" backing plate. The blue line on the backing plate is where
the cover sits, and the plate overlaps both the skin and the cover by 3/4"
all around.
Here is the RT side access panel, made from the LT side cutout, and the RT
side 0.040" backing plate. The blue line on the backing plate is where
the cover sits, and the plate overlaps both the skin and the cover by 3/4"
all around.
Sep 12 - lay out, drill, dimple & cleco RT access panel backing plate. Update web site 2.0 hr + 0.5 hr doc
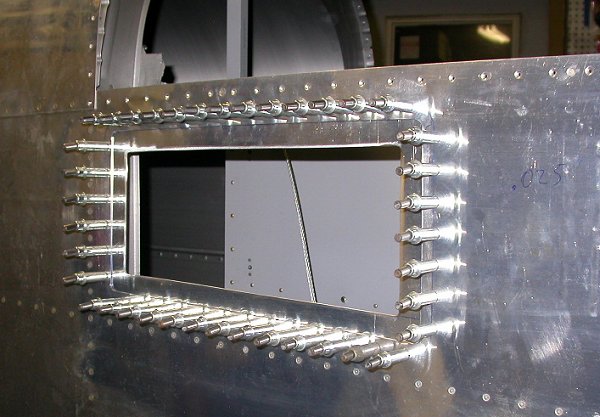 Here is the RT side fuselage access panel, with the backing plate drilled,
dimpled, and clecoed into place. Now, I need to do the fine-tuning of
fitting the panel to the opening.
Here is the RT side fuselage access panel, with the backing plate drilled,
dimpled, and clecoed into place. Now, I need to do the fine-tuning of
fitting the panel to the opening.
Sep 13 - Fine-trim RT fuselage access panel cover for good snug fit. Drill & cleco RT cover to backing plate. Dimple cover & plate, and fit nutplates to RT backing plate. 2.75 hr
 Here is the RT access panel, after careful fitting to the opening. I
was pleased with how the fit came out.
Here is the RT access panel, after careful fitting to the opening. I
was pleased with how the fit came out.
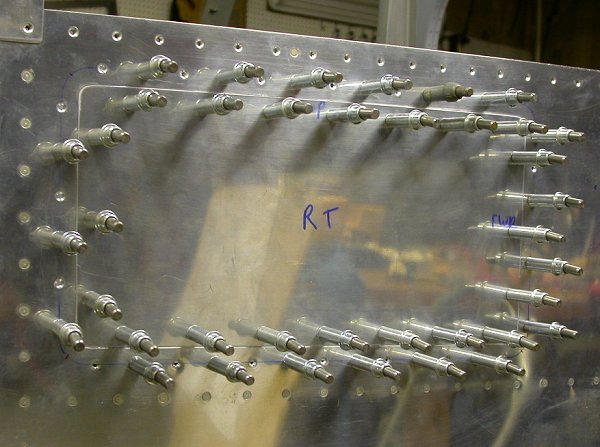
 Here, I have drilled all the cover screw holes into the backing plate,
dimpled them, and clecoed dimpled nutplates onto the back of each screw
hole. Now, I need to drill all the rivet holes to hold the
nutplates on.
Here, I have drilled all the cover screw holes into the backing plate,
dimpled them, and clecoed dimpled nutplates onto the back of each screw
hole. Now, I need to drill all the rivet holes to hold the
nutplates on.
Sep 14 - Dimple nutplates and drill & dimple nutplate rivet mount holes in RT side. Prime RT backing plate. 1.5 hr + 1.0 hr doc
 Here is the RT backing plate, all drilled, dimpled, and primed. That's
a LOT of holes! The LT side will have even more holes. It's ready now to have the nutplates riveted in and
the plate riveted to the fuselage skin. The screw head dimpling bowed
the backing plate, but it straightens right out when clecoed into place.
Here is the RT backing plate, all drilled, dimpled, and primed. That's
a LOT of holes! The LT side will have even more holes. It's ready now to have the nutplates riveted in and
the plate riveted to the fuselage skin. The screw head dimpling bowed
the backing plate, but it straightens right out when clecoed into place.
Sep 15 - rivet nutplates to RT backing plate and backing plate to fuselage skin. Update web site. 1.5 hr + 1.0 hr doc
 Here is the RT side fuselage access panel, all finished.
Sep 16 - Make LT side access panel and backing plate from sheet stock. Cut center out of backing plate. Fit backing plate to skin. Dimple backing plate and fuselage skin. Fit cover to hole. Lay out cover screw holes. Match drill and dimple cover and backing plate. 7.25 hr
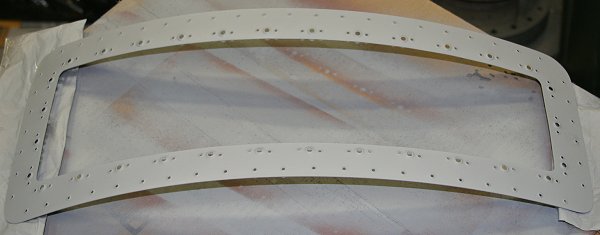
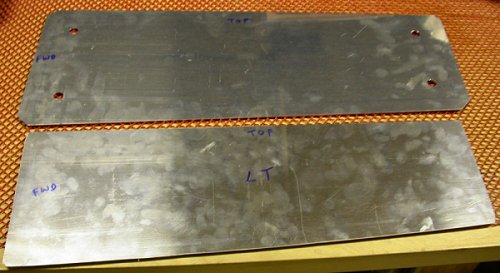 Here are the 0.025" access cover and the 0.040" backing plate for the LT
side, cut out from sheet stock with the shear.
Here are the 0.025" access cover and the 0.040" backing plate for the LT
side, cut out from sheet stock with the shear.
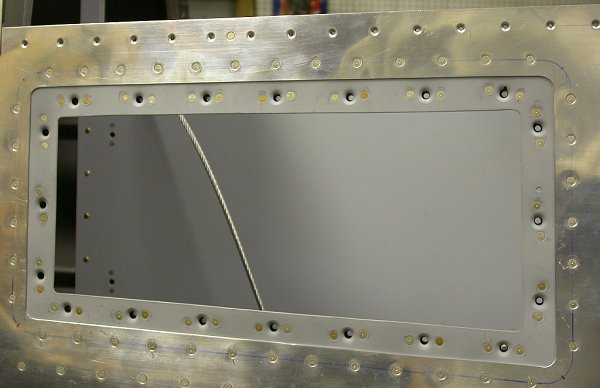
 Here is the LT backing plate, clecoed in place.
 I removed the backing plate and put a light coat of dark primer on it.
This makes it MUCH easier to see exactly where the seam is when trying to
fine-tune the fit of the cover to the hole.
I removed the backing plate and put a light coat of dark primer on it.
This makes it MUCH easier to see exactly where the seam is when trying to
fine-tune the fit of the cover to the hole.
Sep 17 - Lay out nutplates for LT cover screws. Drill & cleco nutplate rivet holes. Dimple nutplate rivet holes. Prime backing plate to 0330. Slept to noon, then clecoed the backing plate in place and dimpled the nutplates. Clecoed the nutplates in and riveted them. Riveted the backing plate to the skin. 3.75 hr
 Here is the drilled, dimpled, and primed LT backing plate.
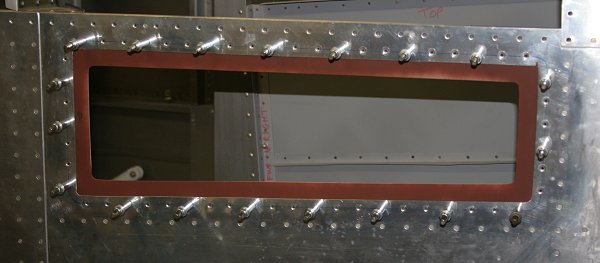
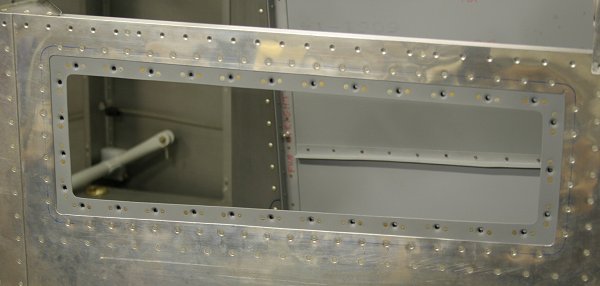 The LT fuselage access panel is complete.
Sep 21 - update web site. Been down & out for several days with debilitating abscessed tooth pain. No work on plane. 1.5 hr doc
Sep 24 - start pondering where & how to mount the 3 EFIS magnetometers. Each one will need to be individually 3-way adjustable. 0.5 hr
Sep 25 - more pondering magnetometer placement. Started doing a possible layout. Lay out mag mount panel under top rib behind baggage compartment. Not sure if it will work out, due to necessary proximity to 3 nutplates & screws holding aft baggage compartment panel in place. Currently 12" from nutplates, but to get Dynon to fit in there, will need to move to within 6". Sent email to Dynon support asking about this. 2.0 hr
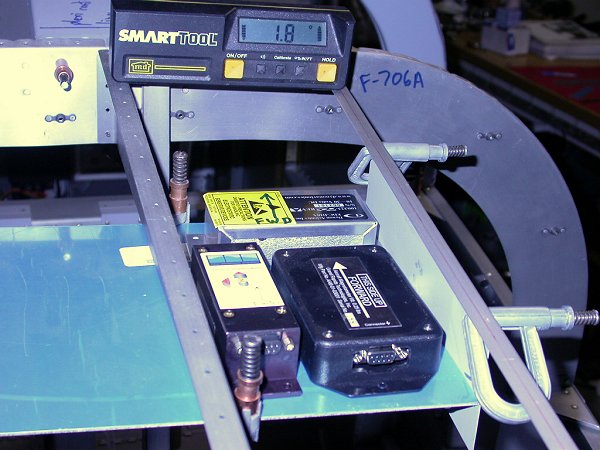 Here are the 3 magnetometers, sitting on a temporary mounting plate just
behind the baggage compartment.
Here are the 3 magnetometers, sitting on a temporary mounting plate just
behind the baggage compartment.
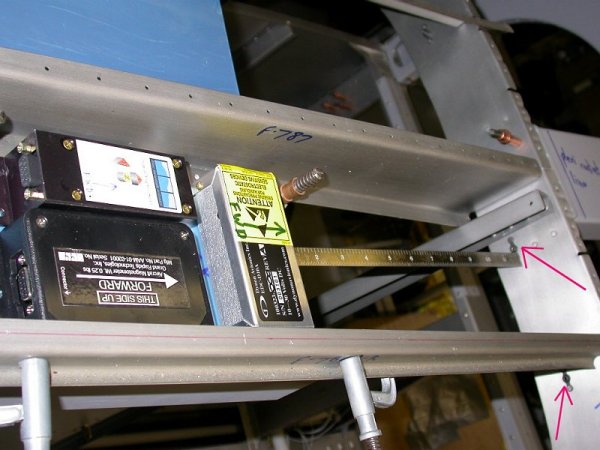 The mags are 12" from the nutplates, but this space tapers wider as it goes
fwd, and I really need more width to mount that sideways-mounting Dynon mag,
so I need to move to within 6" or so of the nutplates. We'll see
what Dynon replies with.
The mags are 12" from the nutplates, but this space tapers wider as it goes
fwd, and I really need more width to mount that sideways-mounting Dynon mag,
so I need to move to within 6" or so of the nutplates. We'll see
what Dynon replies with.
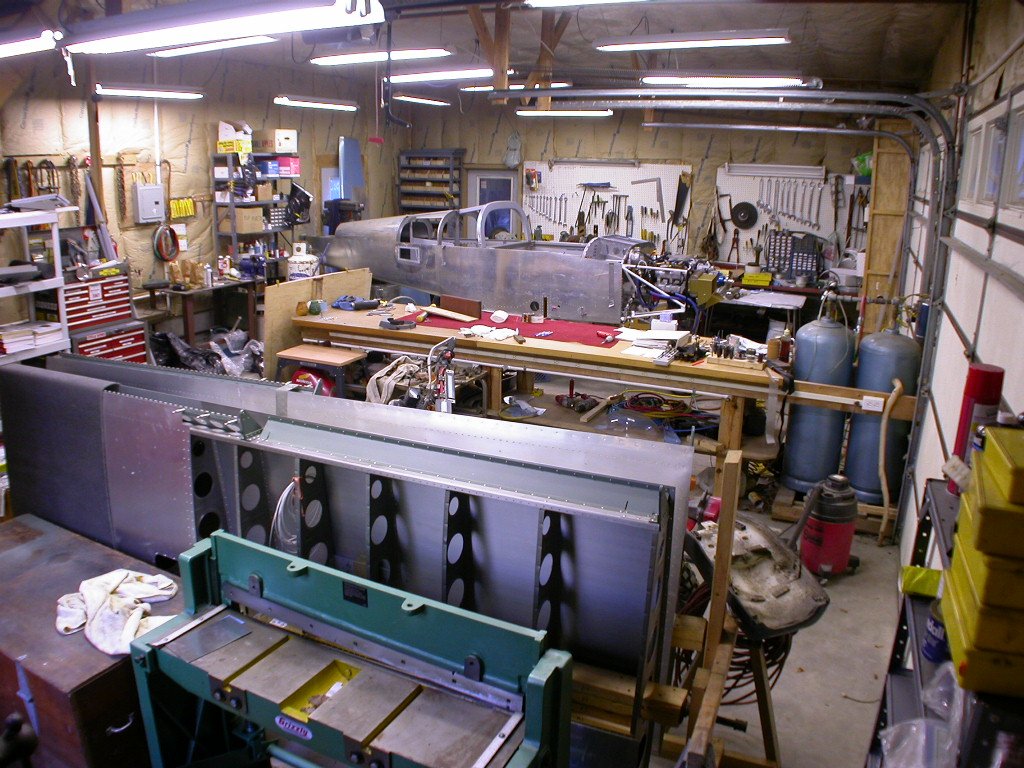
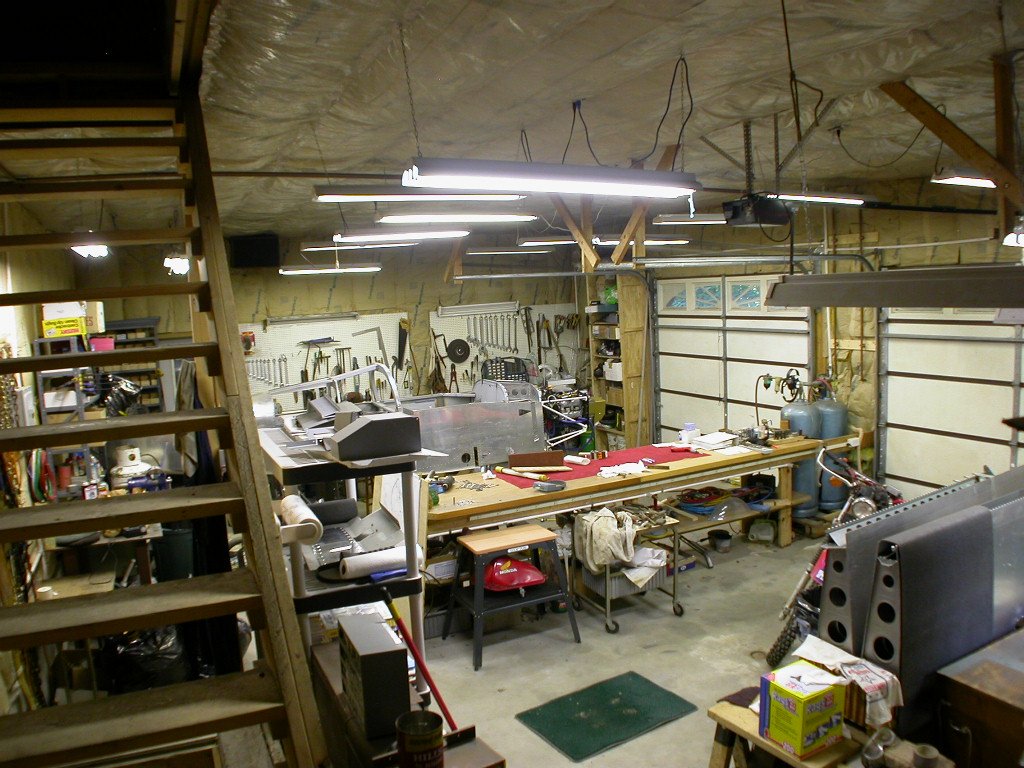
I just got a wide angle adapter lens for my Coolpix - Click HERE and HERE to see mostly complete pics of my garage workshop.
Sep 26 - Ponder new location for magnetometers, particularly the Dynon. Perhaps I can fit it in near the horizontal stabilizer somewhere. Got a reply from Dynon. They said this: We generally recommend at least 12" between the remote magnetometer and other ferrous metals or powered equipment. From the picture you sent, it looks like you'll be alright. Even if you move the Dynon magnetometer a few inches forward you'll likely still be OK. Essentially, dynamic magnetic fields and moving metal (moving gyros, strobes, etc) are the worst for the magnetometer's accuracy and calibration. Small, static pieces of ferrous metal are easier to calibrate out. Proximity to other mags should not be an issue. Very small bits of stationary ferrous metal such as the D9 screws will not likely tremendously affect the magnetometer. You can use the steel screws that typically would come with those connectors. So, it's not a definitive matter, but it'll probably be OK. Update web site 0.5 hr + 0.75 hr doc
Sep 28 - Well, I guess the September plane work is over. I am at NHIS for 5 days for the final weekend of the season. Six long, awful months of snow is coming up soon. I guess it's better than living in the hurricane belt; my house will probably still be there come spring. Update web site. 0.5 hr doc
BACK TO MY RV BUILDER'S HOME
BACK TO BRIAN'S HOME